AquaCraft Miss Vegas User Manual
Page 5
5
❏
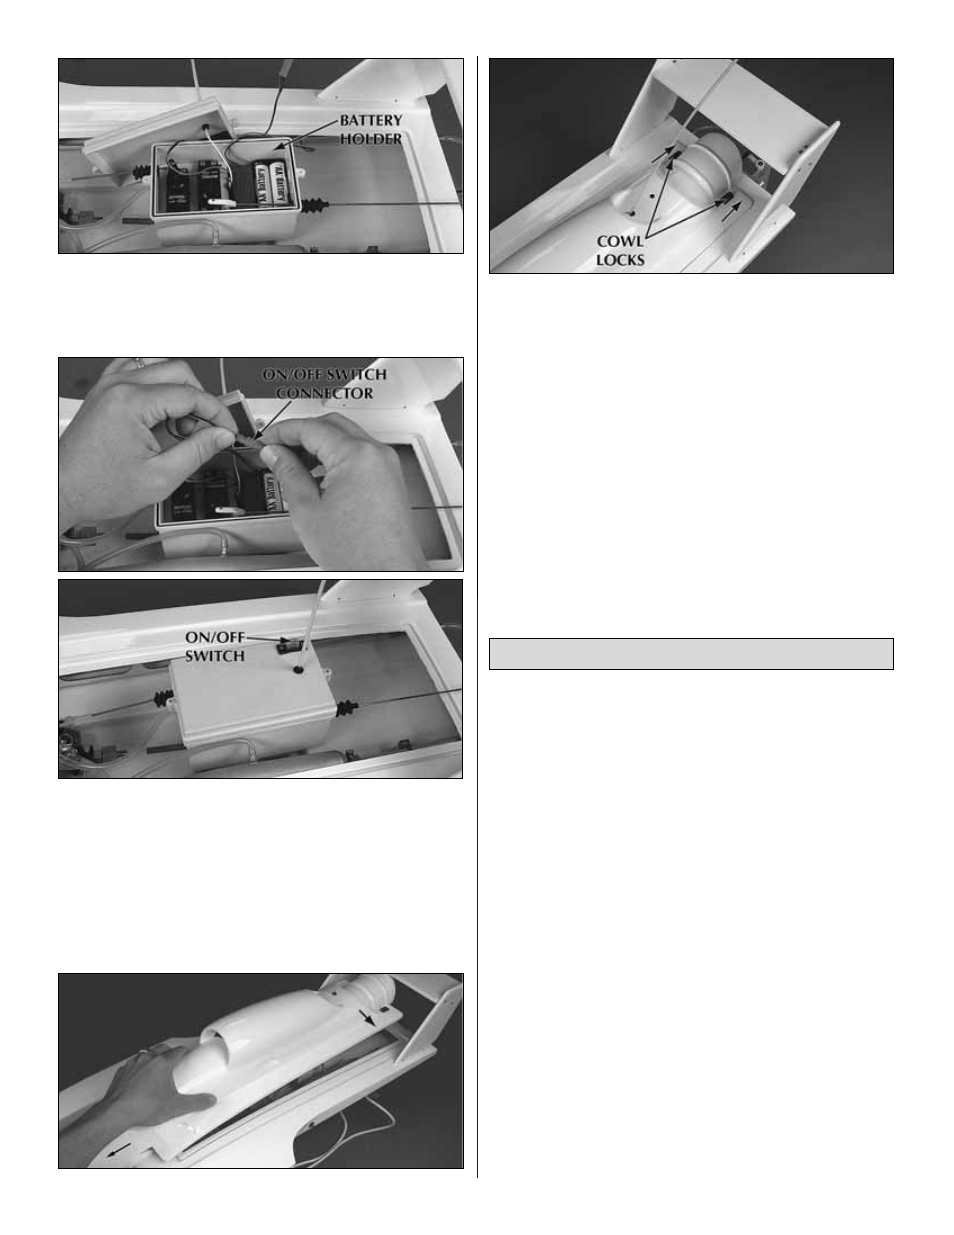
6. Install four fresh “AA” batteries in the battery holder. Be
sure to follow the polarity configuration molded into the
battery holder.
❏
7. Plug the battery box connector into the ON/OFF switch
connector. Do not force them together; they are designed to
fit together only one way.
❏
8. Replace the radio box lid and secure it with the two (2)
2 x 12mm screws.
❏
9. Replace the canopy by first sliding it over the “nose” of
the boat and then lowering the rear section to meet the hull.
Secure it by sliding the two (2) cowl locks toward the rear of
the boat.
CHECK THE RADIO SYSTEM
• Standing behind the boat with both the receiver (vessel)
and transmitter powered up, rotate the wheel to the left.
The back of the rudder should move towards the left.
Move the wheel to the right. The back of the rudder should
move towards the right. If this is not the case, simply move
the steering servo reverse switch to the other position.
• Squeeze the trigger on the transmitter; this should open
the throat of the carburetor. Conversely, moving the trigger
forward should close the throat completely.
Before running the engine, read the manual completely.
There are Several Simple Steps to Starting the Engine:
❏
1. Install a glow plug if one is not in your engine. The glow
plug threads into the top of the cylinder head.
❏
2. Fill the tank almost to the top. Leave a little air at the top
of the tank.
❏
3. Open the high-speed needle valve 2-1/2 turns out
(counterclockwise) from fully closed. The high-speed needle is
sticking up on the left side of the carburetor (looking at it from
behind the boat). If you have previously run the boat, keep the
same needle valve setting that you used on your last run.
❏
4. Prime the engine by placing a finger over the carburetor
opening and pulling the starter handle 2-3 times or until you
see fuel entering the carburetor. The quantity of fuel drawn
into the engine by priming is an important factor in starting
the engine successfully.
IMPORTANT: The propeller will begin spinning as soon as
the engine starts! Be certain that the propeller is
unobstructed; failure to do so will damage the prop.
❏
5. Secure the glow starter onto the engine’s glow plug.
RUNNING THE ENGINE