Craftsman 917.273648 User Manual
Page 9
Attention! The text in this document has been recognized automatically. To view the original document, you can use the "Original mode".
5.
6
.
7.
8
.
9.
4. Sit on seat in operating position,
depress clutch/brake pedal and set the
parking brake.
Place motion control lever in neutral
(N) position.
Press lift lever plunger and raise
attachment lift lever to its highest posi
tion.
Start the engine. After engine has
started, move throttle control to idle
position.
Release parking brake.
Slowly move the motion control lever
forward and slowly drive tractor off
skid.
10. Apply brake to stop tractor, set parking
brake and place motion control lever in
neutral position.
11 .Turn ignition key to "STOP" position.
Continue with the instructions that follow.
REPOSITION RIGHT REAR GAUGE
WHEEL
For shipping purposes, the right rear
gauge wheel assembly is mounted upside
down on the mower. Remove the gauge
wheel assembly and reinstall from the
bottom as shown. To adjust gauge wheels,
see the Operation section in this manual.
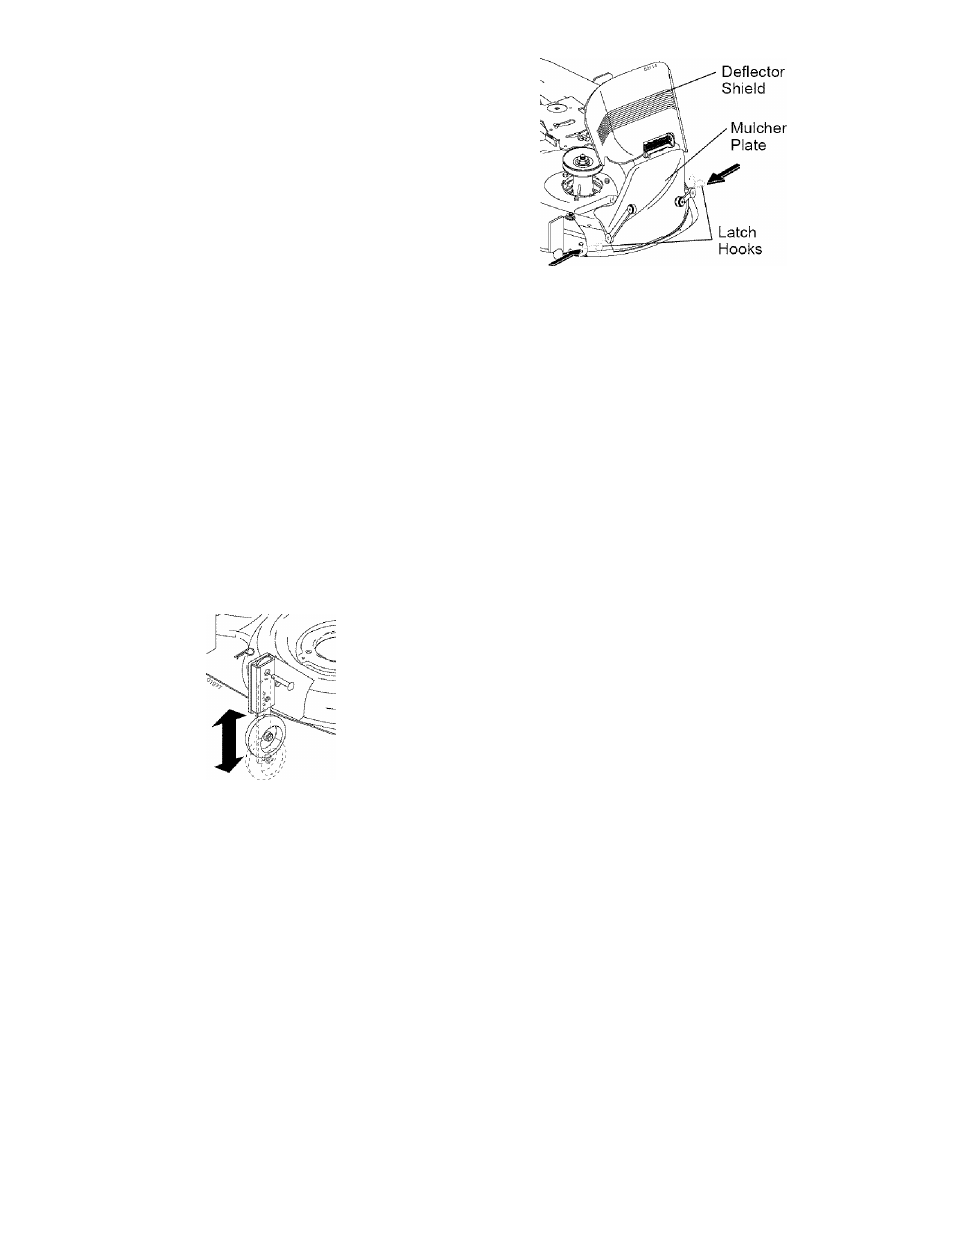
INSTALL MULCHER PLATE
(If previously removed)
1. Raise and hold deflector shield In
upright position.
2. Place front of mulcher plate over front
of mower deck opening and slide into
place, as shown.
3. Hook front latch into hole on front of
mower deck.
4. Hook rear latch into hole on back of
mower deck.
A
c
AUTION: D
o
not remove deflector
shield from mower.
TO CONVERT TO BAGGING OR
DISCHARGING
Simply remove mulcher plate and store in
a safe place. Your mower is now ready for
discharging or installation of optional grass
catcher accessory.
NOTE: It is not necessary to change
blades. The mulching blades are designed
for discharging and bagging also.
CHECK TIRE PRESSURE
The tires on your tractor were overinflated
at the factory for shipping purposes. Cor
rect tire pressure is important for best
cutting performance.
• Reduce tire pressure to PSI shown in
“PRODUCT SPECIFICATIONS” section
of this manual.
CHECK DECK LEVELNESS
For best cutting results, mower hous
ing should be properly leveled. See “TO
LEVEL MOWER HOUSING” in the Service
and Adjustments section of this manual.
CHECK FOR PROPER POSITION
OF ALL BELTS
See the figures that are shown for replac
ing motion and mower blade drive belts
in the Service and Adjustments section
of this manual. Verify that the belts are
routed correctly.
CHECK BRAKE SYSTEM
After you learn how to operate your trac
tor, check to see that the brake is properly
adjusted. See “TO ADJUST BRAKE” in
the Service and Adjustments section of
this manual.