Antenna hookups, Overview, Q' if you have poor am reception – Sony STR-DE345 User Manual
Page 5: Connecting a ground wire, What antennas will i need, Hookups, Fm wire antenna, Audio component hookups, Getting started, Where do i go next
Attention! The text in this document has been recognized automatically. To view the original document, you can use the "Original mode".
Getting Started
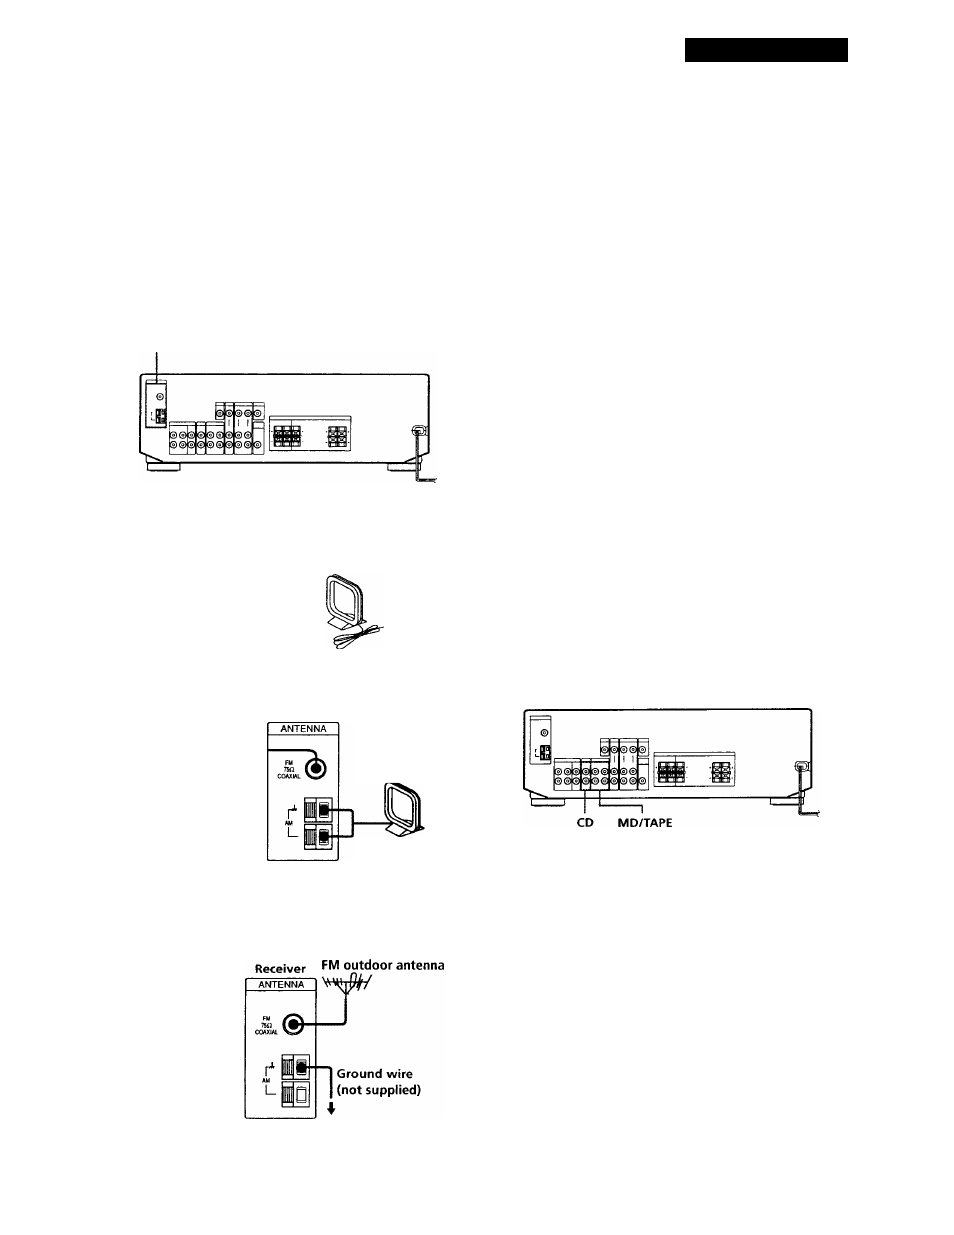
Antenna Hookups
Overview
This section describes how to connect AM and FM
antennas to the receiver. If you want to receive radio
broadcasts with the receiver, complete these
connections first, then go to the following pages.
For specific locations of the terminals, see the
illustration below.
ANTENNA
'Q'
If you have poor AM reception
Connect a 20 to 50 ft. (6 to 15-meter) insulated wire (not
supplied) to the AM antenna terminal in addition to the
AM loop antenna. Try to extend the wire outdoors and
keep it horizontal.
Connecting a ground wire
If you connect the receiver to an outdoor antenna,
ground it against lightning as shown in the illustration
in the left column. To prevent a gas explosion, do not
connect the ground wire to a gas pipe.
Where do I go next?
If you want to connect other components, go on to the next
section. If you're only planning to use the receiver to listen
to the radio, go to "Speaker System Hookups" on pages
7
and 8.
What antennas will I need?
• FM wire antenna
(supplied) (1)
AM loop antenna
(supplied) (1)
Receiver
AM loop antenna
Hookups
FM wire antenna
After connecting
the wire
antenna, keep it
as horizontal as
possible.
If you have poor FM reception
Use a 75-ohm coaxial cable (not supplied) to connect the
receiver to an outdoor FM antenna as shown below.
Audio Component Hookups
Overview
This section describes how to connect your audio
components to the receiver. If you want to use the
receiver as an amplifier, complete these connections.
For specific locations of the jacks, see the illustration
below.
What cables will I need?
Audio cables (not supplied) (1 for CD player; 2 for each MD
recorder or tape deck)
White (L) '
Red (R)
> White (L)
' Red (R)
to ground
(continued)