Anchor LIGHT EXPEDITIONARY SHELTER User Manual
Page 11
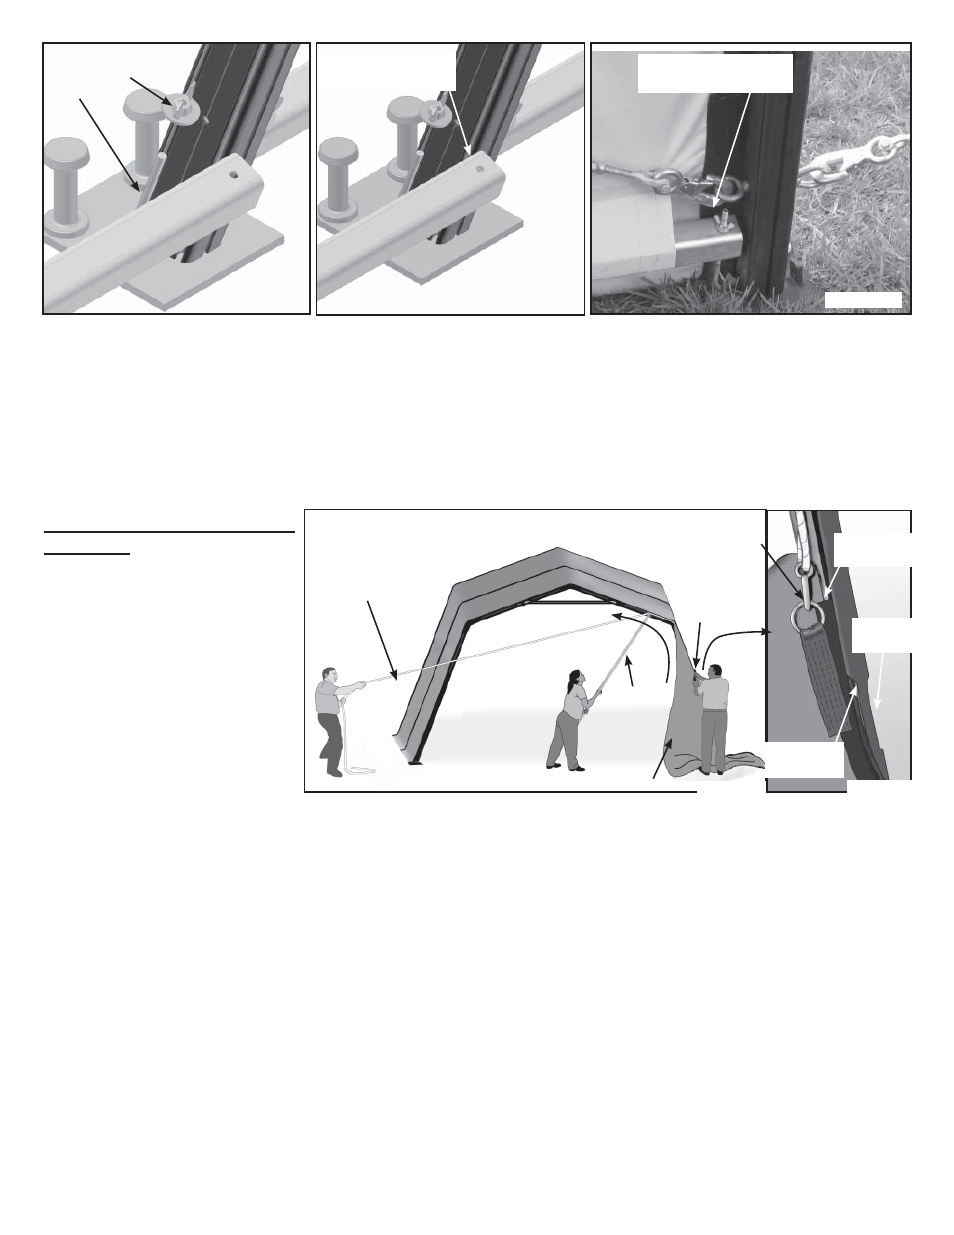
STEP 9 - Pull first gable end
into place
• Be certain that the zippers of the
Gable End are unzipped for ease of
installation.
• Lay out the gable end panel at bot-
tom of one of the end legs. White
side of gable end to inside of tent.
See figures 9a and 9b.
• Insert end of kedar into slotted
opening of top/outer channel of lower
leg. Push the inserted kedar up the
channel of the leg as far as possible (to about the corner). The zipper tool will be required to push the kedar up past the cor-
ner.
• Once the kedar is past the corner, the zipper tool may be used to guide the pull rope while another person pulls on the rope
until the gable end is pulled past the peak and eave corner. Continue pulling the gable end until the bottom of the kedar reach-
es the far base plate and the gable end is centered in the end. See figure 9a.
• Disconnect the pull rope.
• Go back to the slot where you started the gable end installation, and stuff the remaining kedar into the lower channel below
the slotted opening down to the base plate.
• You may use the zipper tool to zip the zippers.
• Gable end may be staked with stakes provided.
11
• Insert a reinforcement tube into each end of the ground bar and align holes. Hook J-Bolt through hole in vertical plate on
base plate and lower ground bar onto J-Bolt. Secure with washer and wing nut. Wing Nuts are used to tension and position
the fabric. See figures 7d through 7f.
• Re-attach the bottom of the X-Cables and re-tension.
Figure 7e
Figure 7f
Ground bar with
reinforcement tube.
Ground bar inserted
into mid pocket.
Figure 7d
J-Bolt
Washer &
Wing Nut
STEP 8 - Pull second mid panel into place.
•
Proceed as with the first mid.
•
Stake mid base plates.
Figure 9a
Figure 9b
Pull rope snapped
onto ring of Gable end.
Gable end
Slotted
Opening
Slotted
Opening
Kedar of
Gable end
.
Pull rope
Bottom of
Gable End
Zipper
Tool
Your Light Expeditionary Shelter (LES) is now ready for use.