Installation instruc tio ns – Poison Spyder JK 07-10 BOLT-TOGETHER TRAIL CAGE User Manual
Page 6
INSTALLATION INSTRUC
TIO
NS
©2010 POISON SPYDER CUSTOMS, INC. • 951-849-5911 • WWW.POISONSPYDER.COM
Poison Spyder Customs • JK BOLT-TOGETHER TRAIL CAGE KIT
Page 6
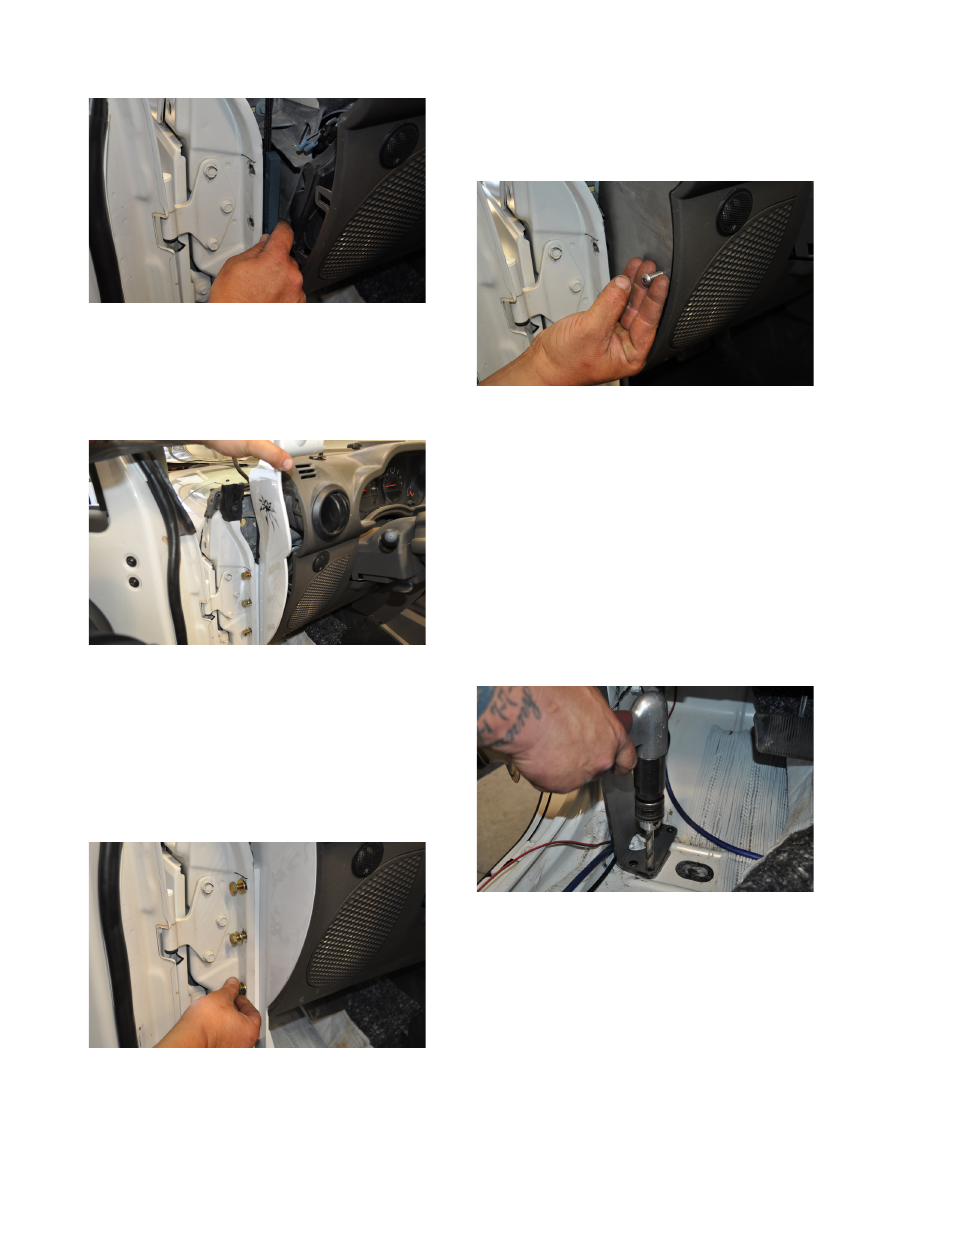
FIGURE 18
22. Carefully insert the A-Pillar Assembly in
between the end of the dash and the door
post. Be careful not to knock the Fill Plate
from where it is hanging behind the flange on
the door post.
FIGURE 19
23. Align the A-Pillar Assembly, and thread
the three 3/8-24 X 1-1/4 Gr8 Hex Head Cap
Screws in to the corresponding threaded
holes on the A-Pillar Assembly. Note that
the three bolts will sandwich the Filler Plate
between the door post flange and the A-Pillar
Assembly. Leave these bolts slightly loose at
this time.
FIGURE 20
24. Insert a supplied 1/4-20 X 3/4 Stainless
Steel Button Head Cap Screw into each of
the three holes along the curved edge of the
A-Pillar Assembly. Thread these into the clip
nuts installed in an earlier step. Tighten these
three screws as well as the three Hex Head
Cap Screws installed in the previous step.
FIGURE 21
25. At the foot of the A-Pillar Assembly, use a
bar clamp to make sure the bottom end of
the A-Pillar is snug against the side of the
footwell (pushed away from the center of the
Jeep). Make sure that the bolt holes of the
previously placed Large and Small A-Pillar
Foot Plate are correctly aligned with the four
holes in the foot of the A-Pillar Assembly. Drill
each hole location with a 1/2” bit. After each
hole is drilled, temporarily insert a supplied
1/2-20 X 3 Gr8 Hex Head Cap Screw into
the hole to keep the foot from walking slightly
while drilling the remaining holes.
FIGURE 22
26. Once all of the holes have been drilled,
install the remaining supplied 1/2-13 X 3 Gr8
Hex Head Cap Screws, 1/2-13 X1-1/2 Gr8
Hex Head Cap Screws into the 4 holes in the
foot plate. Under the floor, install the supplied
1/2 Flat Washers and 1/2-13 Nylon Insert
Lock Nuts to the threads of the cap screws
where they protrude beneath the floor. Do
not fully tighten these yet.
27. Install the Door Header Bar Assembly for
each side. Begin by carefully slide together