Initial oil lubrication of new bearings, Caution, Table 4 – Goulds Pumps 3410 - IOM User Manual
Page 40: Bearing temperatures, Emergency ball bearing replacement, Warning, Bearing conditions
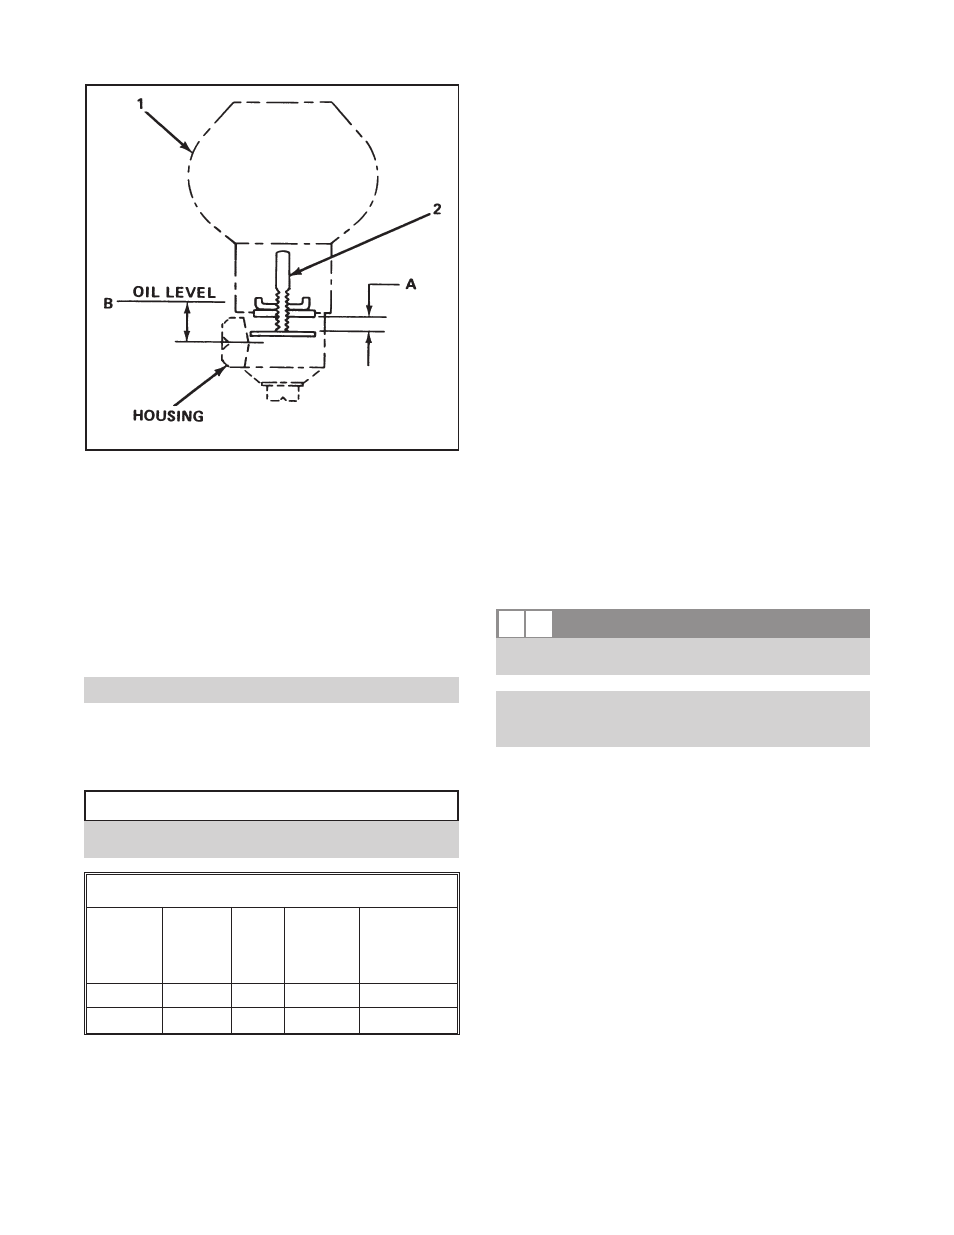
INITIAL OIL LUBRICATION OF
NEW BEARINGS
1.
Remove oiler (1), Fig. 34.
2.
Remove adjustment assembly (2) from oiler.
3.
Adjust bars to dimension A, as required, Table 4.
4.
Lock in position.
5.
Replace adjustment assembly in oiler.
6.
Install oiler.
NOTE: Never fill through oil vent or oiler housing.
7.
Fill each oiler bottle with oil and replace in oiler
housing. Oil reservoir in bearing housing is filled
when oil remains visible in bottle. Several fillings of
bottle may be required.
$
CAUTION
Bar adjust must be adjusted as stated in step 3 above. If
not adjusted properly, bearing will not be lubricated.
Table 4
GROUP
A
in. (mm)
B
in. (mm)
OILER
SIZE
oz. (ml)
CASING
CAPACITY
ounces (ml)
S & M
9/16 (14.5) 1/2 (13) #5 - 8 (204)
9 (266)
L & XL
9/16 (14.5) 1/2 (13) #5 - 8 (204)
16-1/2 (489)
BEARING TEMPERATURES
All bearings operate at some temperature above that of the
surrounding atmosphere, unless cooled. Heat is generated
within the bearing due to rolling friction, churning of oil,
and the drag of the race.
Do not use the human hand as a thermometer. A
temperature which feels hot varies from 120°F (49°C) to
130°F (54°C) depending upon the individual. Above this
temperature, the human hand is worthless in estimating
temperature.
Bearing temperatures up to 180°F (82°C) are normal.
Determine the temperature accurately by placing a contact
type thermometer against the bearing housing. It should be
recorded in a convenient location for reference. The
stability of the temperature, rather than the number of
degrees, is the best indication of normal operation. A
sudden increase in temperature is an indication of danger
and a signal to investigate. The unit should be checked for
abnormal hydraulic operation and unnecessary loads, such
as coupling misalignment, etc. See Troubleshooting.
EMERGENCY BALL BEARING
REPLACEMENT
If the outboard end ball bearing needs replacement and it is
not desirable to overhaul the entire pump, the bearing can
be replaced without disassembling the entire pump. See
Disassembly and Reassembly section for details.
s
!
WARNING
Lock out power driver before starting this procedure to
prevent accidental turning.
NOTE: Coupling end bearing cannot be replaced in
this manner unless pump or driver is removed from
bedplate or spacer coupling is used.
BEARING CONDITIONS
The life of a bearing can be drastically reduced if
contaminated with even a small amount of dust or dirt. All
bearing assembly operations should be done in as dust-free
an atmosphere as possible. All tools, as well as hands,
should be kept clean.
If new bearings are to be installed, they should not be
unwrapped, cleaned, or washed until ready for installation.
If old bearings are contaminated, they should be replaced.
Washing bearings does not guarantee cleanliness and is
risky at best. If new bearings are not readily available and
immediate reassembly is necessary, contaminated bearings
can be cleaned as follows:
1.
Pour one or two quarts of clean, water-free kerosene
into a clean pail. Dip the bearings into kerosene and
agitate slowly.
38
3410 IOM 1/2010
Fig. 34
A B