Component installation, Install sink drains – Power Soak 35351 Skewer Soak INstallation Manual User Manual
Page 13
9
Component Installation
Lay the sink on its back to allow access to the bottom of the tanks. Be
careful to not let the sink assembly drop on the floor with an impact that
would damage the sink assembly or the floor.
The sink must be accessible from its top side and its bottom side in order
to install the accessories. Be aware that the backsplash is unsupported at
this time and can be bent out of shape by trying to support the entire
weight of the sink on the edge of the backsplash.
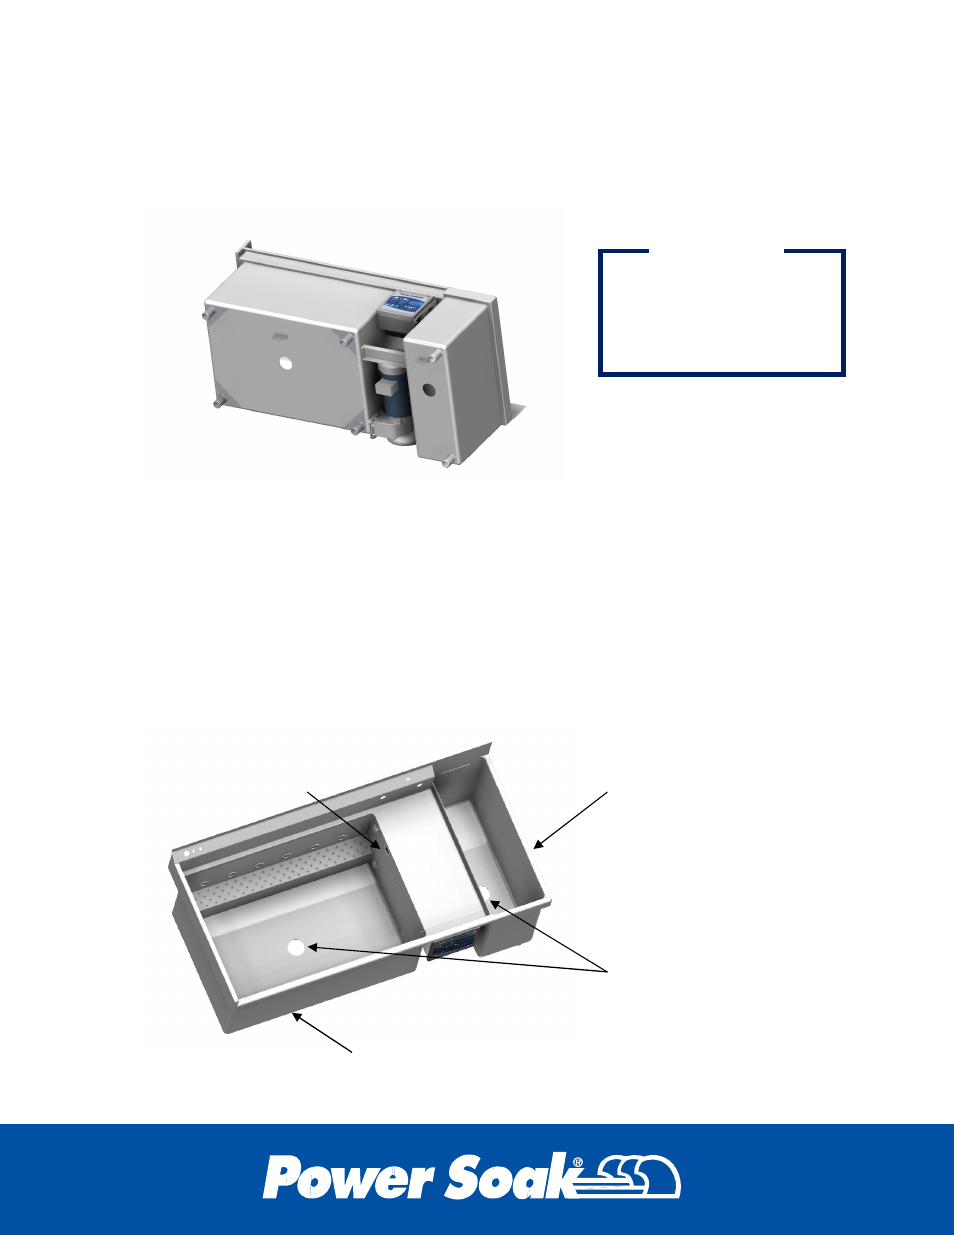
Install Sink Drains
There are two sink drains in the Skewer wash tank and one in the Sanitizer
tank that must be installed. The drain with a valve built into the body is
installed in the bottom of the tank and the drain without a valve built into
the body is installed in the side wall of the Skewer wash tank at the top.
OVERFLOW DRAIN AT
TOP DOES NOT HAVE A
BUILT IN VALVE
DRAIN WITH BUILT-IN
VALVE IS INSTALLED
IN THE BOTTOM OF
THE TANK
NOTE:
THE SANITIZER
TANK IS AN OPTION
AND MAY NOT BE
INCLUDED WITH ALL
INSTALLATIONS
SKEWER WASH TANK
Do not bend the edge of
the backsplash when
laying the sink on its back
side.
IMPORTANT