Metpar Phenolic User Manual
Page 6
Page 5
STEP 5
STEP 5 -- Securing Stiles to Panels
Securing Stiles to Panels
A. Stiles must be both plumb and level. Headrail may
be used as an aid in this process by temporarily
setting them in position (DO NOT fasten it at this
time).
B. Plumb stile and adjust elevation. Fasten stile to
panel using sheet metal screws.
C. By adjusting stile L-brackets on FP500, the proper
door opening and stile elevation can be attained
and set in position by tightening screws.
STEP 6
STEP 6 -- Headrail and Panel Fastening
Headrail and Panel Fastening
A. Place headrail into top of stiles. Plumb stiles while
setting door gaps, and fasten headrail to stiles
using two (2) #14 x 5/8” sheet metal screws
through back of stile into headrail.
B. Fasten panel to wall brackets using #14 x 5/8”
sheet metal screws.
C. Slide stainless steel plinth down to floor level firmly
engaging shoe clips.
D. Cut excess headrail 1/8” to ¼” past end of stile.
Insert headrail end plug.
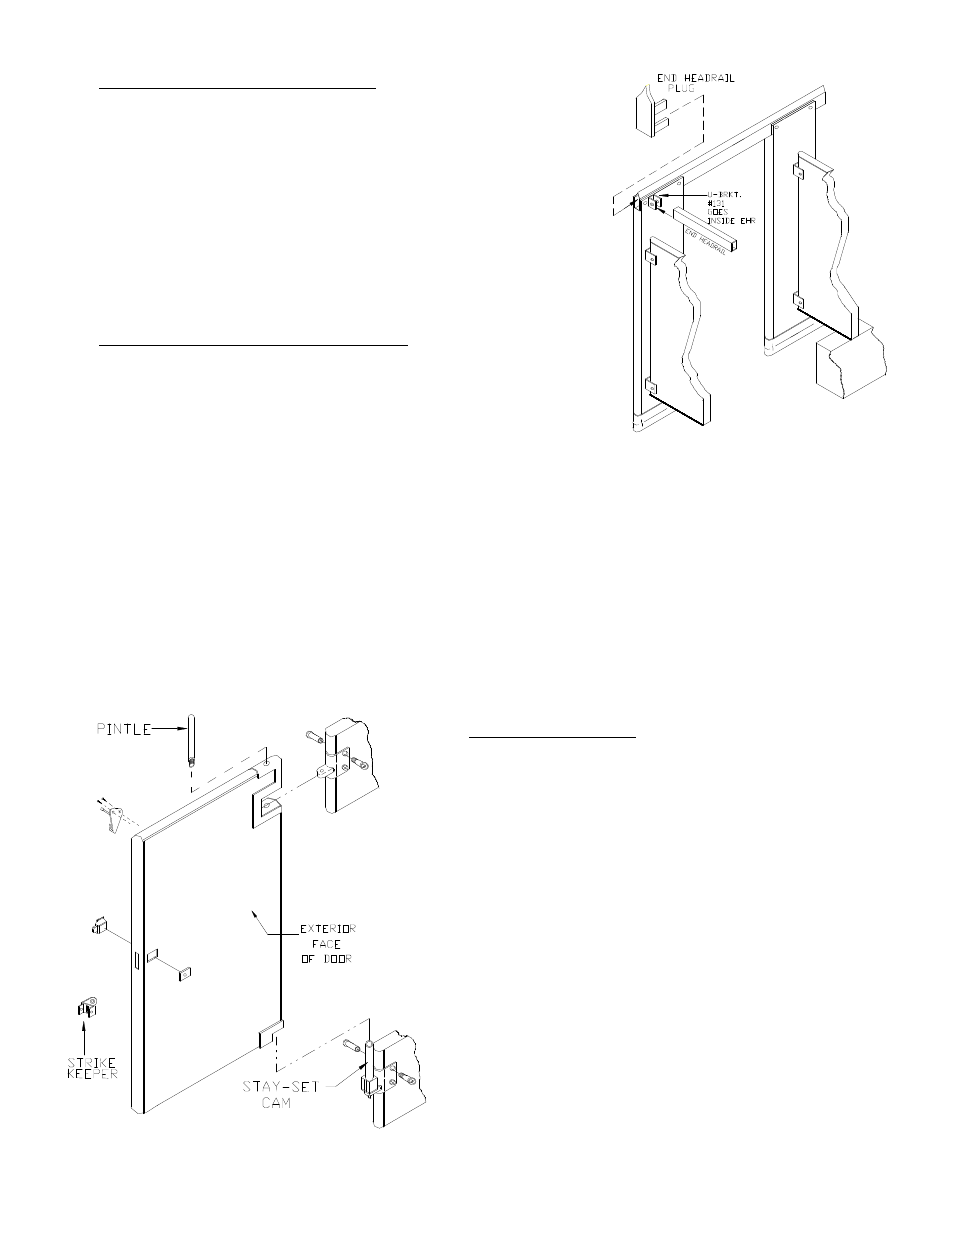
E. To insure rigidity, install rectangular end-headrail
to depth of last stall by securing with U-brackets
at back of stile and also with a 2-ear headrail
bracket at the back wall. Align over the end panel.
STEP 7
STEP 7 -- Install Door
Install Door
A. Secure top and bottom hinge brackets onto stile with
thru-bolts and barrel nuts through pre-drilled clearance
holes.
B. Assemble slide latch on door through pre-punched hole.
Additional instructions and details are provided with the
slide latch hardware package. Install coat hook/bumper.
C. Install stay set cam on lower hinge bracket being sure to
place the long tab on the square part of the stay set
cam towards the inside of the door and the short tab to
the stile. Set the rest position of the door and tighten.
D. Install door onto hinge brackets with pintle and stay set
cam as shown.
E. Install strike/keeper onto stile. Align with door latch,
fasten with thru-bolts and barrel nuts.