Waterstone POTFILLERS 3200 User Manual
Page 2
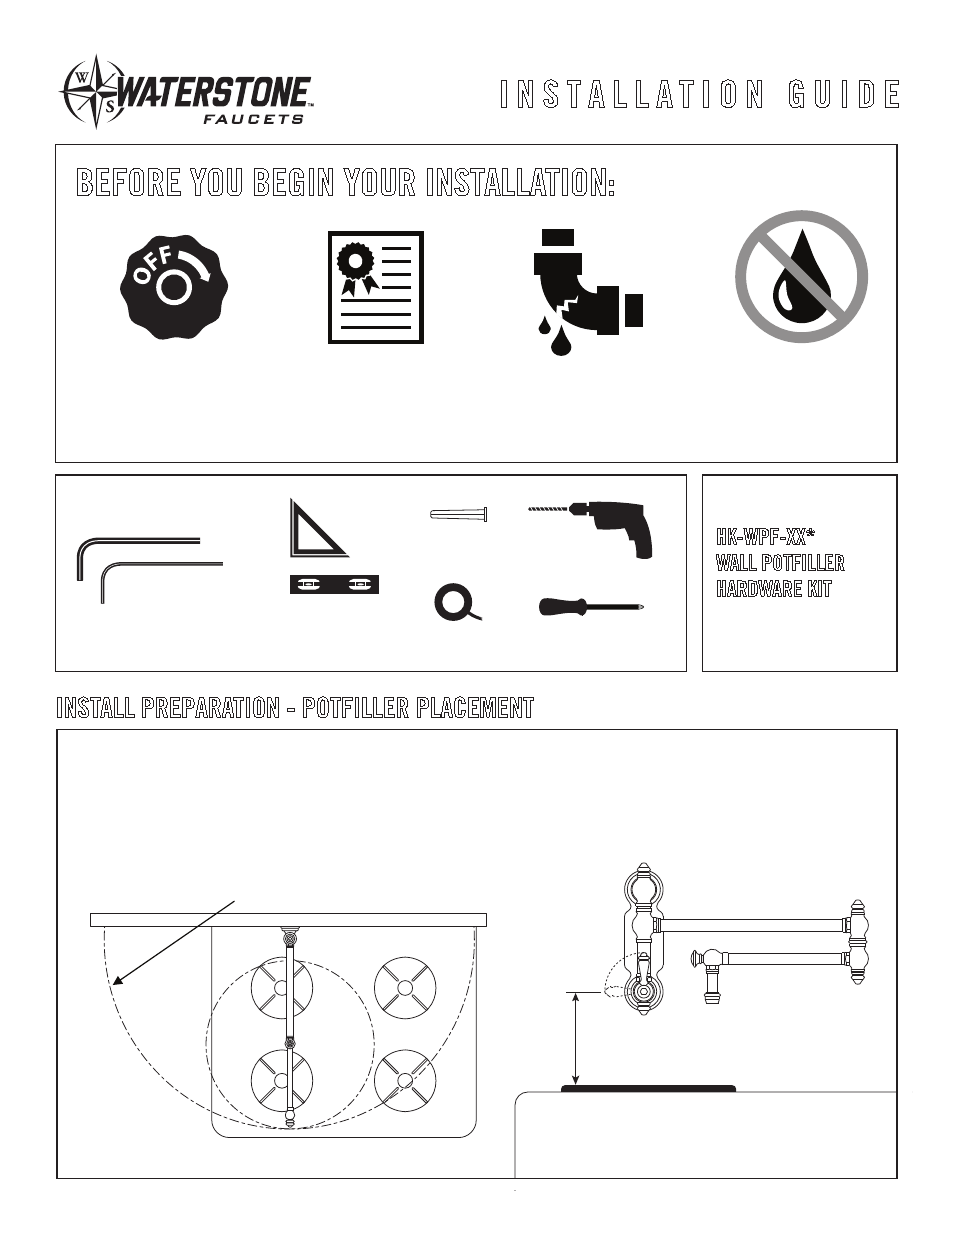
22” REACH
Fig. 1
13” FROM COOKING SURFACE
Pipe adapter
1/2" NPT stub-out.
9/16" minimum thread length.
1/2"
Leave strapping
loose to allow for
1/8” play both
ways.
1/4" Hex wrench
CLEANING AERATOR AND DEBRIS SCREEN
INSTALL PREPARATION - POTFILLER PLACEMENT
1/4” Hex Wrench and
3/32” Hex Wrench
(both included)
Carpenter Square
or Small Level
Teflon Tape
Wall Anchors
Pencil
Power Drill
Phillips Screwdriver
1
2
3
4
Turn off water supply.
Observe all local
plumbing codes.
Inspect waste and water
supplies for signs of damage.
Replace as necessary.
DO NOT use petroleum
based products on this
faucet.
REQUIRED TOOLS:
PARTS INCLUDED:
2. Phillips Screwdriver
1. Adjustable Wrench
BEFORE YOU BEGIN YOUR INSTALLATION:
I N S T A L L A T I O N G U I D E
Prior to installation, rough in plumbing must be completed. The position of your potfiller should be considered prior to starting. When
fully extended from wall, the reach of the potfiller is 22 inches. Use a position on wall that allows potfiller to reach furthest cooking
position for filling (Fig. 1). We recommend aligning the potfiller valve to either left or right side of the cooking surface. Access to valve
should not be over the center of the cooking area.
HK-WPF-XX*
WALL POTFILLER
HARDWARE KIT
*XX represents finish