Premier Mounts GearBox Equipment Enclosure GB-PLEN1 User Manual
Page 6
Page 6
Installation Instructions
GB-PLEN1
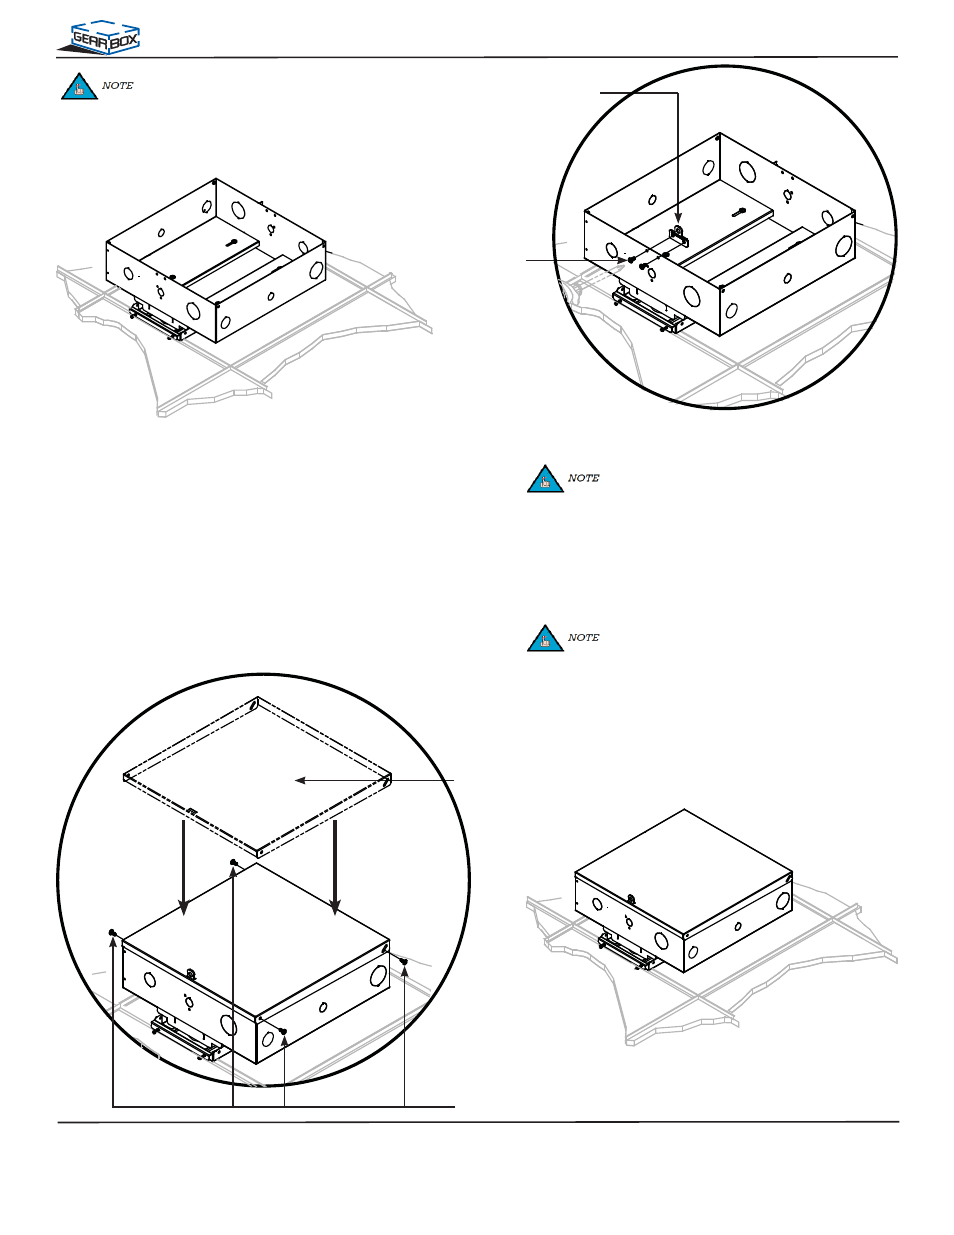
Step 8. Place the padlock hasp on the inside of the
GB-PLEN1
(optional).
Completed Attachment
Padlock Hasp
(optional)
M5 x 10mm
Screws
Step 9. Use two (2) M5 x 10mm Phillips screws to attach
the padlock hasp to the GB-PLEN1.
Step 10. Place the cover lid onto the GB-PLEN1 and
secure using four (4) M5 x 10mm screws and
tighten with a Phillips head screwdriver.
When attaching the padlock hasp, make sure
the flat side is resting against the inside wall
of the GB-PLEN1.
M5 x 10mm
Screws
Cover Lid
Completed Installation
The cover lid may be mounted facing either
direction.
If you did not pre-install electrical components,
then you may now install all power and signal
equipment. A qualified electrician should make any
power connections to the GB-PLEN1.