Connecting to a printer – Panasonic DMC-LC50GN User Manual
Page 84
Playback (advanced)
84
Connecting to a Printer
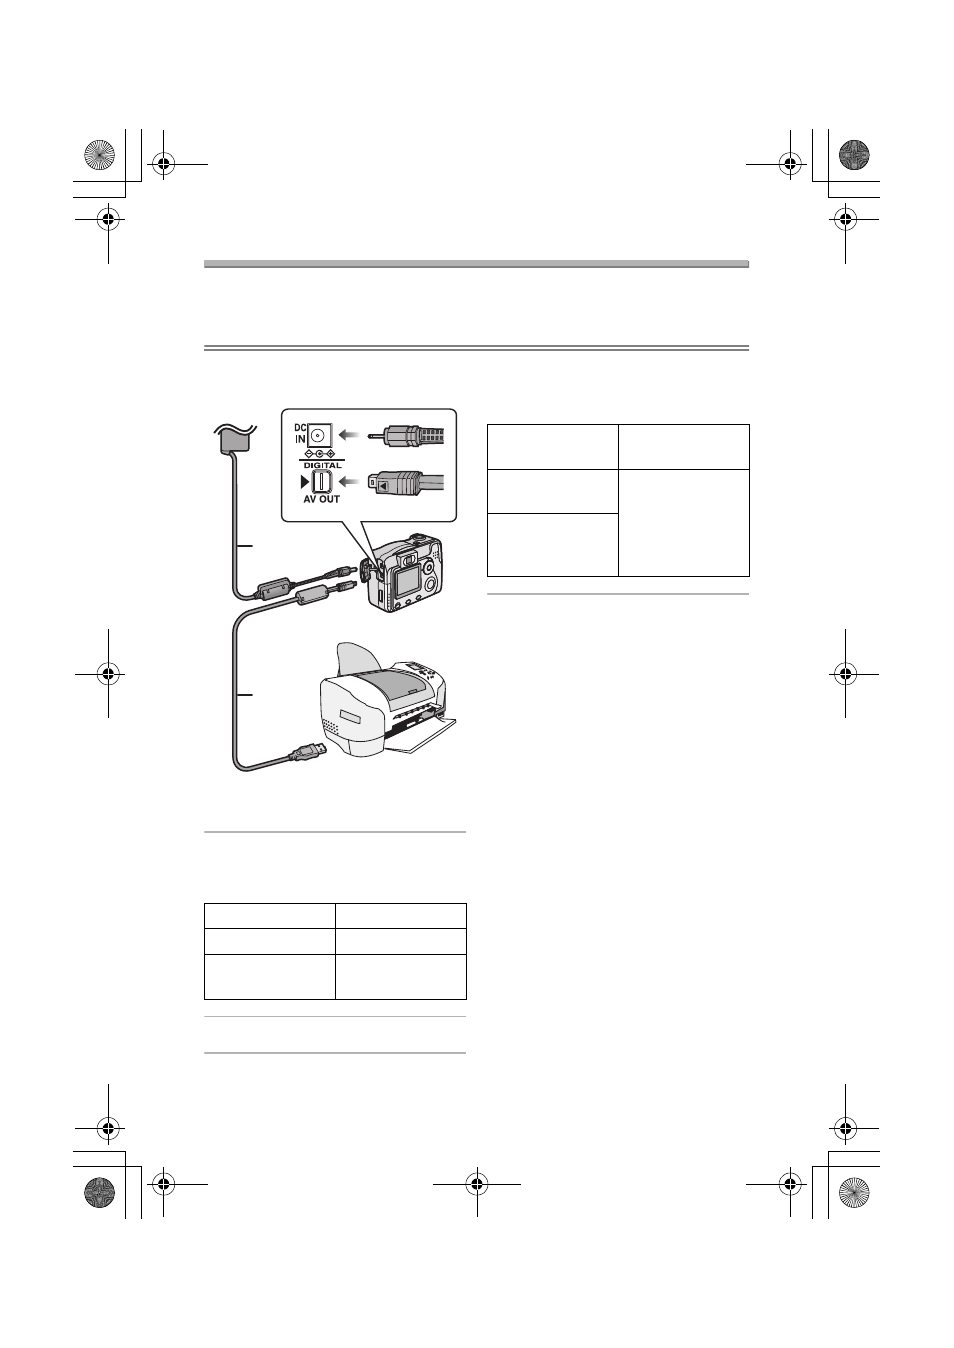
By connecting the camera directly to a printer supporting PictBridge or USB
DIRECT-PRINT via the USB connection cable (supplied), you can select the
pictures to be printed or start printing.
• DMC-LC80/DMC-LC70 is illustrated
below as an example.
A AC adaptor (optional, DMW-AC2)
B USB connection cable
1
Turn the camera on, and the set
the USB mode according to your
printer. (P80)
2
Turn on a printer.
3
Connect the camera to the printer
via the USB connection cable
(supplied).
• Align the
2 mark on the USB
connection cable and the
1 mark on
the [DIGITAL] socket.
¬Suggestions/Tips ¬
• If the remaining battery power
becomes low during
communication, the power
indicator blinks and the alarm
beeps. In this case, stop the
communication, because the data
may be destroyed. Then turn the
camera off and use the following
power source.
• New batteries
• Charged batteries
• AC adaptor (optional, DMW-AC2)
• Ask the manufacturer of the printer
about the corresponding models.
(Read the printer operating
instructions too.)
• It may take time to print pictures.
When connecting, use the batteries
that have sufficiently charged (P13), or
use the AC adaptor (optional,
DMW-AC2) as the power source.
• Disconnect the USB connection cable
after printing.
• Do not use any other USB connection
cables except the supplied one.
Your printer
USB Mode
PictBridge
PTP
USB
DIRECT-PRINT
Mass Storage
A
B
When the DPOF
Print is set. (P65)
Select [DPOF
PICTURE]. (P86)
When the DPOF
Print is not set.
Select [SINGLE
PICTURE]. (P85)
When the printer
does not support
DPOF.
LC80GN.book 84 ページ 2004年6月17日 木曜日 午前10時18分