Setting the date/time (clock set) – Panasonic DMC-LC50GN User Manual
Page 19
Preparation
19
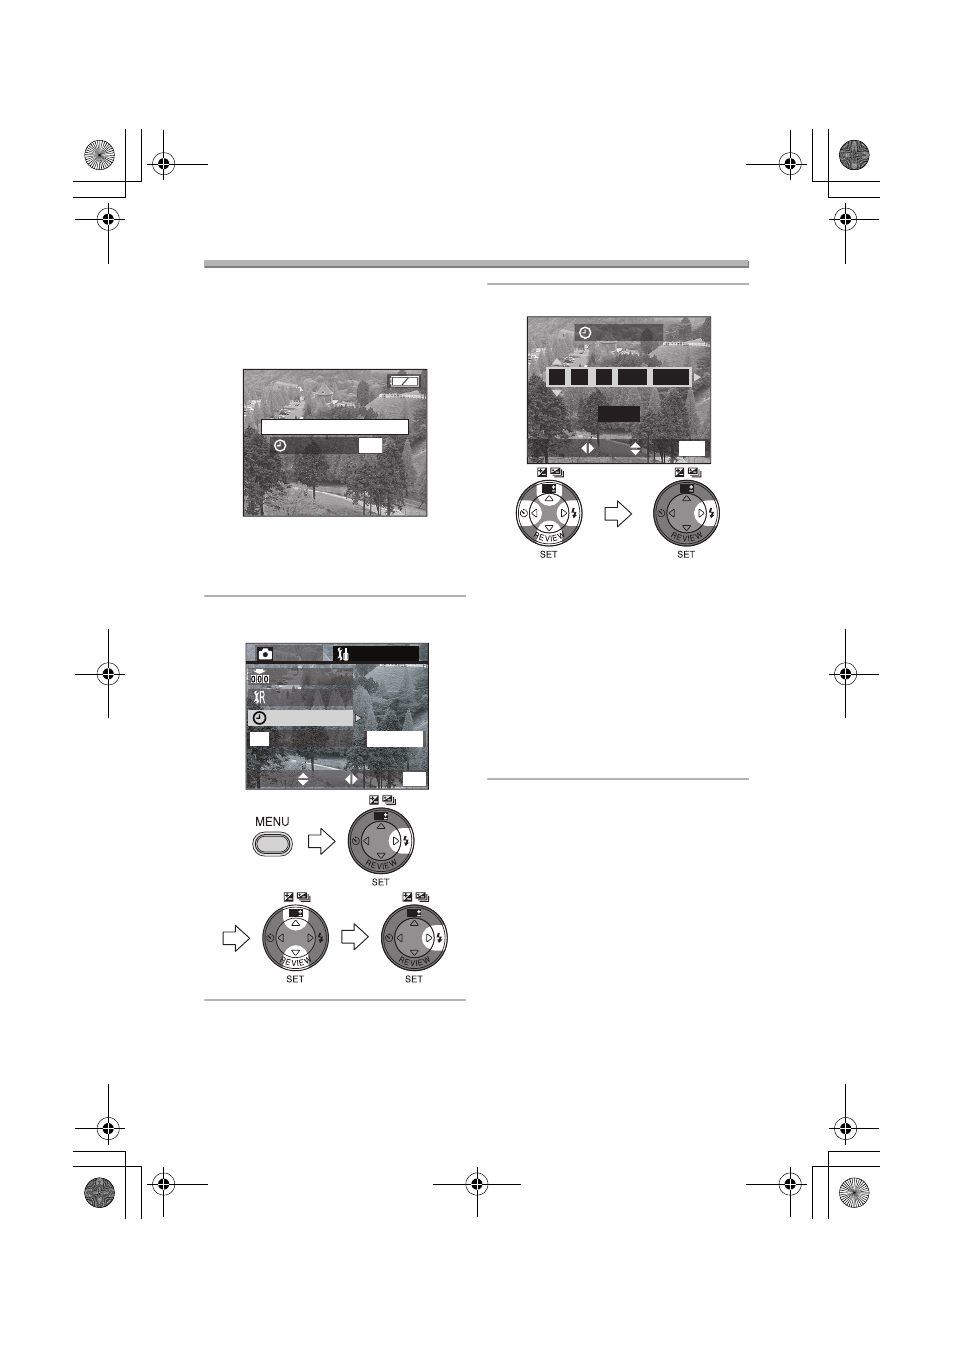
Setting the Date/Time (Clock Set)
ª Initial setting
The clock is not set when the camera is
shipped. When you turn the camera on,
the clock setting screen appears.
When pressing the [MENU] button, the
screen shown in step 2 appears. Set the
clock on it.
1
Select [CLOCK SET] from the
[SETUP] menu. (P20)
2
Set date, time and order.
•
2/1: Select the desired item.
•
3/4: Set date and time.
•
3/4: Select [D/M/Y], [M/D/Y] or
[Y/M/D].
• Close the menu by pressing the
[MENU] button 2 times after
finishing the setting.
• Check if the clock setting is correct,
after turning the camera off and on.
• You can set the year from 2000 to
2099. The 24-hour system is used.
ª Date Printing
• You can set the date printing in DPOF
print setting on this camera. (P68)
• Using the supplied software, [SD Viewer
for DSC], it is possible to have the date
imprinted on the picture. For details,
please read the supplied operating
instructions for PC connection.
• When you go to a photo studio for
printing, be sure to order the printing
of the date. For further information,
ask the photo studio. Depending on
the studio, it may not be possible to
print the date.
PLEASE SET THE CLOCK
MENU
CLOCK SET
REC
SETUP
2/3
USB MODE
NO.RESET
RESET
CLOCK SET
EXIT
SET
SELECT
MENU
M
ass
S
torage
USB
WB
WB
WB
CLOCK SET
D/M/Y
2004
MAR
.
1
1
.
10 00
:
EXIT
SET
SELECT
MENU
WB
WB
LC80GN.book 19 ページ 2004年6月17日 木曜日 午前10時18分