Miter gauge calibration, Table tilt calibration – Woodstock W1828 User Manual
Page 26
Model W1828 (For Machines Mfg. Since 4/11)
-24-
SE
RV
IC
E
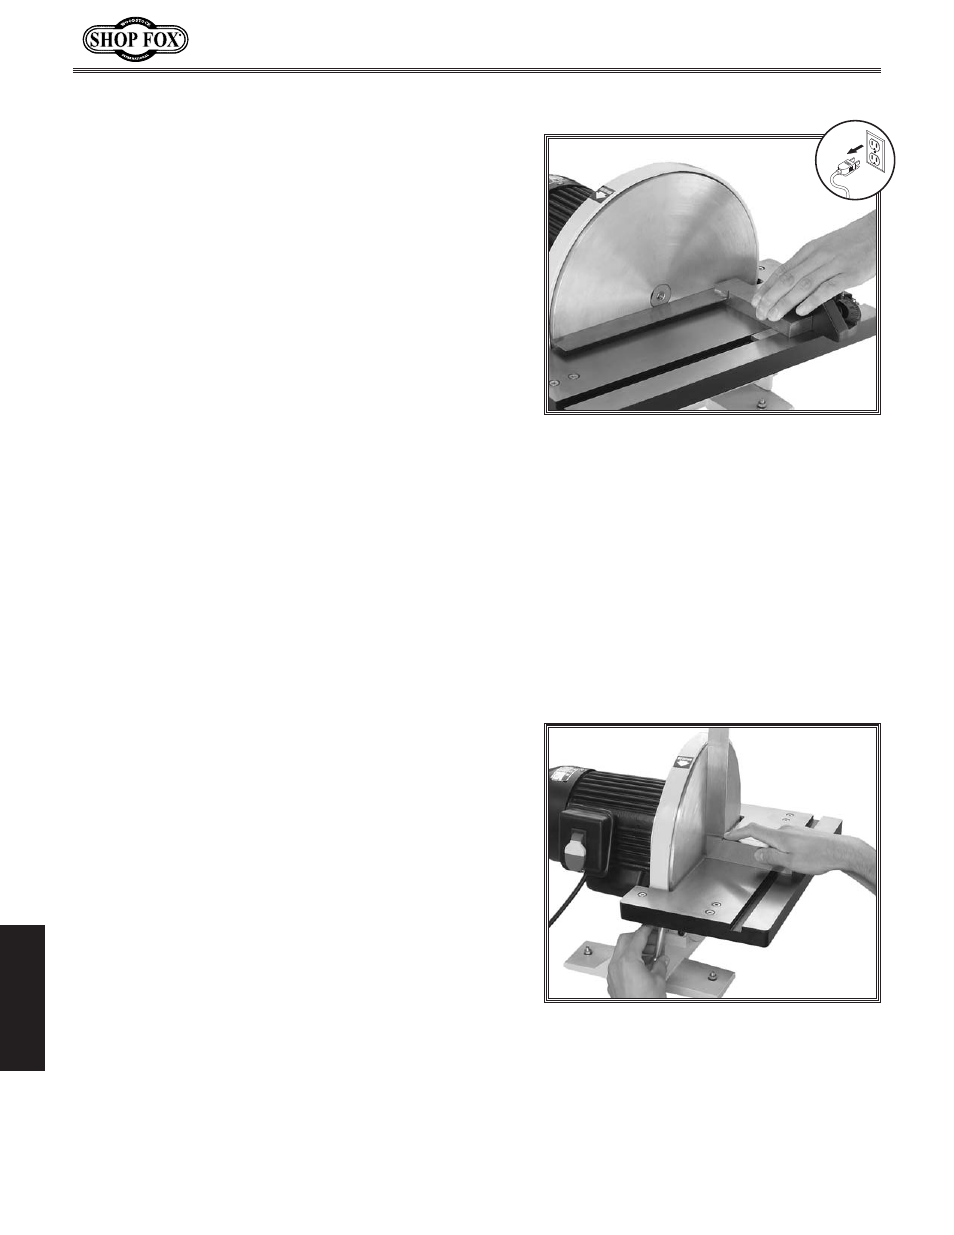
Miter Gauge Calibration
The miter gauge should be perpendicular to the face of
the disc when it is set at 90° and mounted in the table
slot. If not, follow this procedure.
Tools Needed
Qty
Try Square or Machinist's Square .............................1
Phillips Screwdriver #1 .........................................1
To calibrate the miter gauge, do these steps:
1. DISCONNECT MACHINE FROM POWER!
2. Use a try square or machinist’s square with one edge
against the face of the miter gauge and the other
against the disc face, as shown in
Figure 20.
3. Loosen the lock knob on the miter gauge and adjust
the face of the miter gauge so it is flush with the
edge of the square, tighten the gauge lock knob, and
verify the setting.
4. Loosen the degree scale pointer, position the pointer
on 90˚, then re-tighten the screw.
5. Re-check the miter scale accuracy with the square.
Figure 20. Squaring miter gauge to disc.
Table Tilt Calibration
When the table tilt is set to 0˚, the table should be
positioned perpendicular to the sanding disc face. If it is
not, follow this procedure.
To calibrate the table tilt, do these steps:
1. DISCONNECT MACHINE FROM POWER!
2. Using a try square or machinist’s square, set one
edge on the table surface and the other against the
face of the disc, as shown in
Figure 21.
3. Loosen the table tilt lock handles and adjust the
table angle until it is perfectly perpendicular to the
disc, then tighten the lock handles while holding the
table in place.
4. If the angle pointer stickers on both ends do not
point to 0˚, remove them and place them on the
trunnion so they point to 0˚.
5. Recheck the scale accuracy with the square.
Figure 21. Squaring the table.