Sanding spindle, Setup – Woodstock SHOP FOX W1730 User Manual
Page 17
SETUP
-15-
W1730 Oscillating Edge Sander
The Model W1730 comes with a spindle sanding
attachment for sanding curved surfaces. The included
sanding drums measure 1-1/2", 2", and 3" in diameter. The
spindle table may also be used on the end of the sanding
belt if so desired. Be sure to periodically adjust the table
height to minimize spot wear on the spindle/belt.
To install the sanding spindle, do these steps:
1. Release the dust port cover latch, open the cover,
then latch the cover to the belt access door.
2. Remove the three cap screws and false cover from
the sanding belt drum.
3. Line up the screw holes and place the spindle into
the sanding belt drum.
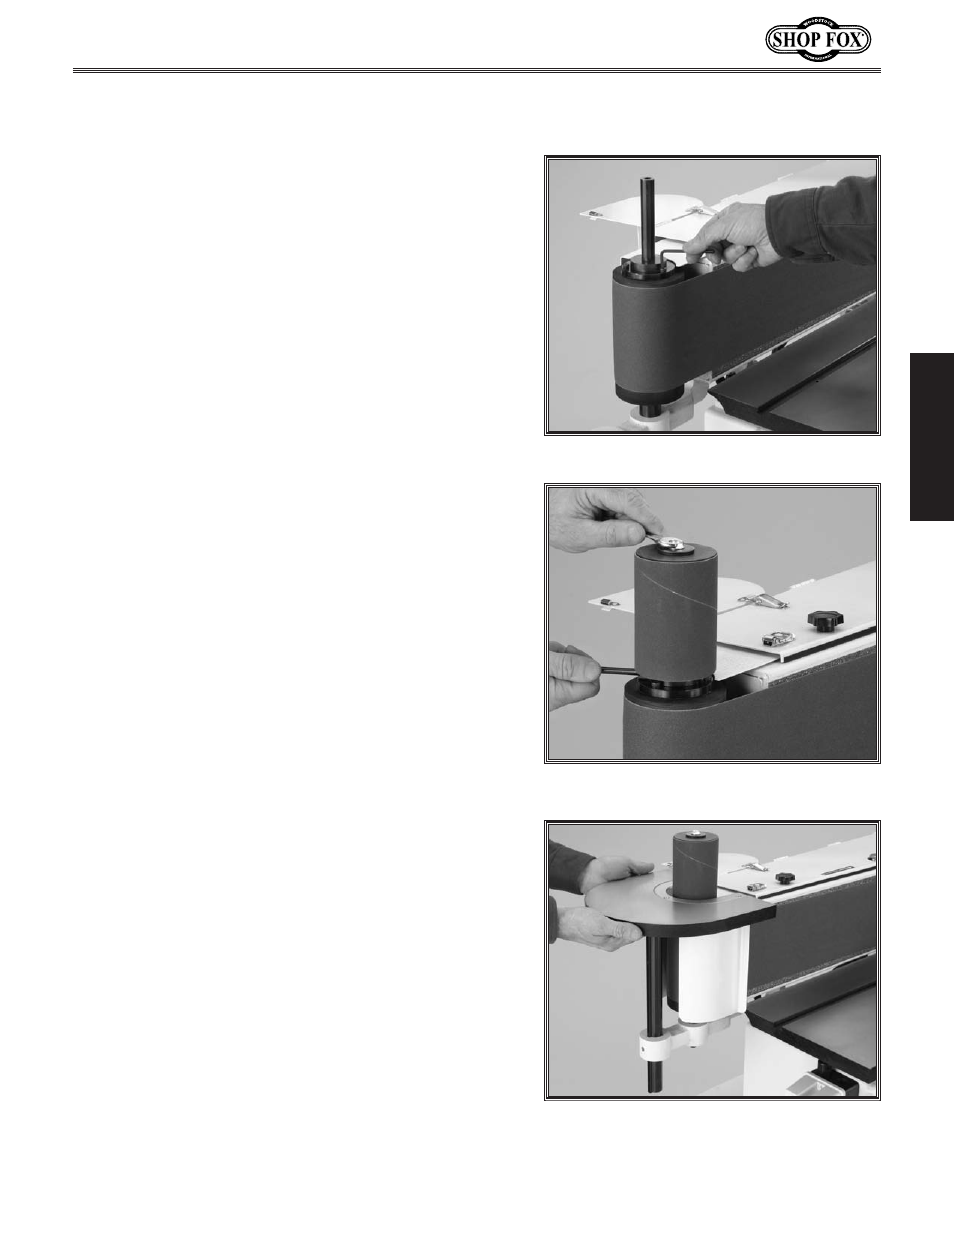
4. Thread the cap screws removed in Step 2 into the
sanding belt drum and tighten evenly and securely
as shown in
Figure 17.
5. Slide a sanding drum onto the spindle, and insert
the 5/16" spindle washer and 5/16-18 x 1/2 hex bolt
into the top of the spindle.
6. Insert the rod into the side of the spindle to anchor
it and tighten the hex bolt as shown in
Figure 18.
7. Insert the spindle table assembly shaft into the
opening in the idler roller bracket as shown in
Figure 19.
8. Thread the table lock handle into the pre-tapped
hole in the idler roller bracket.
Note : The handle is
spring loaded and can be used as a ratchet.
9. Remove the installed table insert by removing the
three flat head screws in the insert.
10. Replace with the table insert that matches the
sanding drum diameter. Tighten with the flat head
screws removed in
Step 9.
Sanding Spindle
Figure 17. Securing the cap screws.
Figure 18. Anchoring the spindle with the
rod.
Figure 19. Inserting spindle table
assembly into idler roller bracket.