Removing the speaker, Removing the rear cabinet, Removing the du lid unit – Matsushita CF-18JHU70TW User Manual
Page 20
7-2
Figure 6
7. Disconnect the Cable from Connector (CN18).
8. Remove the TP Tape.
9. Disconnect the Cable from Connector (CN800).
10. Remove the Touch Pad and Click Button Plate.
Screw: DRSB2+5FKL
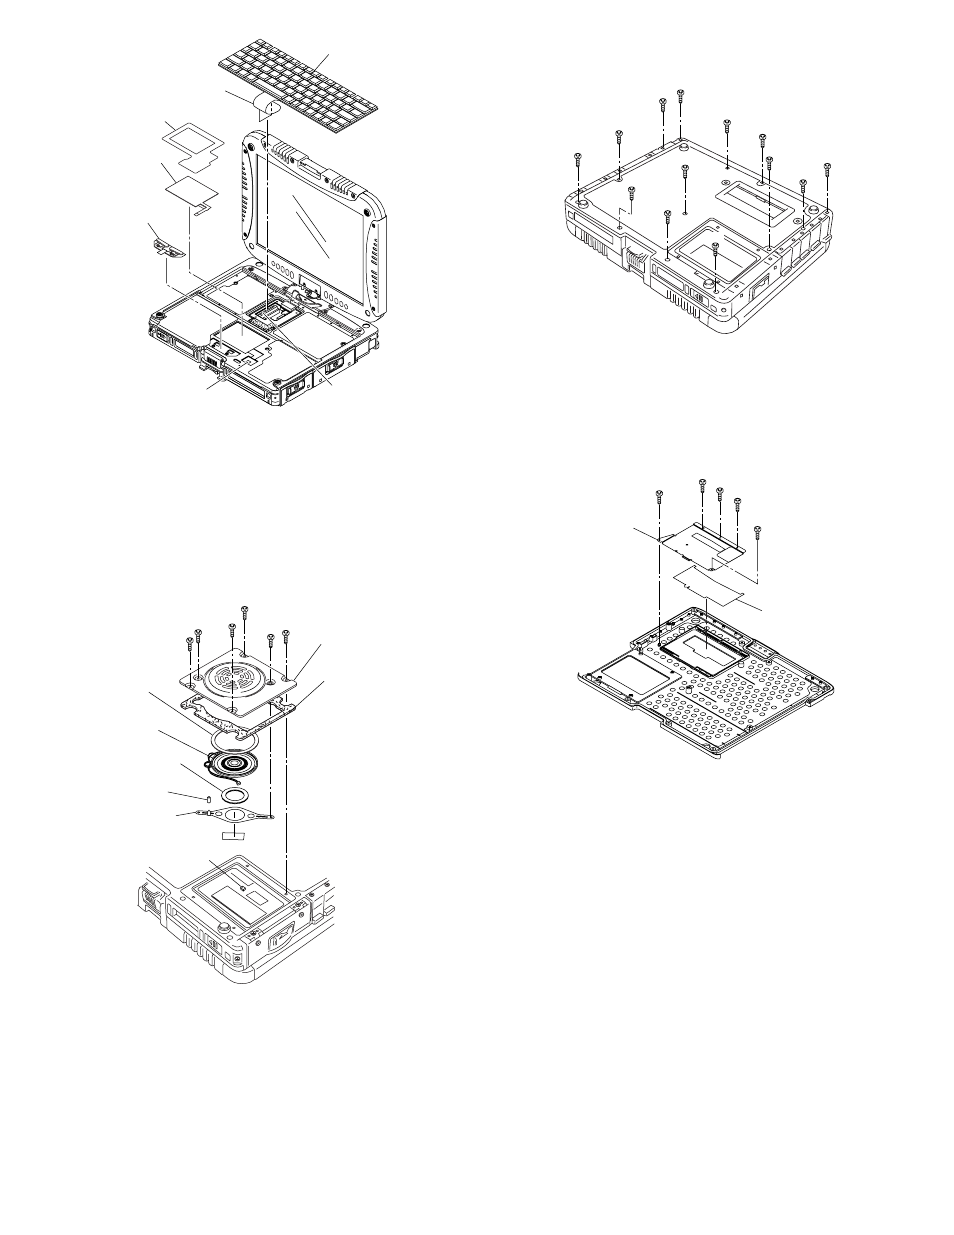
7.3. Removing the Speaker
Figure 7
1. Remove the four Screws.
2. Disconnect the Cable from Connector (CN37).
3. Remove the two Screws.
4. Remove the Speaker Angle.
Screw
7.4. Removing the Rear Cabinet
Figure 8
1. Remove the thirteen Screws.
2. Remove the Rear Cabinet.
Screw
7.5. Removing the DU Lid Unit
Figure 9
1. Remove the five Screws.
2. Remove the DU Lid Angle and DU Lid.
Screw
Keyboard
Keyboard
FPC
Connector
(CN18)
Connector
(CN800)
TP Tape
Touch Pad
Click Button
Panel
DIMM LID Sheet
DIMM LID
Speaker Unit
Speaker
Waterproof
Sheet
Speaker Washer
Speaker Angle
Connector (CN37)
Speaker Cable
Tube
DU LID
DU LID Angle