Warning – Harbor Freight Tools 97055 User Manual
Page 9
Page 9
SKU 97055
For technical questions, please call 1-800-444-3353.
3.
Grip the Sander and make sure the Sanding Belt is not touching any surface
before you turn on the tool. Then pull on the spring-loaded safety lock and gently
squeeze the Paddle Switch (6) and allow the Sanding Belt to rotate to its fullest
speed.
(see Figure c.)
4.
Place the rotating Sanding Belt on the workpiece surface, being careful not to
strike the workpiece with the sides of the Adjusting Bar (36). Move the Sander
back and forth to remove material. To increase the rotating speed of the Sanding
Belt, squeeze the Paddle Switch (6) harder. To decrease the speed of rotation,
relax pressure on the Paddle Switch.
(see Figure c.)
5.
Keep a light pressure on the Sander when in use. Do not apply heavy pressure,
as damage to the work surface may result.
6.
When finished using the Sander, release pressure on the Paddle Switch (6).
Turn off the air compressor. Squeeze the Paddle Switch again to release any
remaining compressed air in the Sander. Then disconnect the air hose from the
tool.
(see Figure d.)
7.
Make sure to store the Sander in a clean, dry, safe location out of reach of
children and other unauthorized people.
Maintenance and serVicing
risk of serious personal injury from accidental starting.
disconnect sander from its compressed air supply before
performing inspection, maintenance, or cleaning procedures.
damaged equipment can fail, causing serious personal
injury. do not use damaged equipment. if abnormal noise or
vibration occurs, correct problem before further use.
1.
beFore each use, inspect the general condition of the Sander. Check for
loose parts, misalignment or binding of moving parts, cracked or broken parts,
damaged hose, and any other condition that may affect its safe operation.
2.
to clean the exterior oF the sander, wipe with a clean, damp cloth
using a mild detergent. Do not use solvents. Do not immerse the tool in liquid.
3.
when storing, keep the Sander in a clean, dry, safe location out of reach of
children and other unauthorized people.
4.
caution: All maintenance, service, and repairs not mentioned in this manual
must only be performed by a qualified service technician.
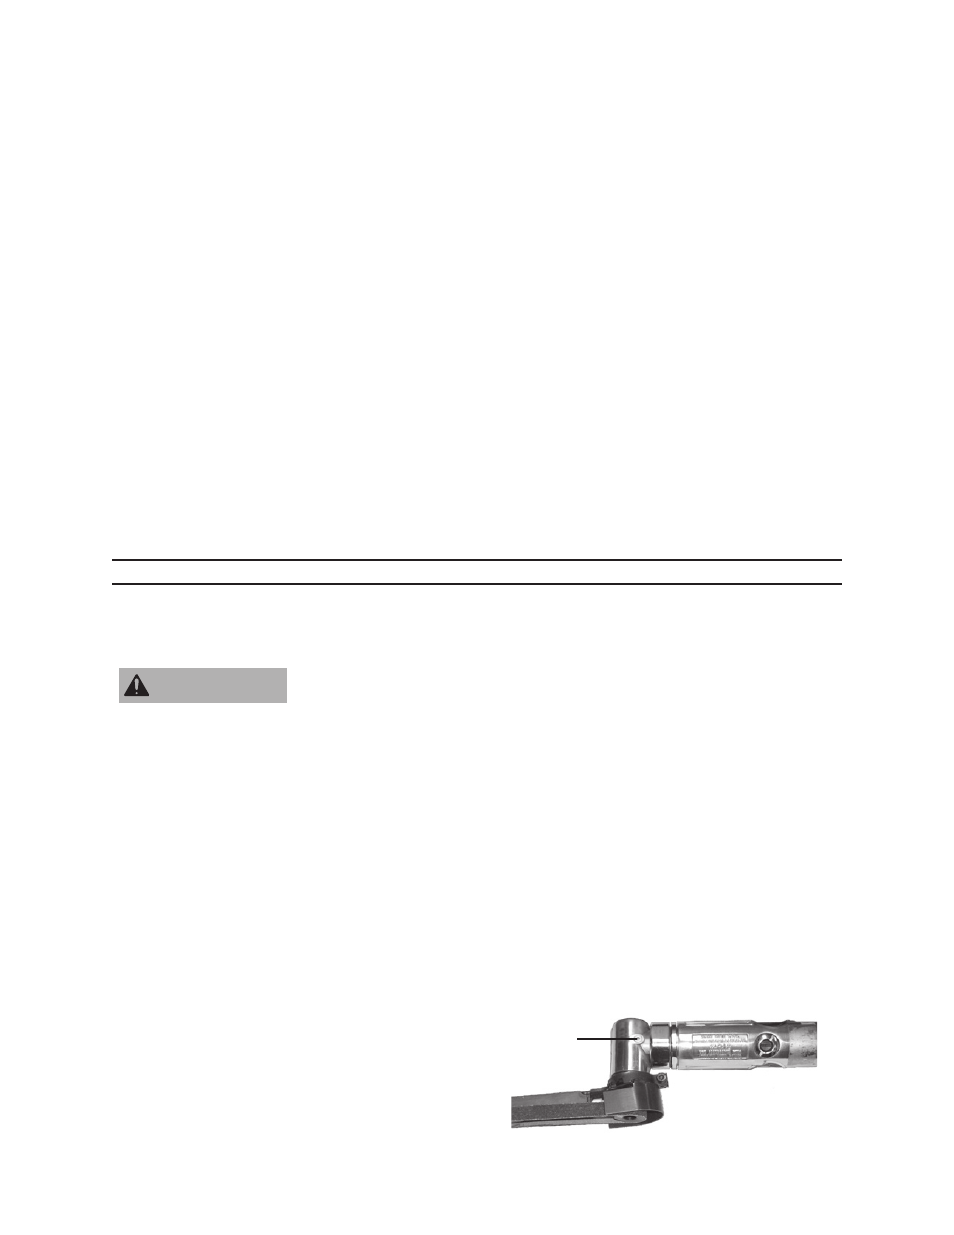
5.
periodicallY applY grease
to the small grease fitting located at
the junction of the Sander handle
and head. See
Figure e, right.
warning
grease
Fitting
Figure e