Husky Baby Carrier User Manual
Page 8
13
12
Installation
5
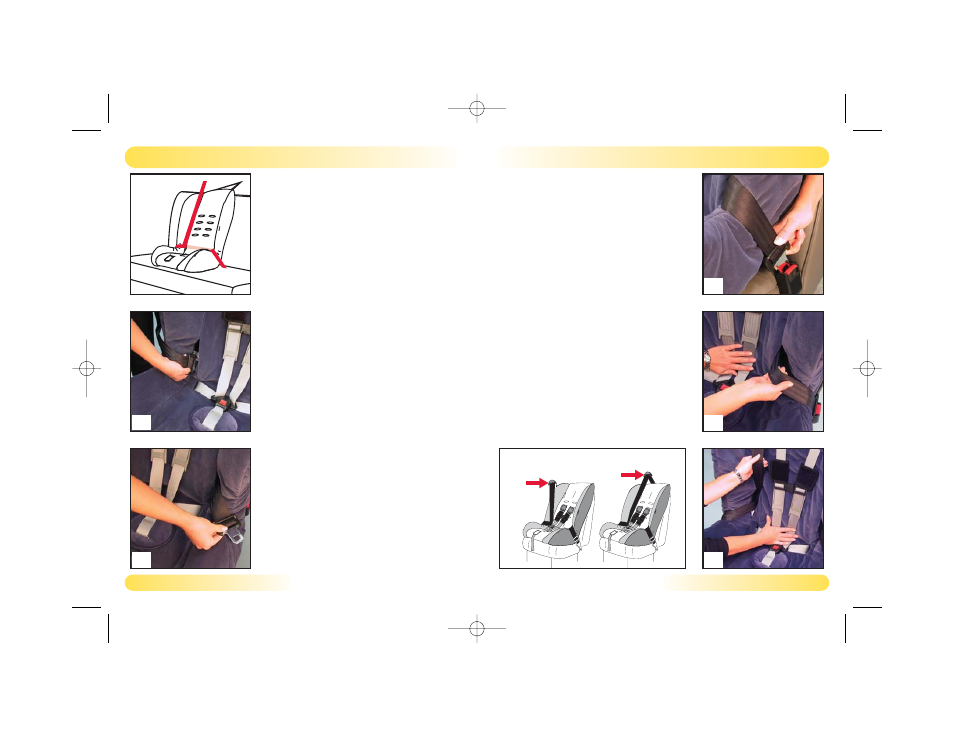
Verify that the vehicle belt is not
twisted, then buckle (Fig. D).
6
While kneeling on the restraint to push
it firmly into the vehicle backrest, remove
all slack from the vehicle belt.
•
First remove slack from the lap portion of
the vehicle belt, then the shoulder portion
(Fig. E & F).
7
Verify that the vehicle belt is tight and
the child restraint is secure.
Refer to Figure G for correct routing of the
lap-shoulder vehicle belt.
IMPORTANT:
Always use the Versa-
Tether for children weighing more than
50 pounds (22.6 kg). See pages 18-19.
Removal
Reverse installation procedure.
E
F
Upper Anchorage Points
G
Installation
Lap-Shoulder Belt Installation
Long Route
Figure A illustrates a typical long route lap-
shoulder belt installation.
WARNING:
•
Do not install this restraint using a non-
locking ELR vehicle belt, unless a locking
clip is used. Refer to the vehicle owner's
manual for instructions on correct use of
vehicle belts with child restraints.
1
Insert recline bar into holes on rear of
restraint (see page 20).
2
Place the child restraint in a forward
facing position on the vehicle seat.
3
Pull the vehicle belt out and pass it
through the first belt slot, from the front of
the restraint to the rear (Fig B).
4
Route the vehicle belt around the
back of the restraint then through the
second belt slot, from the rear of the
restraint to the front (Fig. C).
B
A
C
D
P2219_R03.qxd 8/18/2004 11:04 AM Page 14