Electronic clock & automatic oven timer operation, Auto cooking programmes – Hotpoint DY46 Mk2 User Manual
Page 13
Electronic Clock & Automatic Oven Timer
Operation
13
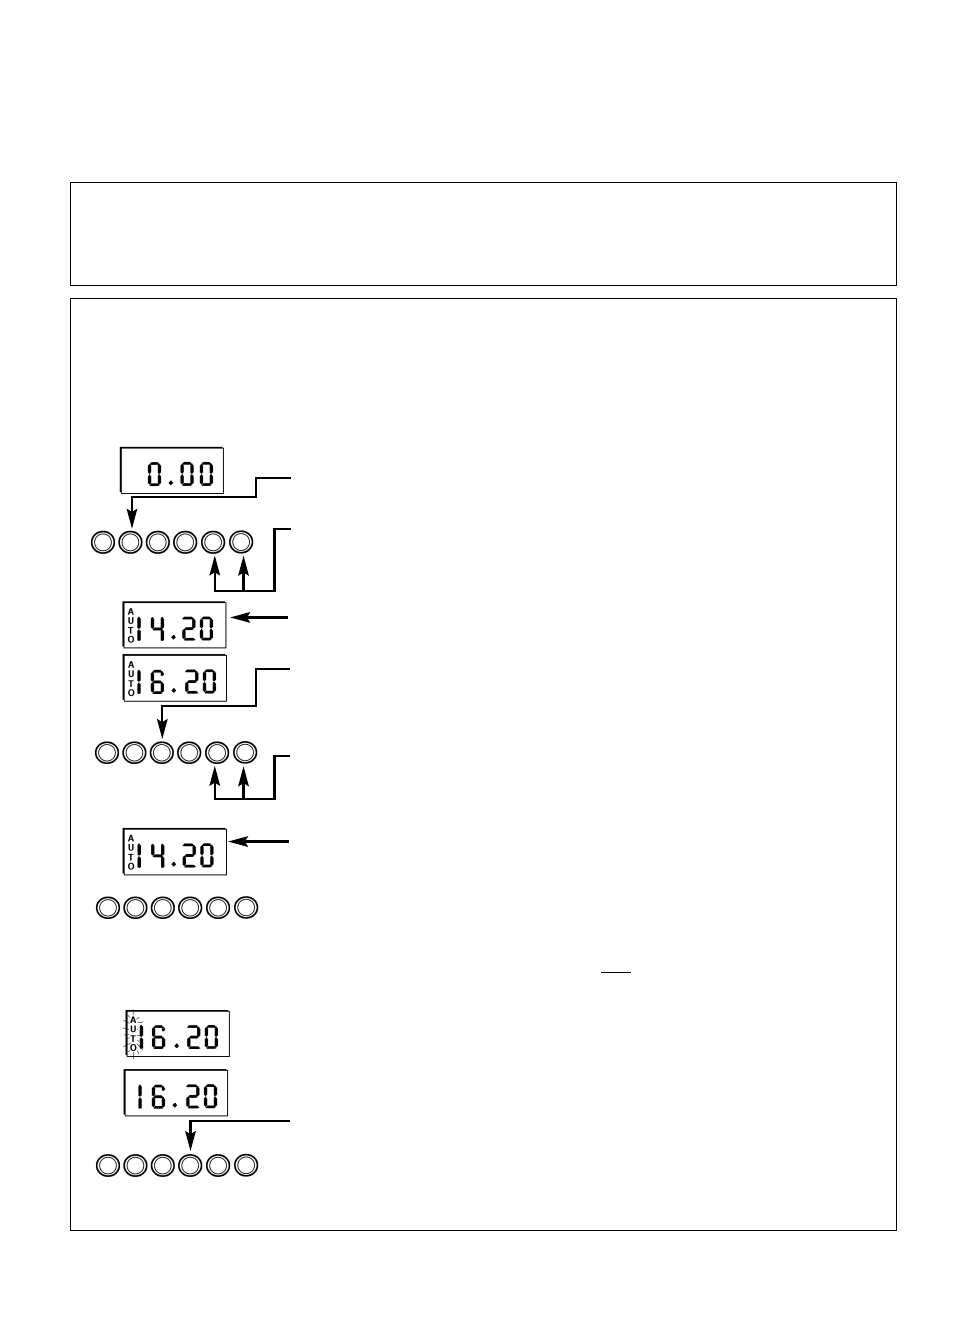
Step 3
Press and hold in the Cook Period button.
The display will read 0.00 with the ‘cookpot’ symbol lit.
Step 4
With the Cook Period button still held in, set the required Cook
Period using the “+” and “–” buttons.
Release the buttons and the timer display will revert to the time of day with
the ‘Auto’ symbol and ‘cookpot’ symbol lit.
Step 5
Press and hold in the End Time button.
The display will read the earliest possible end time for the Cook
Period that you have set above.
The ‘Auto’ symbol and ‘cookpot’ symbol will be lit.
Step 6
With the End Time button still held in, use the “+” and “–” buttons to
set the ‘End Time’ (i.e. The time you require the oven to switch off).
Release all the buttons and the timer will revert back to the time of day.
The ‘Auto’ symbol will remain lit to signify that an Auto Cooking Programme
has been set. The ‘cookpot’ symbol will go out.
Step 7
Turn the oven control(s) to the required temperature, and if
necessary select the appropriate oven function.
N
No
ot
te
e:: IIff y
yo
ou
urr a
ap
pp
plliia
an
nc
ce
e h
ha
as
s t
tw
wo
o o
ov
ve
en
ns
s:: W
Wh
he
en
n t
th
he
e t
tiim
me
err h
ha
as
s b
be
ee
en
n s
se
et
t ffo
orr o
on
ne
e
o
ov
ve
en
n iit
t iis
s p
po
os
ss
siib
blle
e t
to
o u
us
se
e t
th
he
e o
ot
th
he
err o
ov
ve
en
n o
on
nlly
y d
du
urriin
ng
g t
th
he
e s
sa
am
me
e A
Au
ut
to
om
ma
at
tiic
c
p
prro
og
grra
am
mm
me
e..
At the end of the Automatic Cook Period the Auto Symbol will flash and an
intermittent bleeping sound will be heard.
The audible tone will continue unless cancelled.
The ‘Auto’ symbol will continue to flash until the timer is returned to Manual
operation (see below).
Step 8
Press the Manual button, the audible tone will be cancelled and the
oven(s) will be returned to Manual.
Step 9
Turn the oven control(s) to the OFF position.
AUTO COOKING PROGRAMMES
There are two Auto Cooking programmes that can be selected using your timer:–
(a)
To set the timer to switch the oven(s) On and Off Automatically
(b)
To set timer to switch on immediately and OFF automatically after a set cook period.
a) TO SET THE TIMER TO SWITCH THE OVEN(S) ON AND OFF AUTOMATICALLY
T
Th
hiis
s a
allllo
ow
ws
s y
yo
ou
u t
to
o c
co
oo
ok
k a
at
t a
a s
sp
pe
ec
ciiffiie
ed
d t
tiim
me
e ffo
orr a
a c
ch
ho
os
se
en
n p
pe
erriio
od
d b
be
effo
orre
e t
th
he
e o
ov
ve
en
n s
sw
wiit
tc
ch
he
es
s
o
offff A
Au
ut
to
om
ma
at
tiic
ca
alllly
y..
Step 1
Check that the correct time of day is set, if not follow instructions for setting the
time of day.
Step 2
Place food onto the correct shelf position in the oven and close the oven door(s).