Hitachi UT32V502W User Manual
Page 20
19
CONNECTION (continued)
2. Connect your Equipment to the Monitor (continued)
Connecting to Equipment Having a HDMI Output Terminal
HDMI-Interfaced System
With
“HDMI Control” function, you can interface the connected equipment through the HDMI terminal automatically
if the connected equipment meets an industry standard “HDMI CEC (Consumer Electronics Control)”. Please check
if the connected equipment supports HDMI CEC before using this function.
1. Press the
button.
2. Select “Function” menu.
3. Select “HDMI Control”.
4. Select “Auto Input Change” or “System Standby”.
Auto Input Change
Off
Condition : while the monitor is in Standby mode.
When the connected equipment starts (such as DVD
playback and Disc insertion), the monitor is automatically
turned On and switches the picture and audio to HDMI input.
On
System Standby
Off
Condition : while the monitor is On.
When the monitor is switched off or set to Standby mode, the
connected equipment is also turned off or in Standby mode.
On
AV Center Control
Off
Selecting On will activate AV Center OSD interface, in case
you purchased the optional Hitachi A/V Center.
On
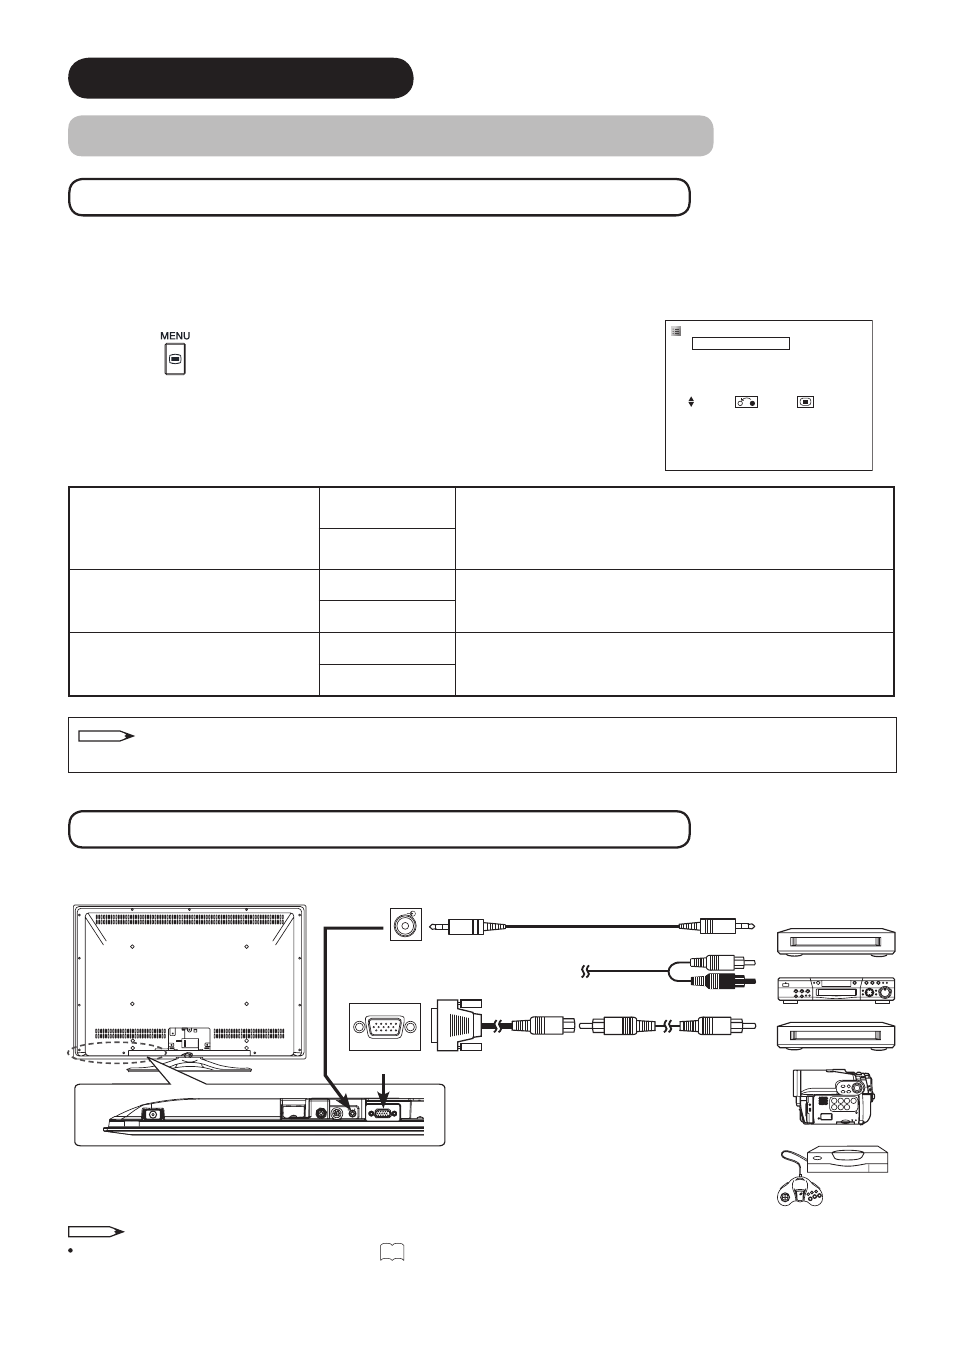
Connecting to Equipment Having Video Output Terminals
The unit can be connected to equipments having video output using the optional D-sub 15 pin - composite cable.
VCR
DVD player
Home video game system
Camcorder
Set-Top Box
AUDIO
(Audio)
(D-sub 15 Pin)
or
*
* Optional D-sub 15 pin - composite
cable.
[Example]
IN
OUT
NOTE
About the connection of D-sub 15 pin, see
13
for details.
NOTE
If the HDMI-DVI cable is used, this HDMI-interfaced system is not available.
Function
HDMI Control
Auto Input Change Off
System Standby
Off
AV Center Control On
Select Return Exit