Step 2: attaching broom to tractor – HONDA FS5047 User Manual
Page 8
STEP
2:
ATTACHING
BROOM TO TRACTOR
a) Insert driveline
half (with quick connect
yoke) over broom driveline half. Set
driveline on its support.
NOTE:
Driveline sliding surfaces must be
greased.
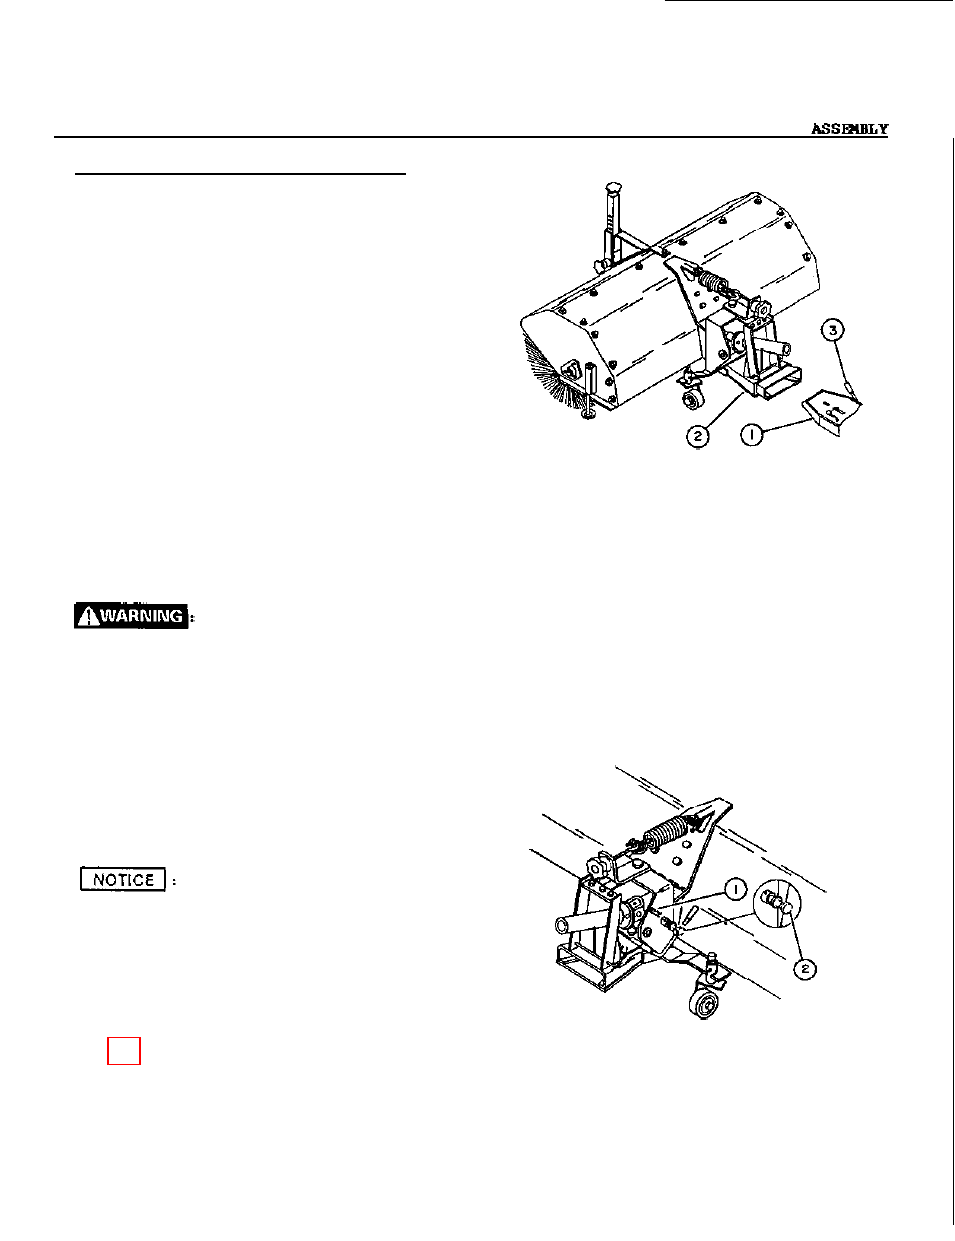
b) Insert male quick hitch (fig.3, item 1)
into broom female
hitch (fig.3,
item 2)
and
place male quick hitch lever (fig.3,
item 3) fully forward
in "locked" position.
Secure male quick hitch latch with the
linchpin.
c)
Connect broom driveline to tractor PTO
shaft by sliding back the locking collar
on yoke, then push over PTO shaft until
the locking collar snaps back fully.
Make sure driveline is
well secured at
both ends.
This shaft turns at very high
RPM. If
the collar is not 1ocked to the PTO
shaft at the tractor end, or if the yoke at
the broom end is not secured properly, the
driveline can fly loose with great force
capable of causing serious injury or death.
d) Remove hair pin (fig.4, item 1) from
welded sleeve on right hand
side of broom
mounting bracket. Carefully pull out the
pin (fig.4, item 2) to its most extended
position and lock in place with same
hair
pin.
The
pin in
the inmost position
is used to prevent female hitch on
broom from being pulled
up by the
brush ground contact adjustment
spring, thus facilitating mounting
and dismounting of broom.
e) Correct
all adjustment settings on page
FIGURE
3
FIGURE
4
OM
0180
7