Replacing the blade, Warning, Safety o pera tion m aintenance setup – Harbor Freight Tools 98199 User Manual
Page 14
Page 14
For technical questions, please call 1-800-444-3353.
ITEM 98199
SAFETY
O
PERA
TION
M
AINTENANCE
SETUP
Replacing the Blade
WARNING
TO REDUCE RISK OF SERIOUS INJURY:
Return guard to original position and secure in place after replacing blade.
1.
Unplug the tool from its power source.
2.
Lock the blade assembly in the raised
position by pushing in the Locking Pin.
3.
Use the supplied Wrench to remove the Center
Cover Fixing Bolt holding the Center Cover in place
by turning it counterclockwise.
(See Figure C.)
Figure C: Removing Bolt
4.
Remove the Safety Screw.
(See Figure D.)
Figure D: Removing Safety Screw
5.
Raise the Blade Guard and Center Cover.
(See Figure E.)
Figure E: Raise Blade Guard
6.
While holding in the Arbor Lock Button,
use the Wrench to loosen the Arbor Bolt
by turning it clockwise.
(See Figure F.)
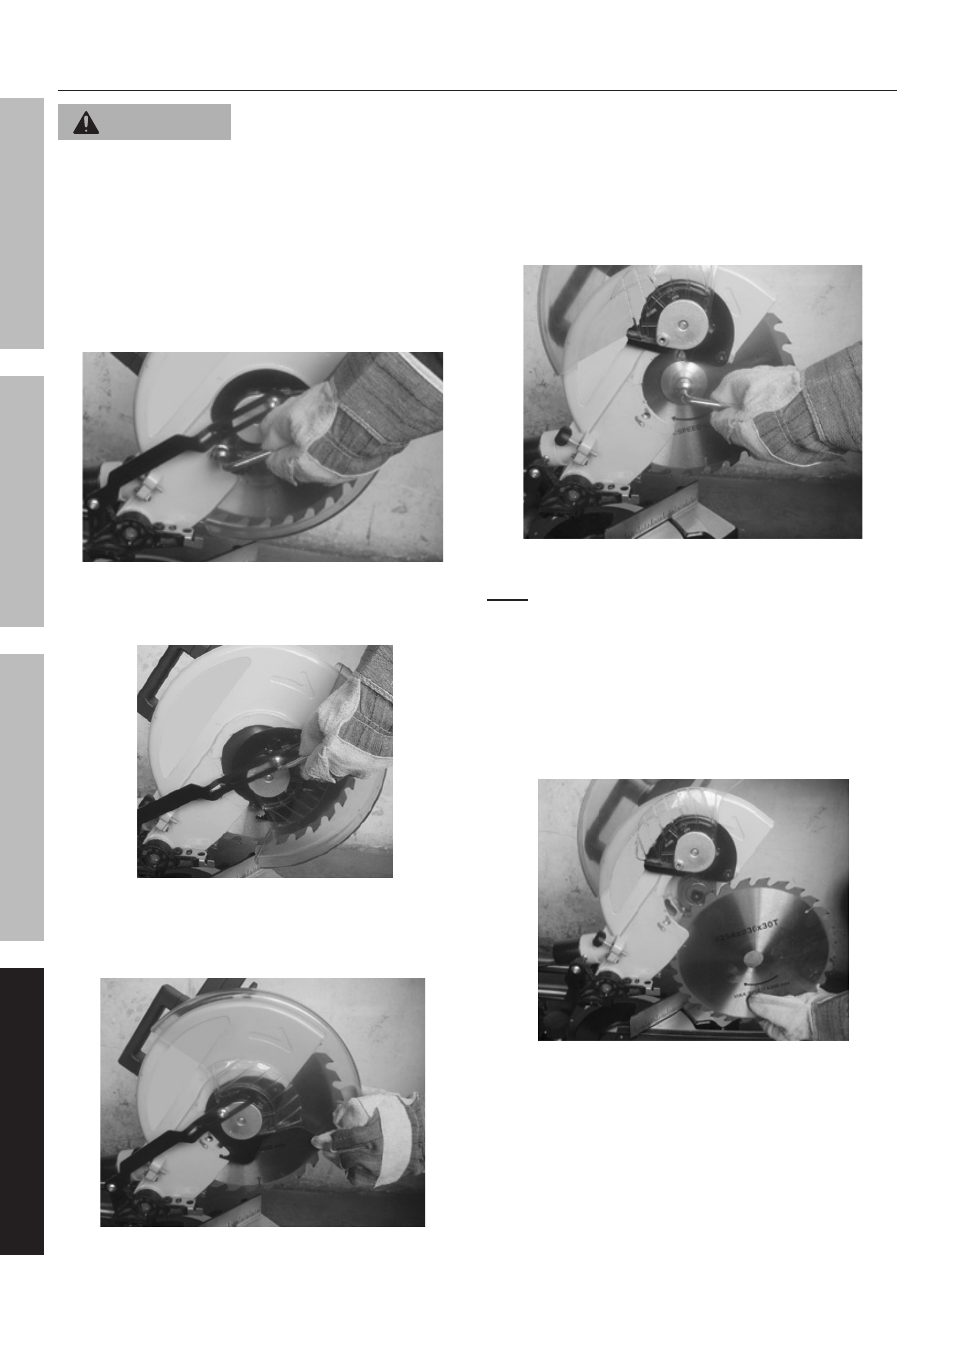
Figure F: Arbor Bolt
Note: The Arbor Bolt has a left hand thread,
so it loosens by turning clockwise.
7.
Remove the Arbor Bolt, Outer Flange and Saw
Blade by pulling them straight off the Arbor.
8.
Reinstall a new Blade on the Arbor.
(See Figure G.) Be sure to match the direction
marked on the new blade with the direction
marked on the saw Blade Housing.
Figure G: Removing Blade
9.
Replace the Outer Flange and Arbor Bolt.
Tighten the Arbor Bolt securely using the
Wrench by turning it counterclockwise.
10. Rotate the Center Cover back into place
and tighten the Center Cover Fixing Bolt
using the Wrench by turning it clockwise.
11. Release the Locking Pin.