Assembly/mounting, Safet y op era tion m aintenan c e setu p – Harbor Freight Tools 97181 User Manual
Page 6
Page 6
For technical questions, please call 1-800-444-3353.
Item 97181
SAFET
y
Op
ERA
TION
M
AINTENAN
c
E
SETU
p
Specifications
Electrical Rating
120V~ / 60Hz / 3.5A
Belt Size
4" W x 36" L
Disc Size
6"
Max. Speed
1819 RPM (Disc)
1185 FPM (Belt)
Setup - Before Use:
Read the ENTIRE IMpORTANT SAFETy INFORMATION
yy
section at the beginning of this
manual including all text under subheadings therein before set up or use of this product.
TO pREVENT SERIOUS INJURy
REVENT SERIOUS INJUR
REVENT SERIOUS INJUR FROM A
yy
ccIDENTAL OpERATION:
Turn the power Switch of the tool off and unplug the tool from its
ower Switch of the tool off
ower Switch of the tool off
electrical outlet
before performing any procedure in this section.
Note: For additional information regarding the parts listed in the following pages,
For additional information regarding the parts listed in the following pages,
refer to the Assembly Diagram near the end of this manual.
Assembly/Mounting
Feet placement
1. Carefully set the Belt/Disc Sander on its side.
2. Press Rubber Feet (28) over the four
corner lips of the Base.
See Figure A.
Rubber Feet (28)
Figure A
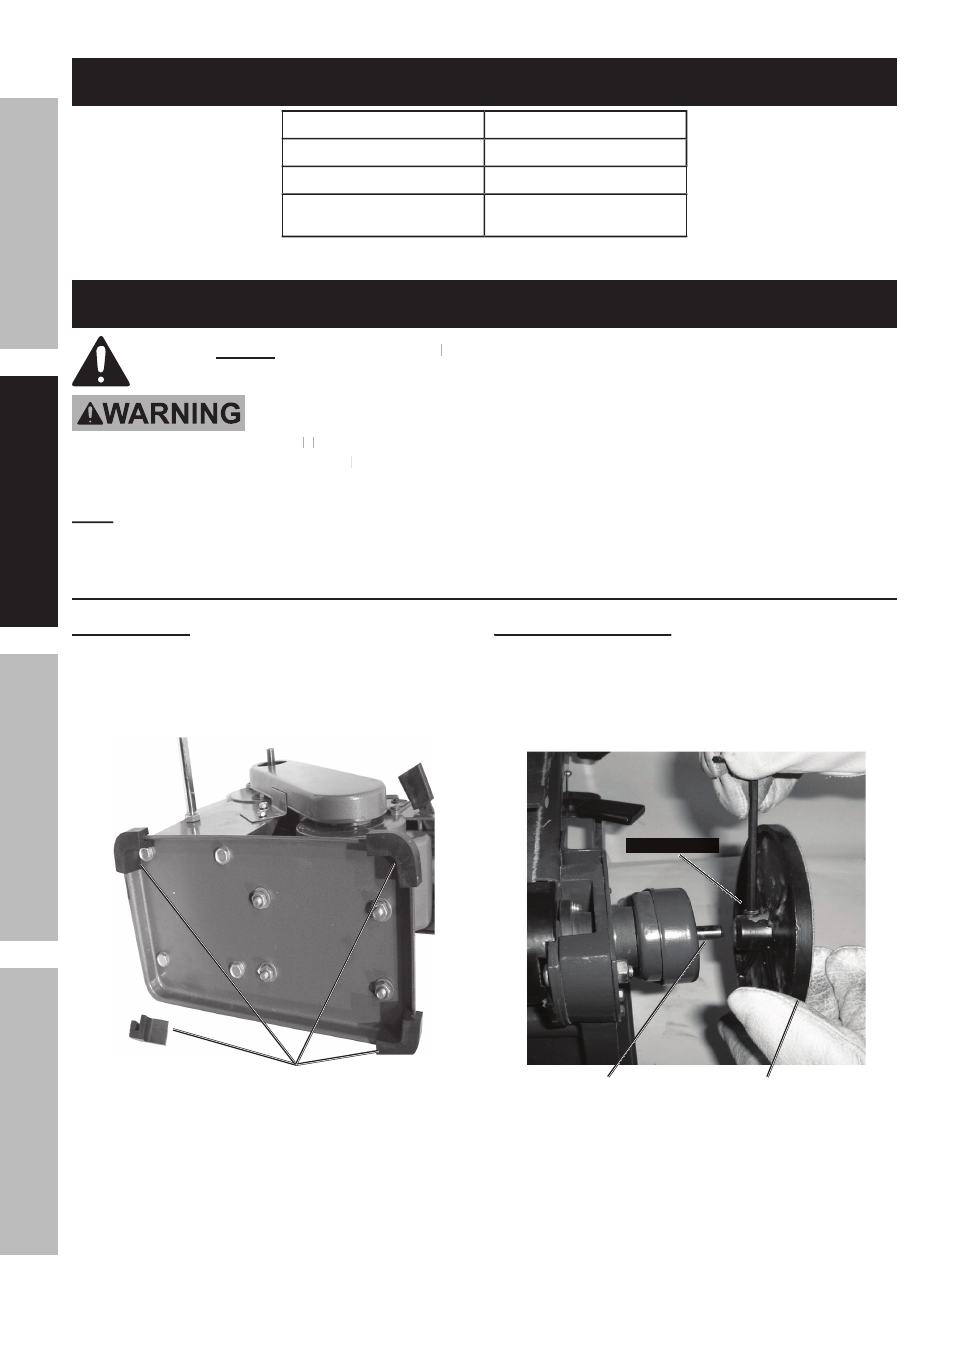
Mounting Backing Disc
Mounting Backing Disc
1. Set the Belt/Disc Sander on its feet
.
2. Slide the Backing Disc (5) onto the Drive Axle (54).
The Set Screw (6) must face the flat surface
of the Drive Axle (54).
See Figure B.
Figure B
Drive Axle (54)
Backing Disc (5)
3. Tighten the Set Screw (6) securely.