Harbor Freight Tools Pittsburgh Automotive 2WD and 4WD Ball Joint Service Kit 4065 User Manual
Page 4
Page 4
For technical questions, please call 1-800-444-3353.
Item 4065
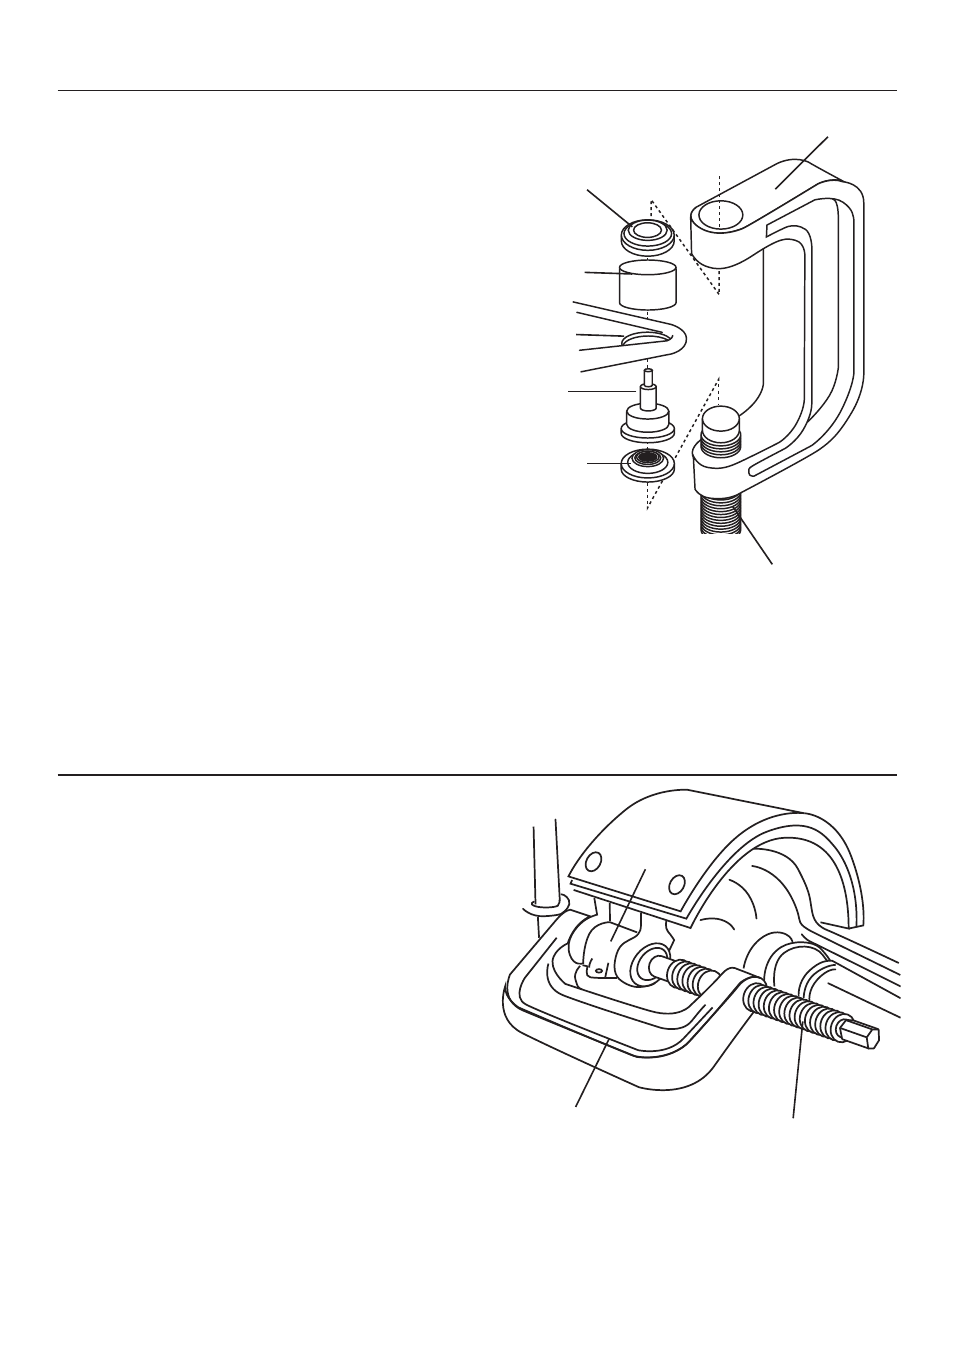
To Install a Ball Joint
1. Clean the vehicle’s control arm, and coat the inside
diameter of the control arm with a light lubricant.
2. Insert the replacement ball joint as straight
as possible into the vehicle’s control arm.
3. Assemble the Ball Joint Press over the
vehicle’s control arm. Select the correct size
Receiving Tube and position it on top of the
vehicle’s control arm. See Figure 2, below.
4. Place the Install Adapter between the Receiving Tube
and the Ball Joint Press. Then, place the Remove
Adapter between the ball joint and the Jackscrew.
5. Check the alignment of all the Ball Joint Kit
parts. Then, tighten the Jackscrew until
the vehicle’s ball joint is firmly sealed.
Figure 2
Ball Joint
Press (1)
Jackscrew
(2)
Remove
Adapter
(7)
Ball
Joint
Control
Arm
Receiving
Tube
(3, 4 or 5)
Install
Adapter (6)
To Remove and Install Brake Anchor Pins
1. To remove the brake anchor pins, remove all
lock ring retainers from the Brake Anchor Pins.
2. Position the Ball Joint Press over the brake spider.
3. Tighten the Jackscrew until the anchor pins
can be removed. See Figure 3, below.
4. To install the brake anchor pins, insert the
brake anchor pins. Then reinstall the lock
ring retainers on the brake anchor pin.
5. Unscrew and remove the Ball Joint Press.
Figure 3
Jackscrew
(2)
Ball Joint
Press (1)
Brake
Spider