Care and maintenance, Dust collection bin cleaning and assembly – Haan SV-60 User Manual
Page 16
Dust Collection Bin Cleaning and assembly:
Make sure to use the product with the rectangular
filter in place properly, as doing so without it can
cause motor damage. Using the SV-60 without
the filter in place could void the warranty.
•
Clean out the Dust Collection Bin (Fig 20) when
suction becomes weaker than normal and/or the
sound of the motor becomes louder than usual.
•
After vacuuming with the SV-60 it is recommended
to remove the Dust Collection Bin and filter and
rinse it thoroughly. (Suction can be weakened
when the Dust Collection Bin is full.)
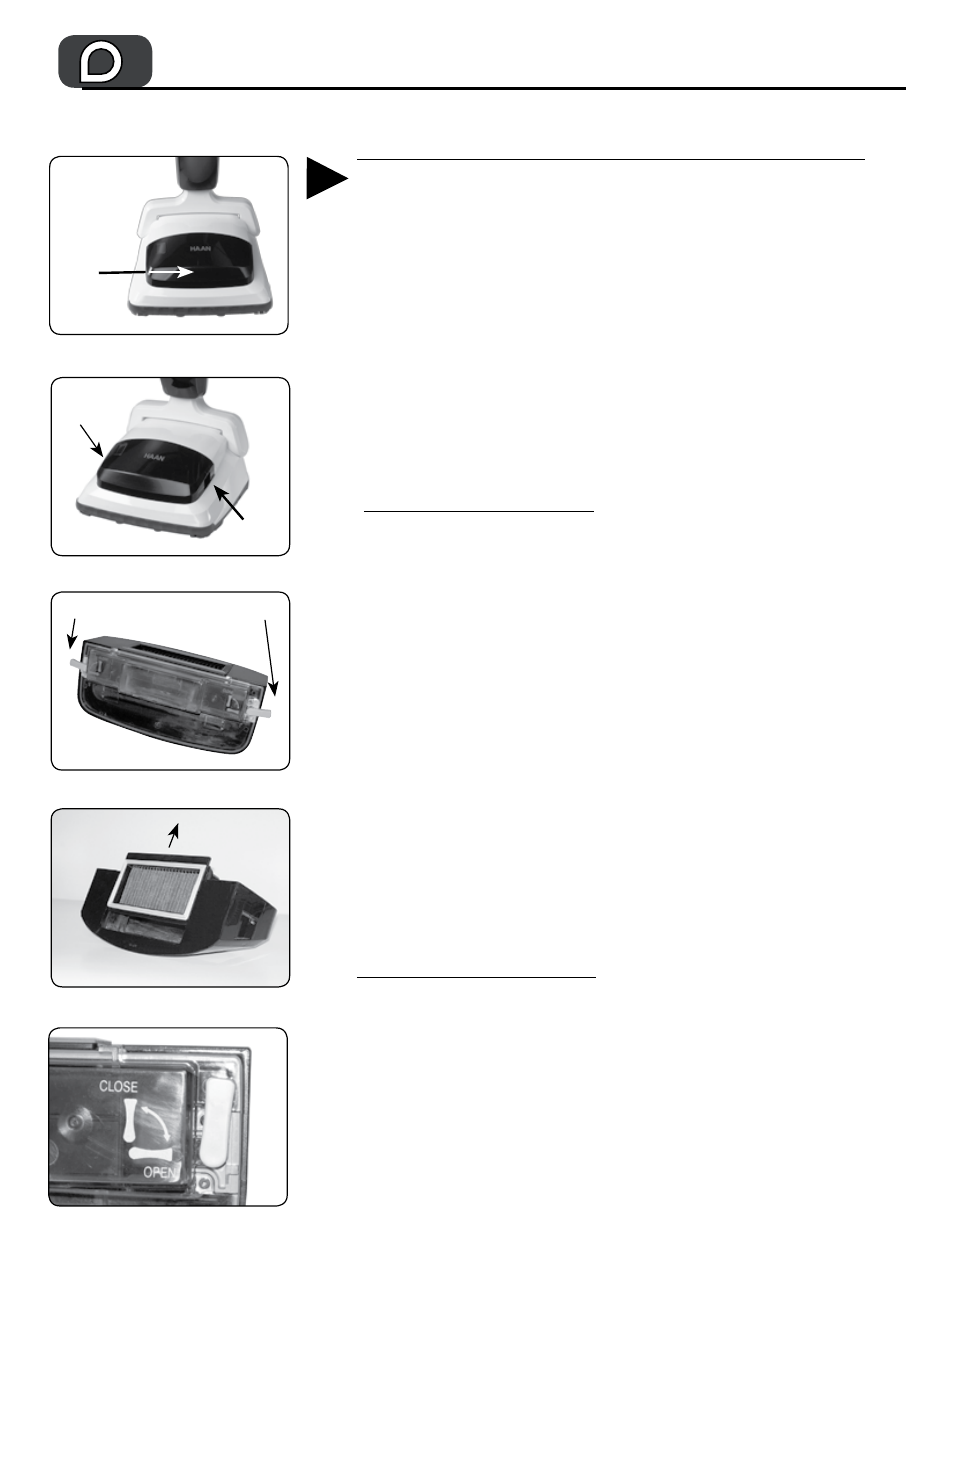
Disassembly Instructions:
1) Grasp the Indent Guides on each side of the
Dust Collection Bin and raise the cartridge
upward. (Fig 21)
2) After carefully turning the Dust Collection Bin
cover over, turn the white levers on each side
to point outward.(Fig 22)
3) Grasp the case and detach the clear cover being
careful not to spill the dirt inside.
4) Grasp the rectangular filter and remove by
sliding upward. (Fig 23)
5) Clean the filter under running water.
7) After cleaning, place the filter in a well-
ventilated, shaded area and reassemble when
fully dry. (Suction is weakened if reassembled
while still wet.)
assembly Instructions:
(Suction is weakened if the Dust Collection Bin is
improperly assembled. Follow the instructions carefully for
optimum use)
1) Align the rectangular filter with the guides
in the cover and slide in completely.
2) Align the clear cover and press firmly into
place. Suction can be weakened if the seal
is not tight between the case and the cover.
3) Turn the white levers inward to lock the case
and cover. Be sure the levers are completely
within the cover in the closed position.
(Fig 24)
4) Firmly press the Dust Collection Bin back
into the SV-60 base.
Care and Maintenance
Fig 20
Fig 22
Fig 21
pg 14 877-HAAN DIRECT / 877-422-6347
www.
HAANUSA.com
Dust
Collection
Bin
Fig 23
indent
indent
Turn levers out to open
Slide up
and out
Fig 24