General operating instructions – Harbor Freight Tools 92421 User Manual
Page 9
Page 9
For technical questions, please call 1-800-444-3353.
SKU 92421
objects) nearby that will present a
hazard while working.
General Operating Instructions
1.
WARNING! Use only 1” Drive Impact
type sockets (sold separately).
2.
WARNING! The Impact Wrench is
heavy and supplies powerful amounts
of torque and should be operated
with BOTH hands. Failure to do
so can lead to personal injury or
property damage.
3. If an automatic oiler is not used, add
a few drops of Pneumatic Tool Oil
to the airline connection before use.
Add a few drops more after each
hour of continual use.
4. Push and snap the socket (not
included) onto the Anvil (38).
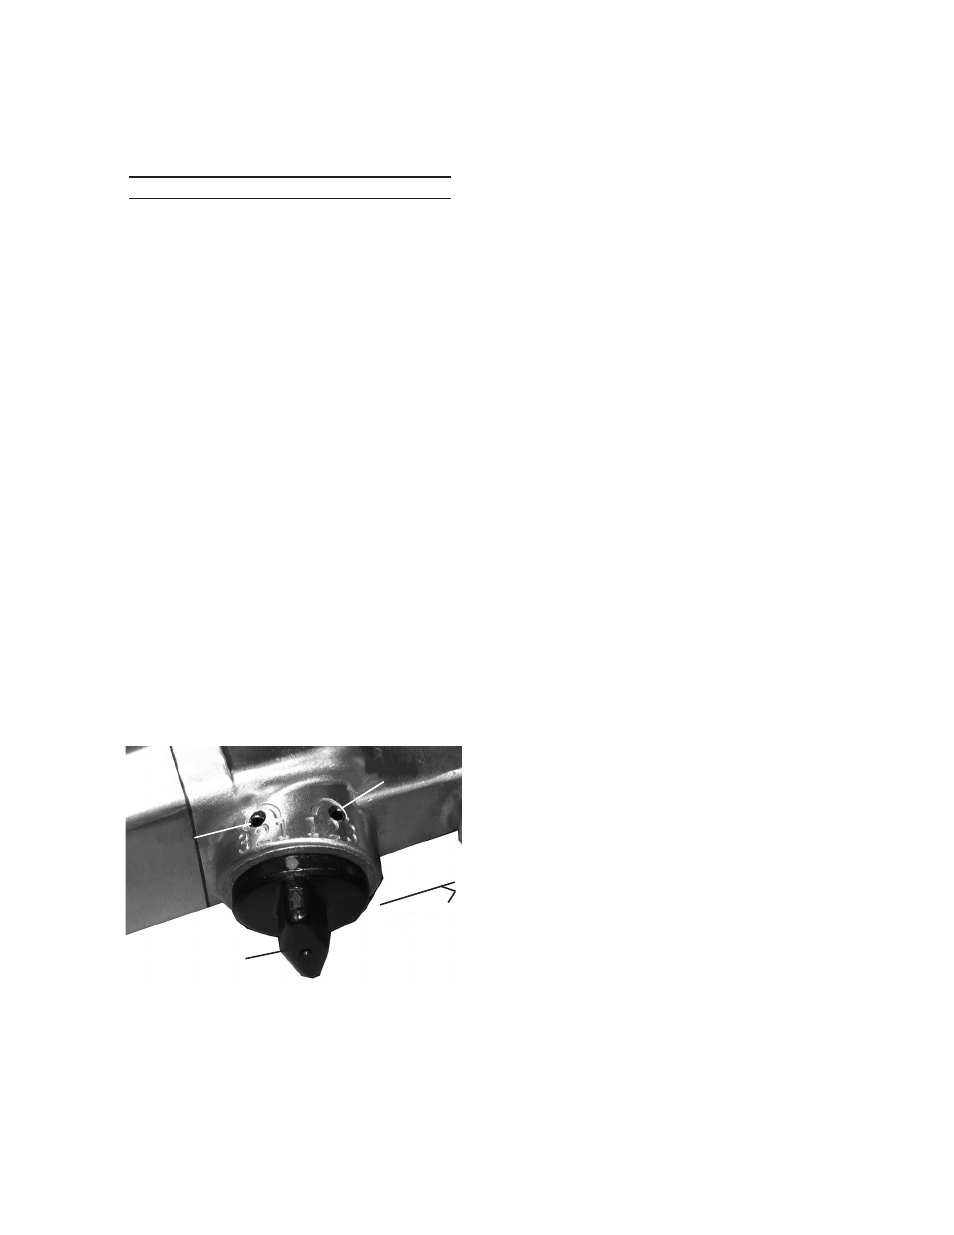
5. The Direction Valve (17) has three
forward and three reverse speed
settings Turn Direction Valve to the
right toward the Trigger Handle (1) to
tighten. See Figure 1, below.
6. Place the socket over the nut you
wish to tighten.
7. Grip tool firmly with BOTH hands and
gently squeeze Trigger (13).
8. Adjust air flow by turning Air
Regulator Knob from positions 1
through 3. Position 1 allows the
lowest amount of air flow, and
Position 3 the highest.
9. If the tool requires more force to
accomplish task, verify that the tool
receives sufficient, unobstructed
airflow (CFM) and increase the
pressure (PSI) output of the regulator
up to the maximum air pressure
rating of this tool.
CAUTION! TO PREVENT TOOL
AND ACCESSORY FAILURE,
RESULTING IN INJURY:
Do not exceed the tool’s maximum
air pressure rating.
If the tool still does not have sufficient
force at maximum pressure and
sufficient airflow, then a larger tool
may be required.
10. Once nut is tightened, release
Trigger. Turn off the air supply and
disconnect the hose.
11. If available, check the recommended
torque specification for the nut. Use
a torque wrench to tighten the nut
to the proper setting after using the
Impact Wrench.
12. To set Impact Wrench in Reverse,
slide Direction Valve to the
left and
away from the Trigger Handle for
counterclockwise (reverse) rotation.
13.
WARNING! Before changing the
rotational direction of the tool, release
the Trigger and allow Tool to come to
a complete stop.
14. Adjust air flow by turning Air
Regulator Knob from positions 1
To Trigger
Handle (1)
Direction Valve (17)
Reverse
Setting
Figure 1
Forward
Setting
Please Note: Figure 1 (view from side of tool)
shows Settings above Direction Valve without
protective black coating.