Humminbird 917C User Manual
Page 26
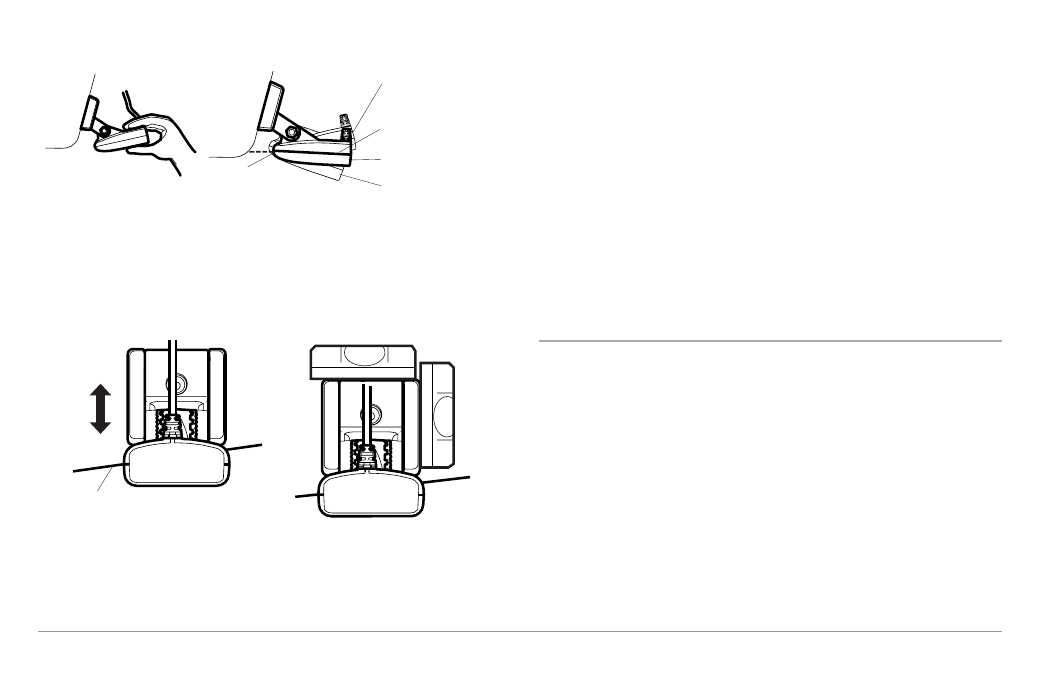
7. Adjust the transducer assembly vertically, until the seam on the
leading edge of the transducer (the edge closest to the transom of
the boat) is level and just slightly below the hull.
NOTE: The transducer has a natural downward slant of 4-5 degrees from leading
edge (closest to the boat transom) to trailing edge (farthest away from the boat).
Looking at the back of the transducer, the seam should be slightly below the
bottom of the hull.
8. Continue to adjust until the bracket is also level from port to
starboard (horizontally level as you look at the transducer from
behind the boat.
9. Mark the correct position on the transom by tracing the silhouette
of the transducer mounting bracket with a pencil or marker.
10. Tighten the pivot bolt, using the pivot screw and nut to lock the
assembly. Hand tighten only!
11. Snap open the assembly and hand-tighten the two mounting
screws, then snap the assembly closed.
NOTE: You will drill the third mounting hole and finalize the installation after you
route the cable and test and finish the installation in the following procedures.
4. Routing the Cable
The transducer cable has a low profile connector, which must be routed to
the point where the control head is mounted. There are several ways to route
the transducer cable to the area where the control head is installed. The
most common procedure routes the cable through the transom into the boat.
NOTE: Your boat may have a pre-existing wiring channel or conduit that you can
use for the transducer cable.
1. Unplug the other end of the transducer cable from the control head.
Make sure that the cable is long enough to accommodate the
planned route by running the cable over the transom.
CAUTION! Do not cut or shorten the transducer cable, and try not to damage the
cable insulation. Route the cable as far as possible from any VHF radio antenna
cables or tachometer cables to reduce the possibility of interference. If the cable
Adjusting the Transducer
Mounting Position
Seam aligned with boat hull
Leveling the Mounting
Assembly Horizontally
Level
Adjusting the Initial Transducer Angle
Leading edge
One click too low
Trailing edge
Correctly aligned
(transducer side seam
aligned with boat bottom)
One click too high
18