Humminbird 917C User Manual
Page 25
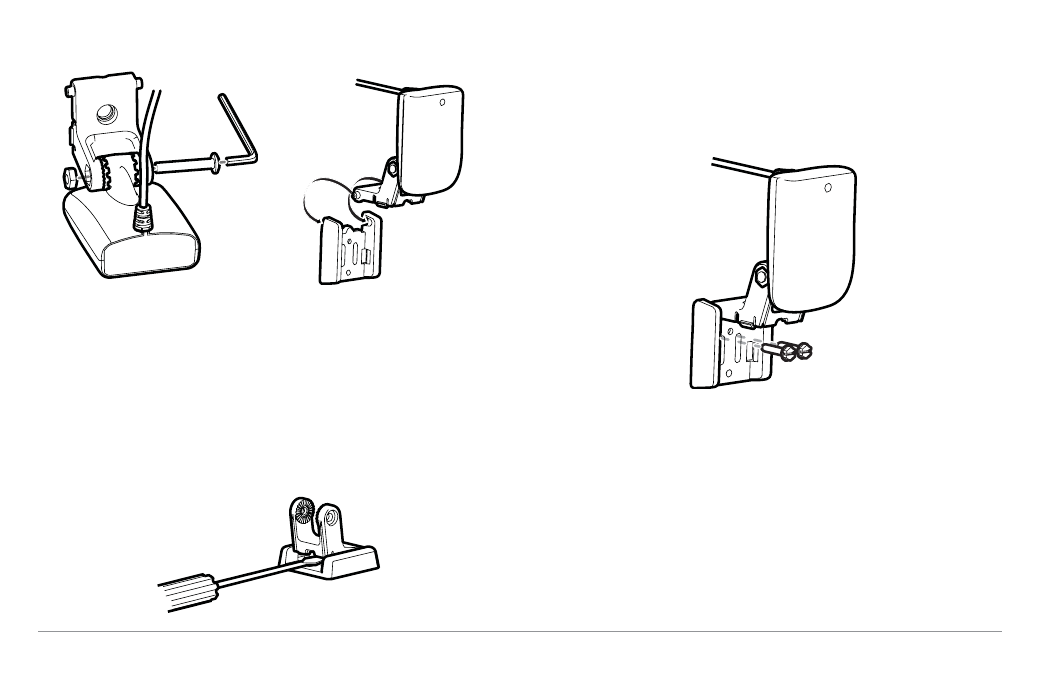
3. Put the pivot bolt through the assembly to hold it in position and
loosely install the nut, but do NOT tighten the nut at this time. Insert
the pivot arm assembly into the mounting bracket. Do NOT snap the
assembly closed, as you will need to access the mounting bracket in
the next step.
NOTE: If the pivot assembly is snapped closed over the mounting bracket, use a
flat head screwdriver or similar tool to gently pry the assembly away from the
mounting bracket).
4. Align the mounting bracket transducer assembly with the drilled
holes in the transom. With a 5/16" socket driver, mount the
assembly to the transom using the two #10 - 1" long screws
provided.
NOTE: Make sure that the mounting screws are snug, but do not fully tighten the
mounting screws at this time to allow the transducer assembly to slide for
adjustment purposes.
5. Snap the pivot arm down into place.
6. Adjust the initial angle of the transducer from back to front by
rotating the transducer until the side seam on the transducer is
almost parallel with the bottom of the boat, one click at a time in
either direction.
Mounting the Assembly to the Transom
Inserting the Pivot Bolt
Inserting the Pivot Arm Assembly
Into the Mounting Bracket
17