Flue restrictor instructions, Straight up, Pilot shield adjustment – Heat & Glo Fireplace GEM42 User Manual
Page 14
14
Heat & Glo • GEM42 • 371-900 Rev. N • 2/05
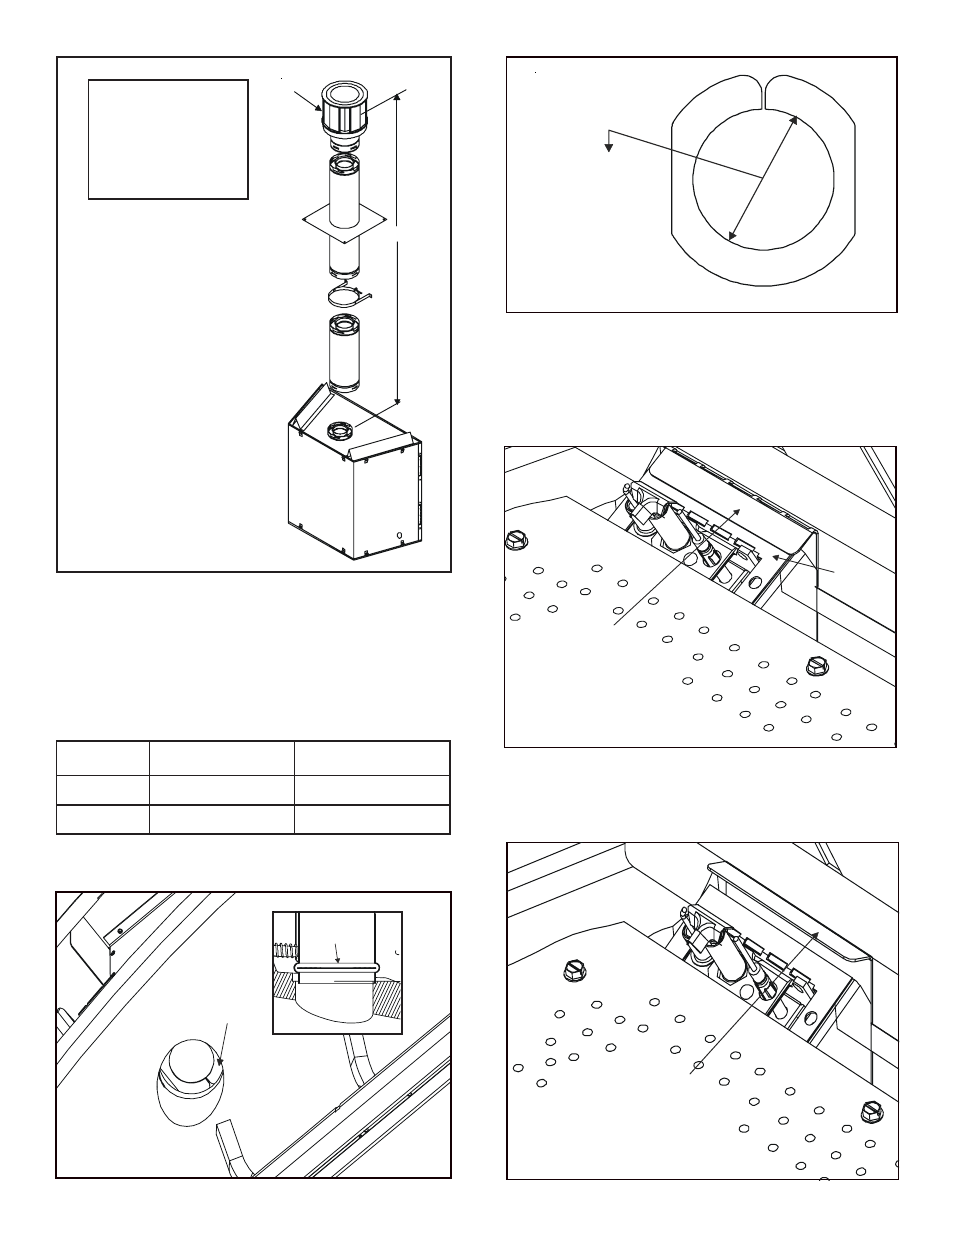
FLUE
RESTRICTOR
Figure 9
PILOT SHIELD
PILOT
BRACKET
PILOT SHIELD SHOULD BE
CLOSED AND TOUCHING
THE PILOT BRACKET
Figure 10
PILOT SHIELD
BEND PILOT SHIELD UP 3/8”
TO ALLOW AIR FLOW TO
FEED THE PILOT FLAME
Flue Restrictor Instructions
1. Locate the flue restrictors inside the unit to the left of the
control panel. There is one each of the 1-1/2” diameter,
1-3/4” diameter and 2” diameter. Use the following table
to determine which restrictor to use for the vent run. Place
one restrictor into either the left or right 3” diameter ex-
haust collar as shown.
2. See Figure 8 for restrictor installation. Insert each restric-
tor in one of the 3” exhaust collars as shown.
Figure 8. Flue Restrictor
1-3/4”& 2” & 1-1/2”
DIAMETER
Figure 7
FLUE
RESTRICTOR
15’-30’
30’-40’
NG 1-3/4”
1-1/2”
LP 2”
1-3/4”
Vent Run
Vertical
Figure 6.
Straight Up Vertical Venting
STRAIGHT UP
VERTICAL VENTING
V (FT.)
40' MAX. (12.4 M)
NOTE: On vertical venting
configurations install the
vertical baffle found in your
manual bag per the flue
restrictor instructions in
this section.
CAP
V
Pilot Shield Adjustment
When venting this unit with high vertical (8 feet or more)
with very little horizontal the pilot shield will need to be
bent down in the closed position as shown in Figure 9.
Í
Note: When venting this unit with long horizontal runs
and/or multiple elbows, the pilot shield will need to be in
the opened position as in Figure 10.
Н