English – Hasselblad Flextight 646 User Manual
Page 19
8. Lift the top layer of the original holder and place your original as
follows:
• For transparencies, place your original (G) with the emulsion side
down. The original must completely fill the hole with no edges
showing and with a minimum overlap of 2mm along each edge.
Also, no edges of the original must extend past the outer edges of
the holder. Use the grid in the light area (B) of the feed table (A) to
help line up the image.
• For reflectives, make sure that no part of the original (M) extends
past the edge of the holder. Use the dotted lines printed on the
holder to line up the image. Handle the clear plastic layer only by
the edges to avoid fingerprints. Curl the plastic layer back and
slip the front edge into Flextight's foil holder.
9. Lay the top layer of the holder down flat over the original.
• For transparency holders (H), the top layer (D) is magnetic, which
will hold the original in place.
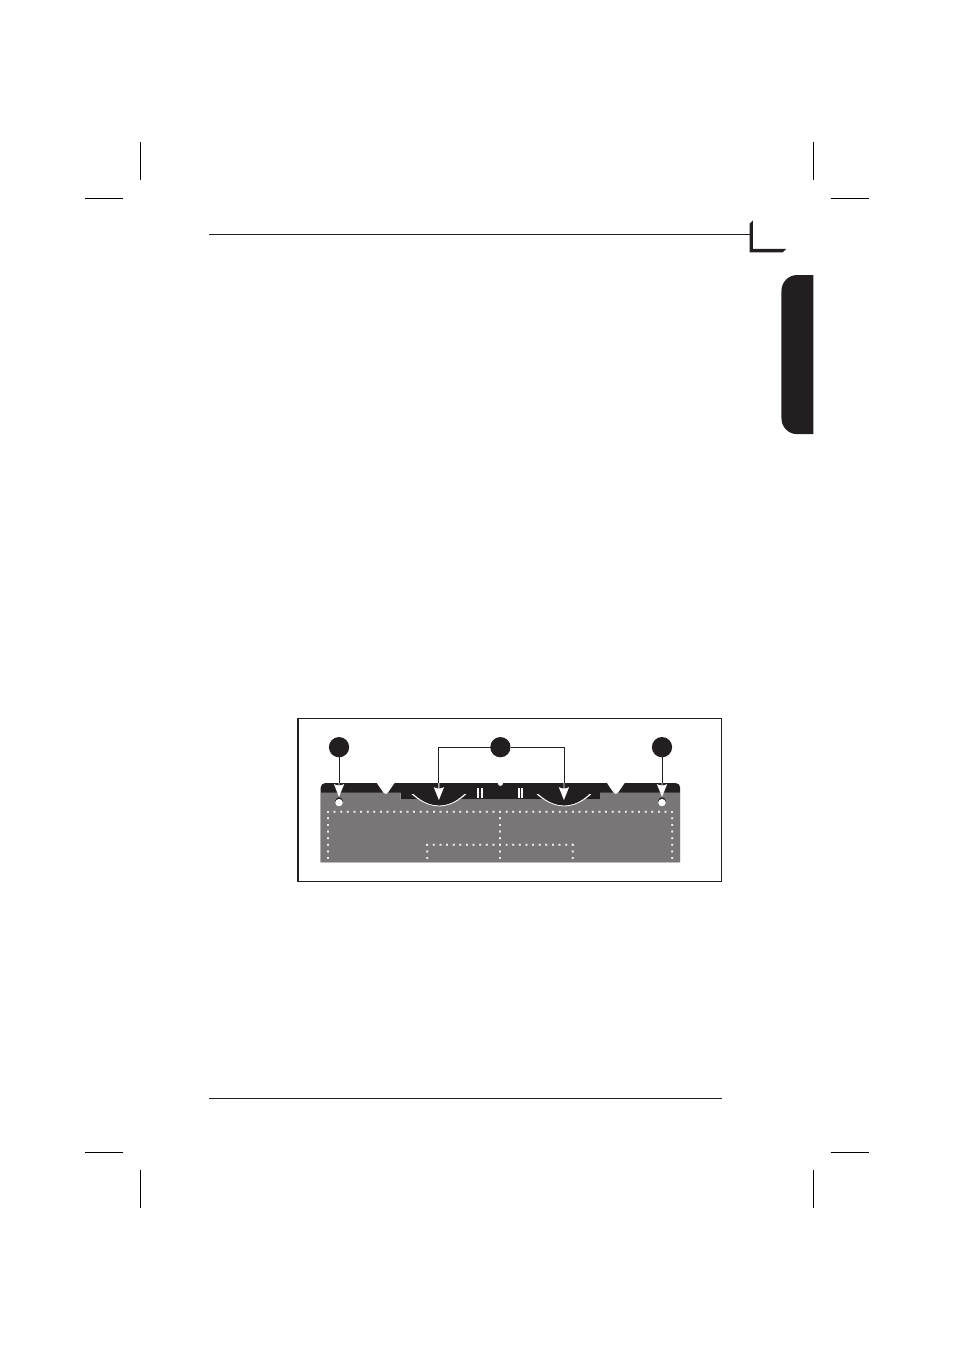
• For the reflective holder (L), note the four metal pegs (the top two
are shown as A and C in Figure 7 below); make sure that the clear
plastic sheet is pressed all the way down over all four pegs. Note
also the two curved tabs at the top of the holder (B in the figure
below); the clear sheet must slip under each of these tabs, as
shown.
10. Go to your computer and follow the directions given in the
FlexColor
software manual to take a preview, make settings, and
take the final scan.
User's Guide - Flextight 646
Hardware Reference - Flextight 646
19
Operating the Scanner
English
A
B
C
Figure 7: Reflective holder, top