Safet y o pera tion m aintenan c e setup – Harbor Freight Tools 37793 User Manual
Page 10
Page 10
For technical questions, please call 1-800-444-3353.
Item 37793
SAFET
y
O
PERA
TION
M
AINTENAN
c
E
SETUP
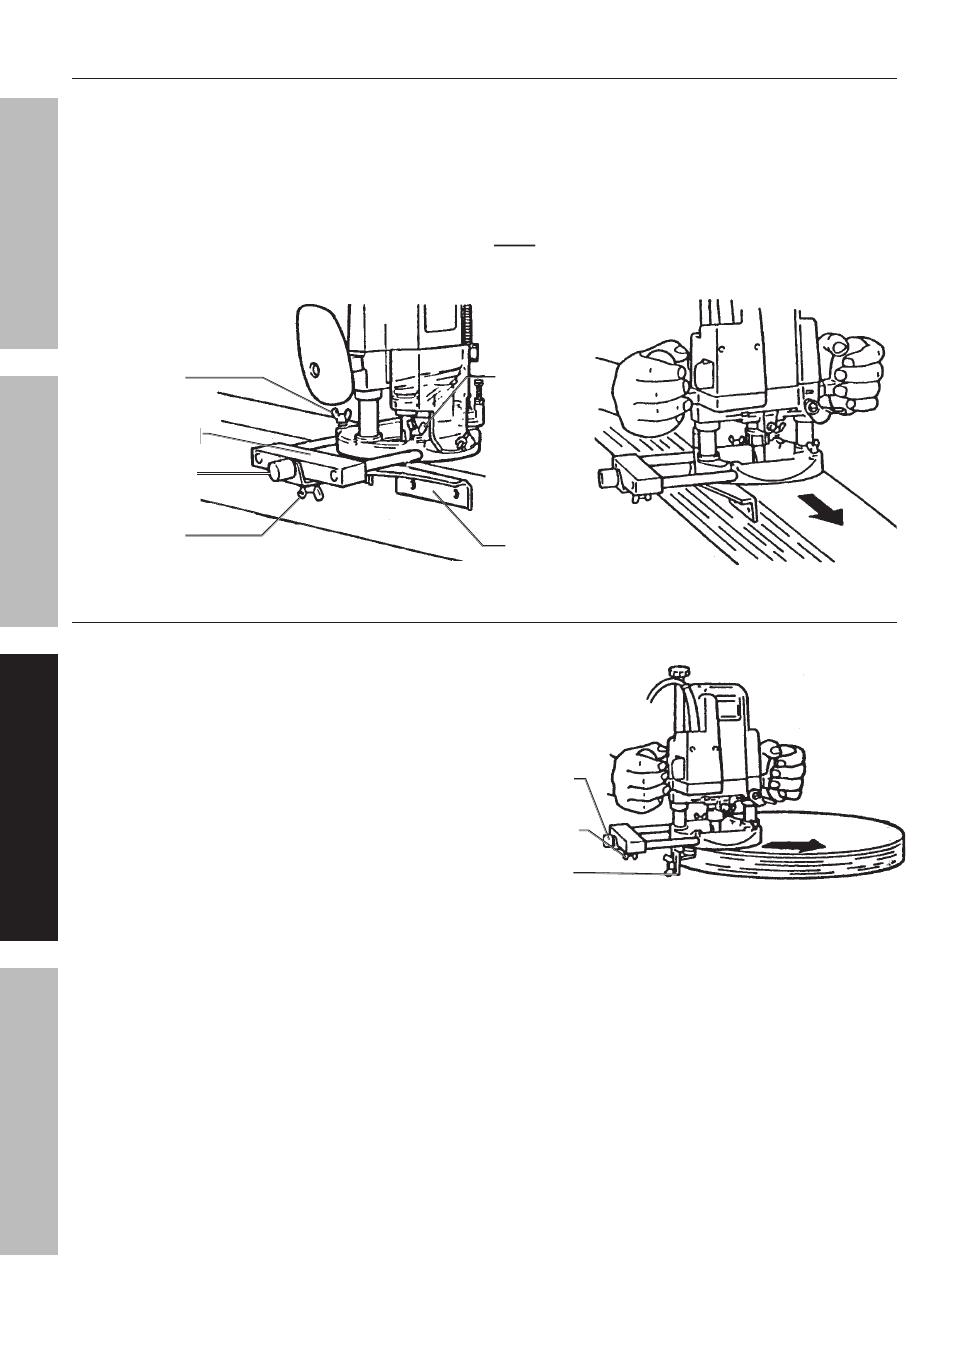
Using the Straight Guide
The Straight Guide (4A) and Guide Holder (6A) are used for chamfering or grooving cuts.
1. Place the Straight Guide on the Guide
Holder with the Wing Nut (B).
2. Insert Guide Holder into the holes in the router base.
3. Adjust the Straight Guide by turning
the Fine Adjustment Screw (A) to the
desired distance from the bit.
4. Tighten wing nuts (C).
5. When cutting, move the router with the Straight Guide
flat against the side of the material to be chamfered or
grooved. See figure.
Note: Standoffs can be mounted to the Straight Guide
Standoffs can be mounted to the Straight Guide
to widen its operation. This also prevents larger bits from
striking the Straight Guide.
Guide Holder (6A)
Guide (4A)
Fine Adjustment
Screw (A)
Wing Nut (B)
Wing Nut (C)
Wing Nut (C)
Using the Trimmer Guide
The Trimmer Guide (3A) is used to make cuts on curved material. The guide roller rides the curve of the material.
1. Place the Trimmer Guide (3A) on the
Guide Holder with the wing nut.
2. Insert Guide Holder into the holes in the router base.
3. Adjust the Trimmer Guide by turning the Fine
Adjustment Screw (A) to the desired distance from
the bit.
4. Tighten Wing Nut (B).
5. When cutting, move the router with the Trimmer Guide
flat against the side of the material to be chamfered
or grooved.
Trimmer
Guide (3A)
Fine
Adjustment
Screw (A)
Wing Nut (B)