Clock & automatic oven timer operation – Hotpoint H250E User Manual
Page 19
Step 1 Check that the correct time of day is set, if not follow instructions
for setting the time of day.
Step 2 Place food onto the correct shelf position in the oven and close the
oven door(s).
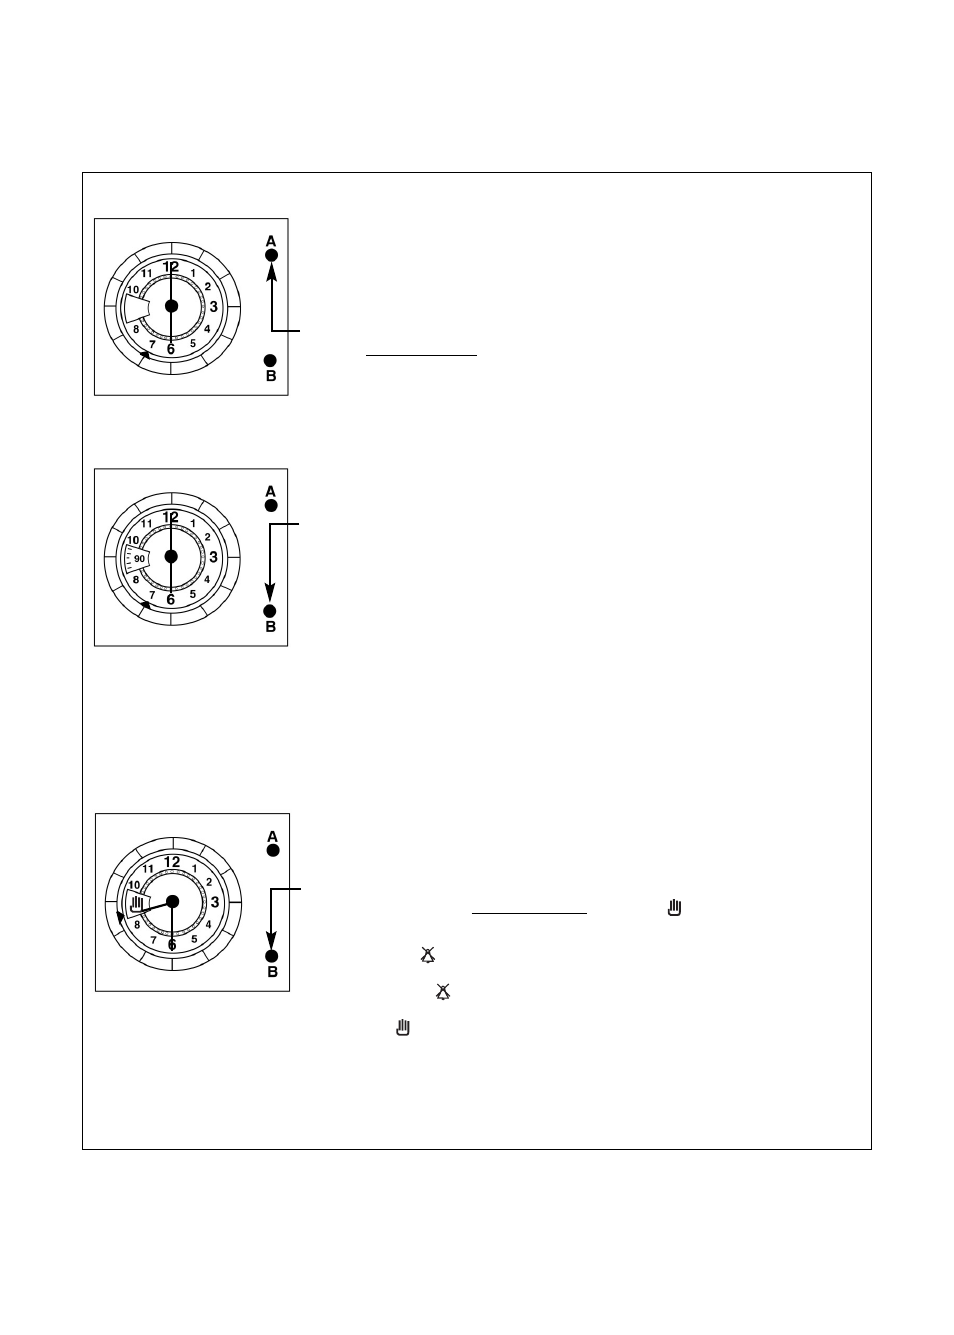
Step 3 Set the “Start Time” by pushing and turning knob (A)
anti-clockwise, until the required start time is set.
This allows the auto function to be set.
Note: The "Start Time" is the time of day you want the Auto
Cooking programme to start.
Step 4 Set the "Cook Period" by turning knob (B) anti-clockwise, until the
required cook period in minutes is indicated in the display window.
e.g. 90 minutes (as shown).
Note: The "Cook Period" is the length of time that you wish the
food to cook, and it can be set for up to 180 minutes.
Step 5 Turn the oven control(s) to the required temperature, and if
necessary select the appropriate oven function.
Note: If an “Auto Cooking Programme” has been set the oven(s)
will ONLY operate during the pre-programmed times.
At the end of the Auto Cook Period the oven(s) will switch off
and a bell will ring.
Step 6 Return the oven controls to the OFF position.
Step 7 To cancel the Bell and return the timer to "Manual Operation",
turn knob (B) anti-clockwise, until the
symbol is shown in
the display window.
Note: Cancel Bell
The bell can be cancelled by turning knob (B) anti-clockwise
until the symbol is shown in the display window.
For normal oven operation, turn knob (B) anti-clockwise until
the symbol is shown in the display window.
b) TO SET THE TIMER TO SWITCH THE OVEN(S) ON AND OFF AUTOMATICALLY
Clock & Automatic Oven Timer Operation
19