Front panel controls – Harman-Kardon DPR 1001 User Manual
Page 5
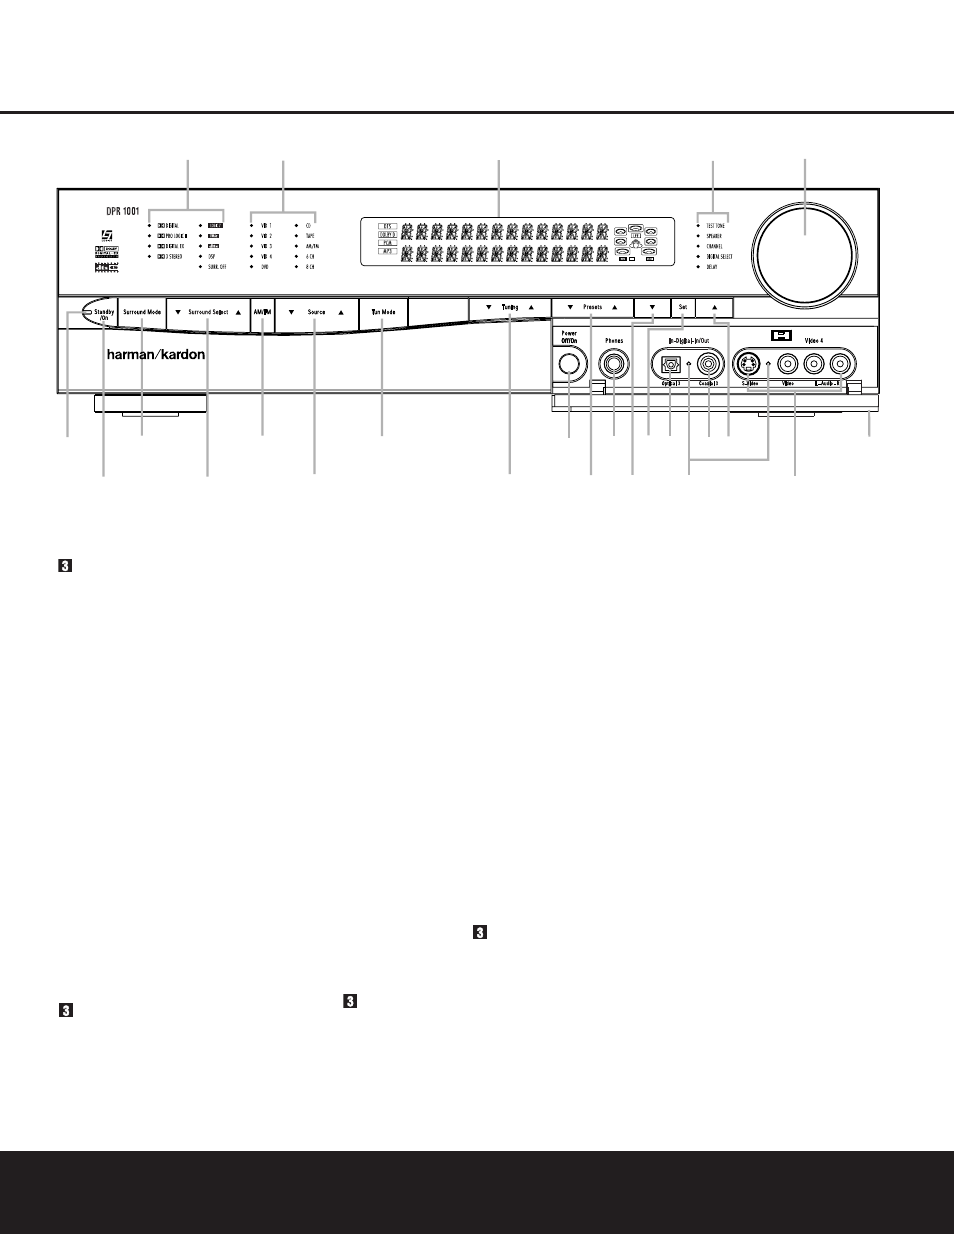
FRONT PANEL CONTROLS
FRONT PANEL CONTROLS 5
0 Power Indicator: This LED turns red when the
unit is in the Standby mode to signal that the unit is
ready to be turned on. When the unit is in operation,
the indicator will turn green.
2 Standby/On Button: When the Main Power
Switch
I is “ON,” press this button to turn on the
DPR 1001; press it again to turn the unit off. The
Power Indicator
0 will turn green when the
unit is on.
NOTE: The Main Power Switch
( must be turned
on before this button will operate.
Surround Mode Selector: Press this button to
choose a surround processing format category by
scrolling through the list of available formats as
indicated in the Surround Mode Indicators
H.
These format categories are: Dolby surround modes,
DTS Digital modes, DTS Neo:6 modes, Logic 7
modes, DSP modes and Stereo modes. Once you
have selected a format category, use the Surround
Select Button
3 to choose a specific mode within
the overall category.
3 Surround Select Button: After choosing a
surround processing format category by using the
Surround Mode Selector
, press this button to
scroll through the list of available modes for that for-
mat category. For example, to select the 7.1 Logic 7
Cinema mode, press the Surround Mode Selector
until the indicator next to Logic 7
H is lit. Then
press the Surround Select Button
3 to scroll
through the available choices until the desired mode
appears in the Main Information Display
F. (For
more information see page 26.)
4 AM/FM Selector: Pressing this button will auto-
matically switch the DPR 1001 to the Tuner mode.
Pressing it again will switch between the AM and FM
frequency bands. (See page 28 for more information
on the tuner.)
5 Input Source Selector: Press this button to
change the input by scrolling up or down through the
list of input sources.
6 Tuning Mode Selector: This button is used to
switch back and forth between the Auto and Manual
tuning modes. In Auto mode, you may use the Tuning
Selector
7 to scan through stations with an accept-
able signal. In Manual mode, you may use the Tuning
Selector
7 to step through one frequency increment
at a time.
1
3
5
6
8
!
1
2
4
7
9
)
@
#
%
$
^
&
*
(
У
Ф
Т
Ъ
0 Power Indicator
1 Standby/On Button
Surround Mode Selector
3 Surround Select Button
4 AM/FM Selector
5 Input Source Selector
6 Tuning Mode Selector
7 Tuning Selector
8 Preset Station Selector
9
¤
Button
! Set Button
B
⁄
Button
C Door
D Volume Control
E System Configuration Indicators
F Main Information Display
G Input Indicators
H Surround Mode Indicators
I Main Power Switch
J Headphone Jack
K Digital Optical 3 Input
L Input/Output Status Indicators
M Digital Coax 3 Jack
N Video 4 Input/Output Jacks
NOTE: To make it easier to follow the installation instructions that refer to this illustration, a larger copy may be
downloaded from the Product Support section at www.harmankardon.com.