Flushing, Warning, Caution – Hitachi 220-856 User Manual
Page 9
307-830
9
Flushing
NOTE:
Several flushes may be required to clean the system and prepare it for the next fluid or storage. Use this
chart to determine the required flushes and use the procedure below for flushing.
*Use this category for flushing a brand new sprayer and flushing after storage.
System has this
fluid in it:
Next fluid to be
sprayed:
Flushing order
Before you spray or store
sprayer:
y
fluid in it:
sprayed:
Flush 1
Flush 2
Flush 3
y
p y
sprayer:
*Oil-based solvent
or paint
Oil-based paint –
new color
Mineral spirits
none
none
Prime with oil
Oil-based solvent or
paint
Water-based paint
Mineral spirits
Warm soapy
water
Clean water
Prime with water
Oil-based solvent or
paint
Prepare for storage
Mineral spirits
none
none
Relieve pressure
Leave drain valve open
Water or water-
based paint
Water–based
paint – new color
Warm soapy
water
Clean water
none
Prime with water
Water or water-
based paint
Oil-based paint
Warm soapy
water
Clean water
Mineral spirits
Prime with oil
Water or water-
based paint
Prepare for storage
Warm soapy
water
Clean water
Mineral spirits
Relieve pressure
Leave drain valve open
WARNING
INJECTION HAZARD
To reduce the risk of serious bodily
injury, follow the Pressure Relief Proce-
dure Warning on page 11 before check-
ing or repairing any part of the spray system.
CAUTION
NEVER allow water or water–base material to freeze
in the pressure control. Doing so prevents the
sprayer from being started and causes serious
damage to the pressure control. Pump the water out
with mineral spirits.
WARNING
FIRE AND EXPLOSION HAZARD
To reduce the risk of static sparking and
splashing when flushing, always remove
the spray tip from the gun and hold a
metal part of the gun firmly to the side of grounded
metal pail.
1.
Relieve pressure. Engage the trigger safety latch.
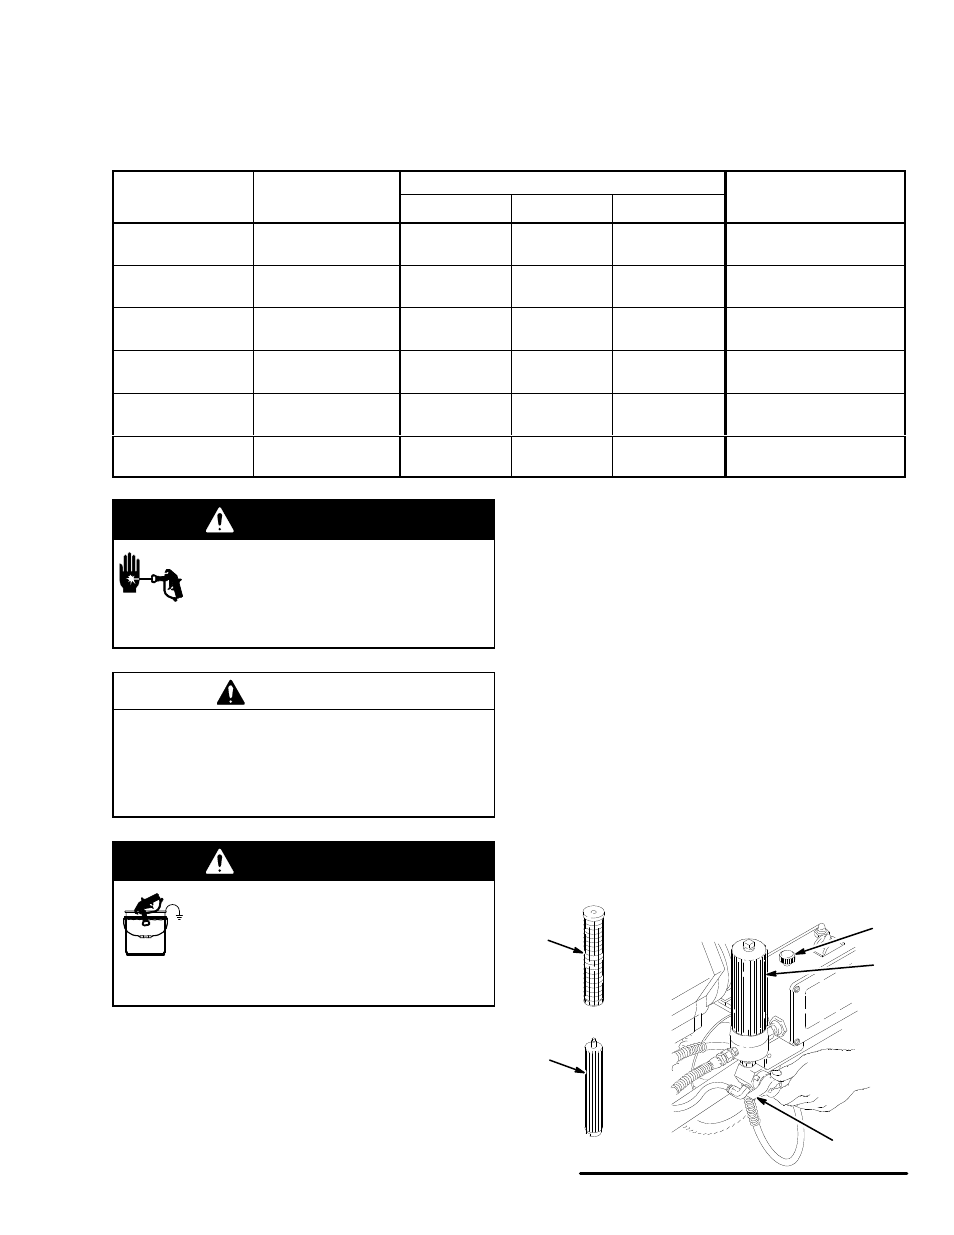
2.
Remove the filter bowl (B) and screen (C). Rein-
stall the bowl and support (D) only. Clean the
screen separately.
3.
Turn the pressure adjusting knob (A) fully counter-
clockwise to the minimum pressure.
4.
Remove the spray tip from the gun.
5.
Put the suction tube into a grounded metal pail
with 1/2 gallon of compatible solvent.
6.
Start the sprayer. See page 7. To save the fluid in
the sprayer as you start to flush, trigger the gun
into another container until the next fluid appears,
then trigger the gun back into the fluid you are
pumping. Circulate the flushing fluid a couple of
minutes to thoroughly clean the system.
7.
Raise the suction tube and trigger the gun to force
solvent from the hose. Do not run the pump dry for
more than 30 seconds to avoid damaging the
pump packings! Relieve pressure.
8.
Remove the suction tube and clean separately.
9.
Install the filter screen. Hand tighten the bowl.
Fig. 6
01749A
44
A
B
C
D