You’re finished, Assembly step – Horizon Fitness PREMIER T1201 User Manual
Page 7
12
INTR
ODUC
TION
IMPOR
TANT
PRE
CA
UTIONS
BEF
ORE
YOU
BE
GIN
TREADMILL
OPER
ATION
LIMITED
W
ARR
ANTY
TR
OUBLE
SHOO
TING
&
MAINTENANCE
CONDITIONING
GUIDELINE
S
AS
SEMBL
Y
BEF
ORE
YOU
BE
GIN
AS
SEMBL
Y
1
INTR
ODUC
TION
IMPOR
TANT
PRE
CA
UTIONS
TREADMILL OPER
ATION
CONDITIONING GUIDELINE
S
TR
OUBLE
SHOO
TING
&
MAINTENANCE
LIMITED
W
ARR
ANTY
YOU’RE FINISHED!
CIRCUIT BREAKER
ON/OFF SWITCH
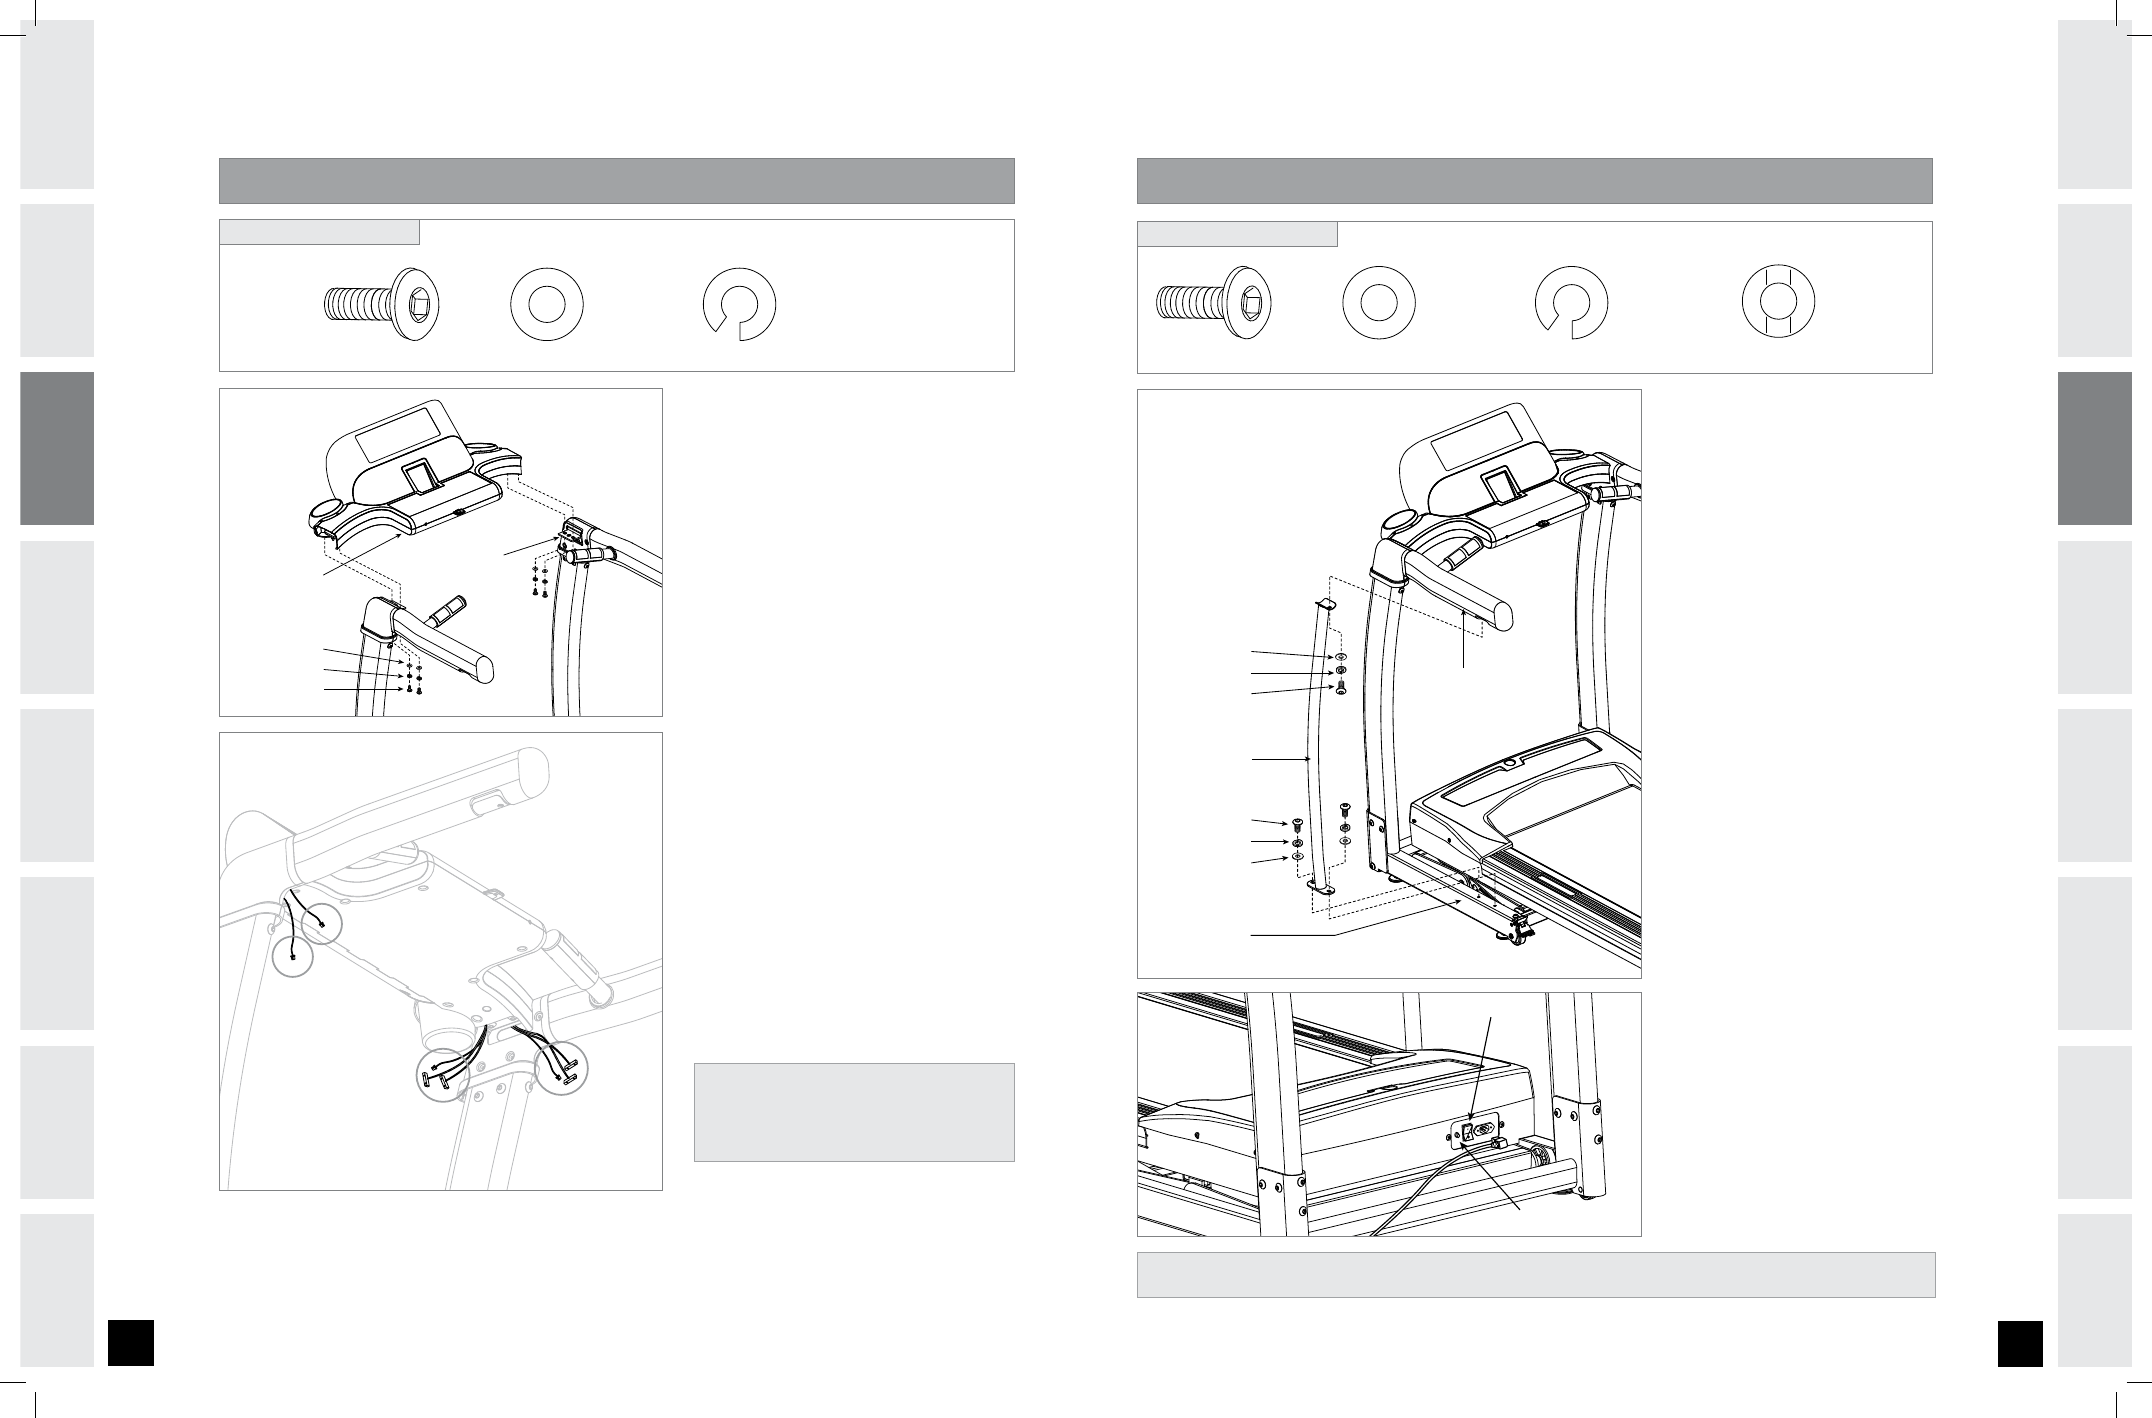
ASSEMBLY STEP
FLAT WASHERS (B)
SPRING WASHERS (C)
BOLTS (G)
CONSOLE
HANDLEBAR BRACKET
RIGHT SIDE:
CONNECT CONSOLE
CABLES, PULSE CABLES
AND POWER CABLES
LEFT SIDE:
CONNECT PULSE
CABLES ONLY
FLAT WASHER (B)
8 mm
Qty: 4
SPRING WASHER (C)
8 mm
Qty: 4
BOLT (G)
16 mm
Qty: 4
HARDWARE BAG CONTENTS:
Open HARDWARE BAG .
Place CONSOLE onto HANDLEBAR
BRACKETS as shown.
NOTE: Do not pinch CONSOLE CABLE
when placing the console onto the
handlebar brackets.
Insert 2 BOLTS (G), 2 SPRING
WASHERS (C) and 2 FLAT WASHERS
(B) through the bottom of the
HANDLEBAR BRACKET to secure the
console to the HANDLEBAR BRACKET.
Repeat on other side.
Reach inside the right underside of
the console to pull out the CONSOLE
CABLE, PULSE CABLE and POWER
CABLE. Attach to the matching cables
that are hanging out of the cable hole
in the handlebar.
Repeat on left side to attach PULSE
CABLE.
Thread attached cables back through
the cable holes when finished.
A
B
C
D
E
F
G
ASSEMBLY STEP
FLAT WASHERS (B)
SPRING WASHERS (C)
BOLTS (A)
ARC WASHER (D)
SPRING WASHER (C)
BOLT (A)
SUPPORT BAR
MAIN FRAME
HANDLEBAR
Open HARDWARE BAG .
With the running deck in the
lowered position, place the
SUPPORT BAR between the
HANDLEBAR and the MAIN
FRAME.
To attach the SUPPORT BAR,
insert 1 BOLT (A), 1 SPRING
WASHER (C) and 1 ARC
WASHER (D) in the top of the
SUPPORT BAR and 2 BOLTS
(A), 2 SPRING WASHERS (C)
and 2 FLAT WASHERS (B) in
the bottom of the SUPPORT
BAR as shown.
Repeat on the other side
Connect power plug to the
treadmill and connect the
cord to a power outlet. The
on/off switch is located next
to the power cord. Flip this
switch to the 'ON' position, so
that the switch is lit. You will
hear a beep and the console
will light up.
Before the first use, lubricate
the treadmill deck by
following the instructions in
the Maintenance section.
A
B
C
D
E
F
FLAT WASHER (B)
8 mm
Qty: 4
SPRING WASHER (C)
8 mm
Qty: 6
ARC WASHER (D)
8 mm
Qty: 2
BOLT (A)
20 mm
Qty: 6
HARDWARE BAG CONTENTS:
NOTE: Do not completely tighten any
bolts until step 6 is complete!
T1201_Rev.1.7.indd 12-13
7/31/08 4:52:44 PM