Setup – Hitachi P42T501A User Manual
Page 58
Setup The Menu Options
Setup
Move
SEL
Return
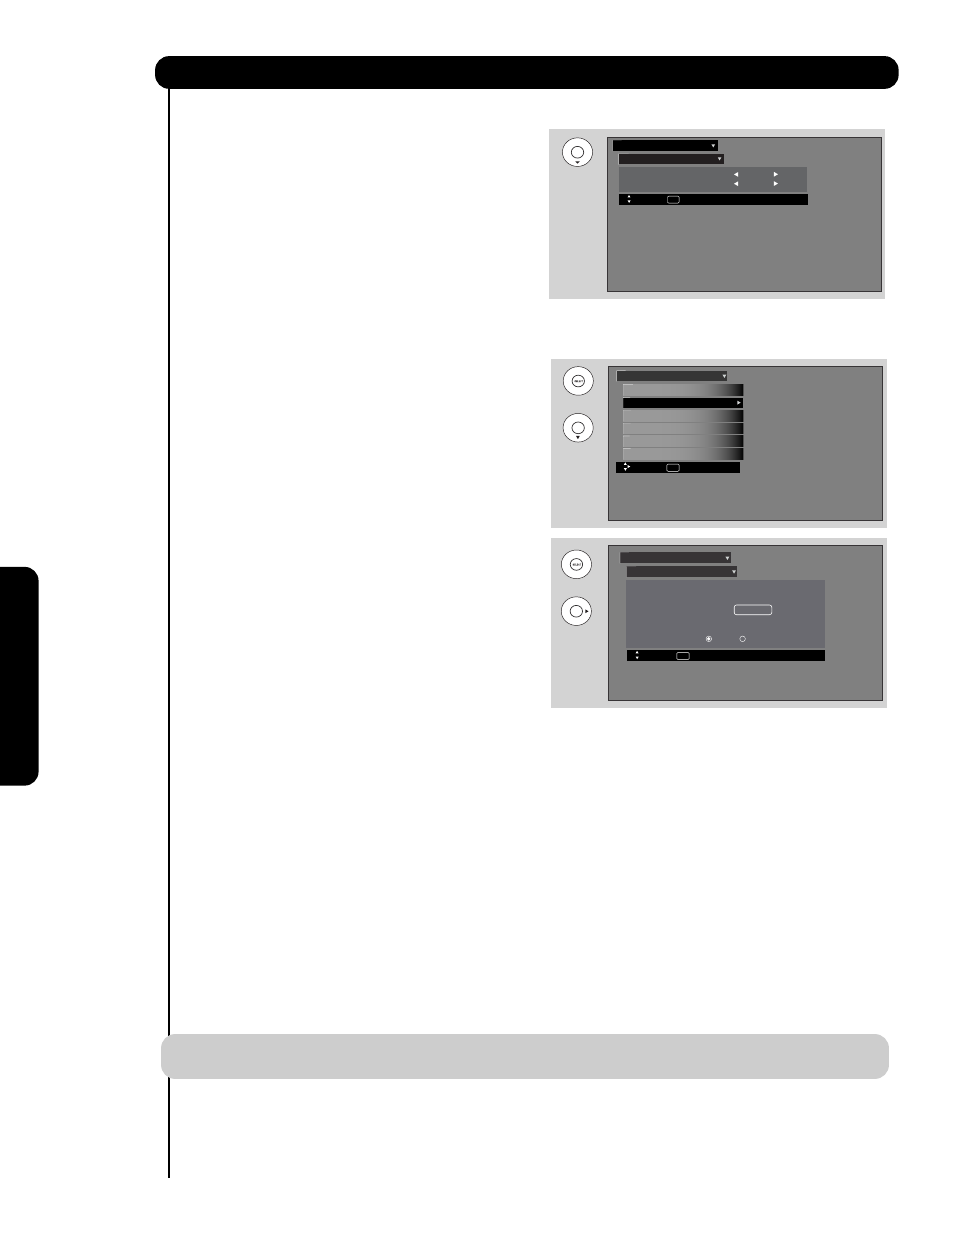
Set The Language
: English
Set The Menu Background
:
Shaded
O
n
-S
c
re
e
n
D
is
p
la
y
58
Set The Menu Background
This function allows you to choose from two menu
backgrounds.
SET THE MENU BACKGROUND (SHADED OR
SOLID) of your choice. Use the CURSOR PAD
̇
or
̈
to select shaded or solid.
2.
Select SOLID for a black background (no picture
can be seen behind menu screen), select SHADED
and a light background is visible.
3.
Press EXIT to quit menu or select SET THE MENU
OPTIONS to return to the previous menu.
Set The Screen Saver
Continuous on-screen displays such as video games,
stock market quotations, computer generated graphics,
and other fixed (non-moving) patterns can cause
permanent damage to the Plasma Television. Use the
SCREEN SAVER feature to hide screen burn.
1. Use CURSOR PAD
̆ or ̄ to highlight Screen
Saver’s Picture
Orbiting
and Image Power
options.
2. Use the CURSOR PAD
̇ or ̈ to select your
choices.
Option 1
The whole picture will shift every 2 minutes by one
pixel.
Option 2
The whole picture will shift every 10 minutes by one
pixel.
Option 3
The whole picture will shift every 20 minutes by one pixel.
Image Power
This function allows you to choose power consumption reduction based on 3 levels (min., medium and max).
Screen Wipe
If pattern mark occurs, use Screen Wipe (White Field Signal) for at least 10 minutes to refresh any damage that
may have occurred from a pattern mark. Screen Wipe can resolve pattern mark to a certain degree, if caution is
not used, permanent damage may occur.
2. Press the
SELECT button to
start.
Automatic Power Saving
Use this feature to turn power off automatically when a video input signal is not detected for 15 seconds.
Setup
Move
SEL
Select
Picture
Orbiti
ng
Automatic Power Saving
:
Option 1
Image Power
:
Max
Screen Wipe
:
Wipe
Yes
No
Set The Screen Saver
Setup
Move
SEL
Select
Reset The Software
Set The Quick Start Options
Set The Closed Captions
Set The Inputs
Set The Screen Saver
Setup The Menu Options
Setup
3. Press the
EXIT
button to return to normal viewing.
1. Use the CURSOR PAD
̆
or
̄
to highlight Screen Wipe.
OR
NOTE:
This feature works only for INPUT 1, 2, 3, Front and HDMI 1, 2, Front.
1.
Use the
CURSOR PAD
̆
or
̄
to
highlight