Pre-assembly assembly step 1, Assembly step 1, Assembly step 2 – Horizon Fitness LIMITED SERIES LS780T User Manual
Page 5: Warning, Do not attempt to lift the treadmill
8
INTRODUCTION
IMPORT
ANT
PRECAUTIONS
ASSEMBL
Y
BEFORE
YOU
BEGIN
TREADMILL
OPERA
TION
LIMITED
W
ARRANTY
TROUBLESHOOTING
&
MAINTENANCE
CONDITIONING
GUIDELINES
INTRODUCTION
IMPORT
ANT
PRECAUTIONS
ASSEMBL
Y
BEFORE YOU
BEGIN
TREADMILL OPERA
TION
CONDITIONING GUIDELINES
TROUBLESHOOTING &
MAINTENANCE
LIMITED WARRANTY
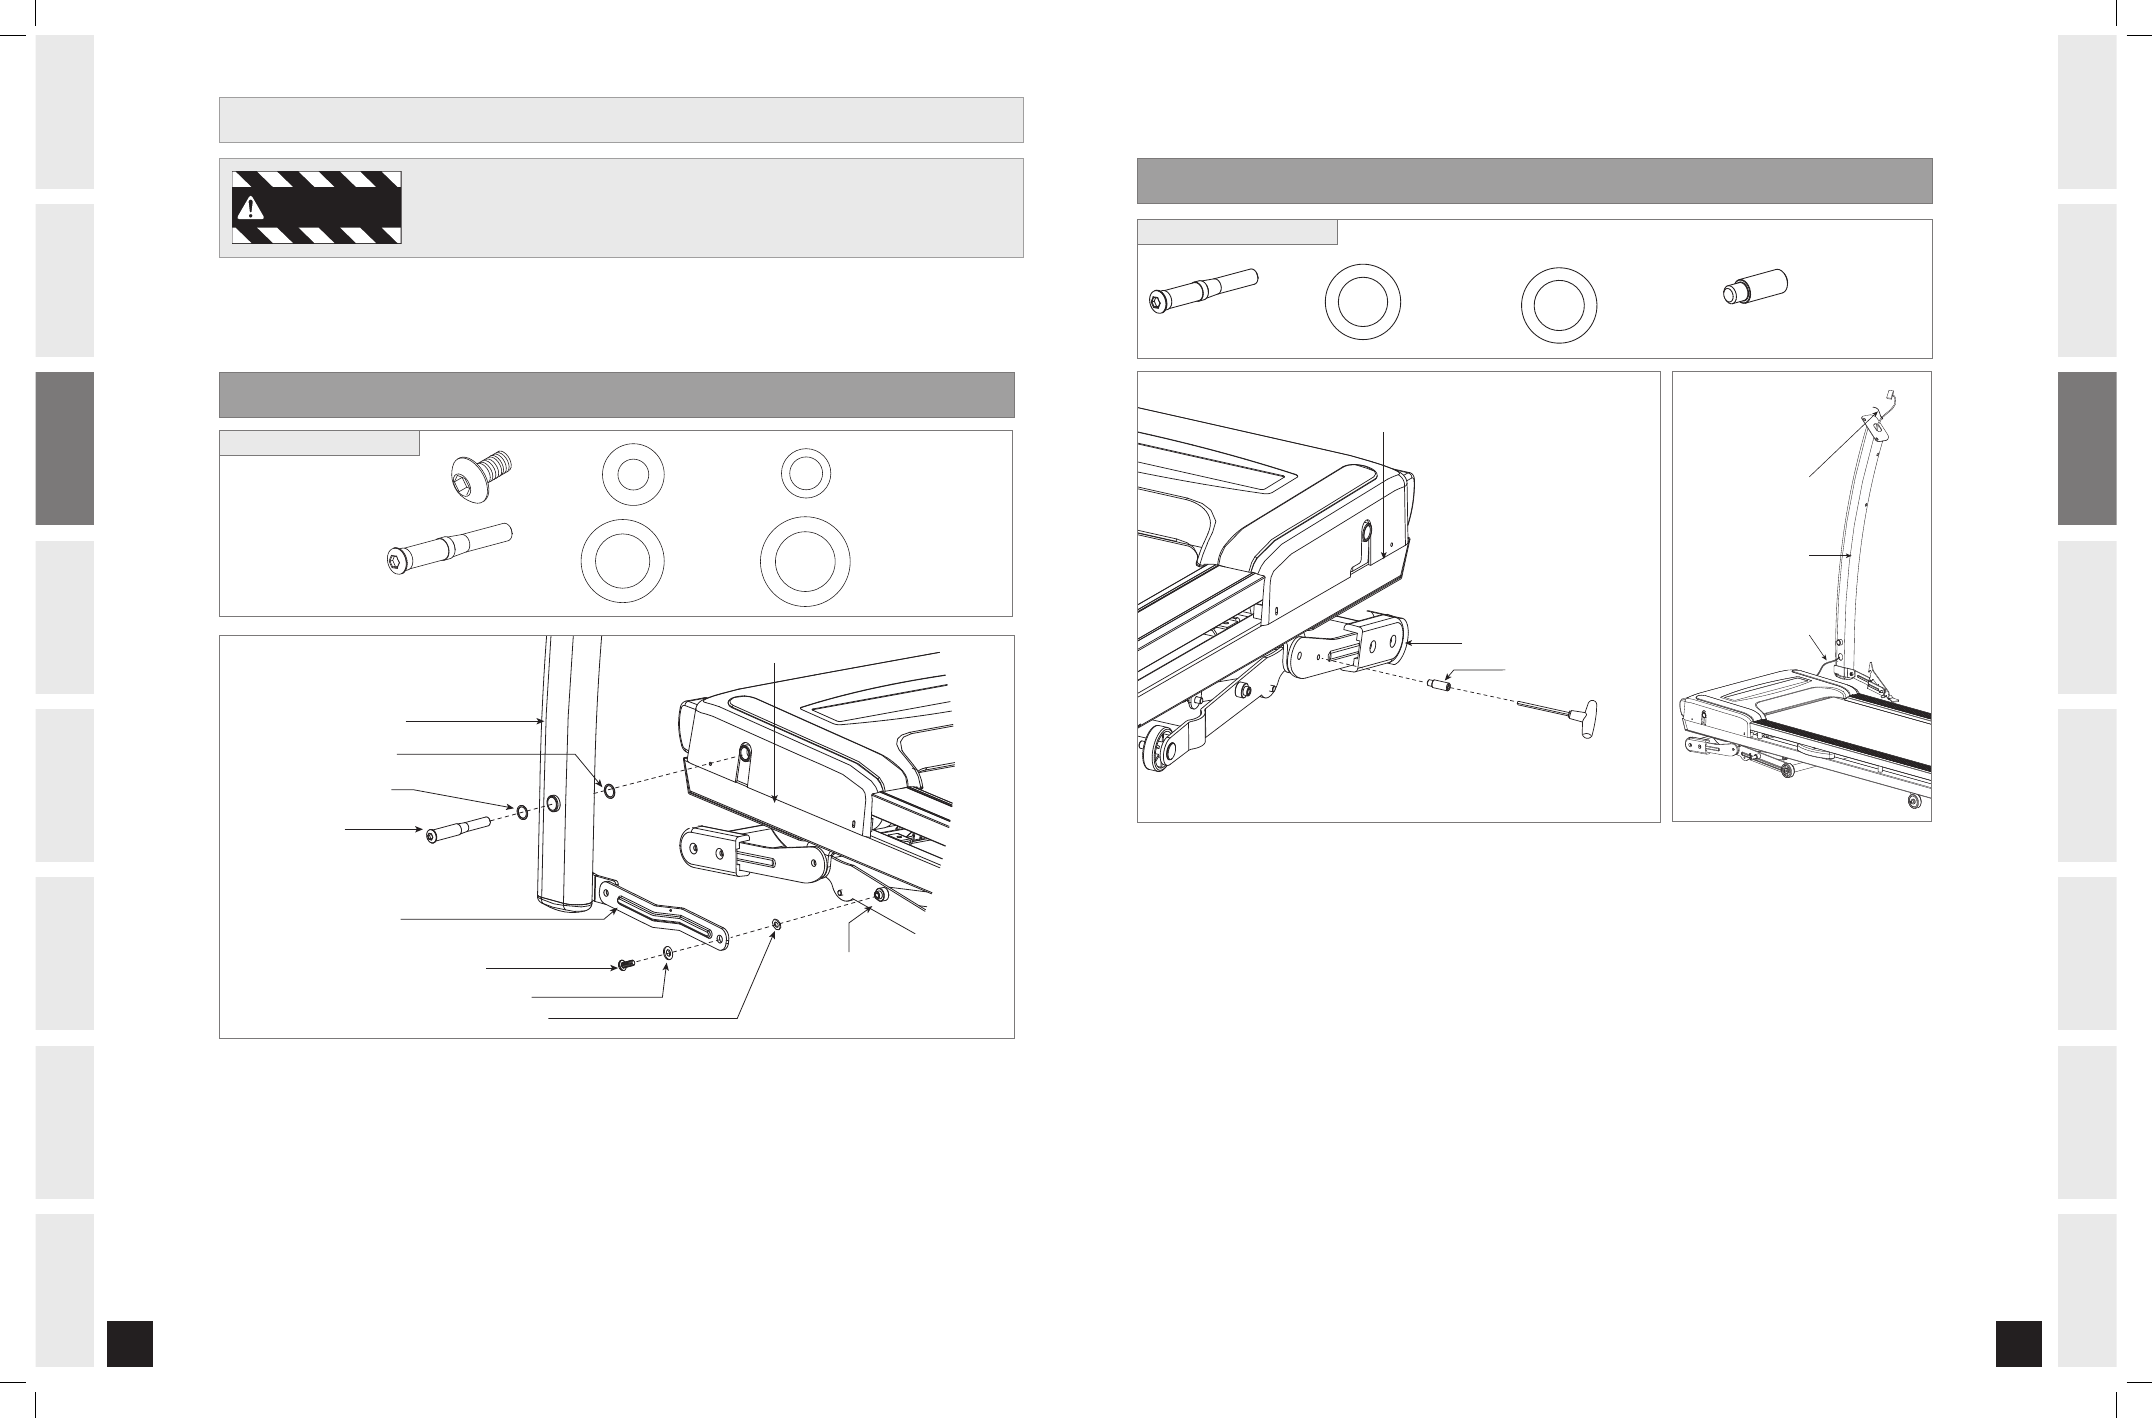
PRE-ASSEMBLY
ASSEMBLY STEP 1
DO NOT ATTEMPT TO LIFT THE TREADMILL!
Do not move or lift treadmill from
packaging until specified to do so in the assembly instructions. Failure to do so may
result in injury! Remove plastic wrap from console masts.
NOTE:
During each assembly step, ensure that ALL nuts and bolts are in place and partially threaded in before
completely tightening any ONE bolt. NOTE: A light application of grease may aid in the installation of hardware.
Any grease, such as lithium bike grease is recommended.
WARNING
ASSEMBLY STEP 1
FLAT WASHER (B)
20 mm
Qty: 1
WAVY WASHER (F)
29 mm
Qty: 1
BOLT (D)
Qty: 1
BOLT (A)
15 mm
Qty: 1
TEFLON WASHER (C)
18 mm
Qty: 1
FLAT WASHER (E)
27 mm
Qty: 1
HARDWARE BAG 1 CONTENTS :
TEFLON WASHER
(C)
FLAT WASHER
(B)
BOLT (A)
LEFT CONSOLE MAST
BOLT (D)
MAIN FRAME
LEFT LINKAGE ARM
FLAT WASHER (E)
WAVY WASHER (F)
ELEVATION FRAME
Open HARDWARE BAG 1.
Cut banding straps. Do not move or lift treadmill from packaging.
Move LEFT LINKAGE ARM into position. Insert 1 BOLT (A) and 1 FLAT WASHER (B) into LEFT
LINKAGE ARM followed by 1 TEFLON WASHER (C) and attach to ELEVATION FRAME.
Lift LEFT CONSOLE MAST into upright position. Be sure to hold the console mast firmly, as
it will not stay in the upright position on its own.
Insert 1 BOLT (D) and 1 FLAT WASHER (E) through LEFT CONSOLE MAST followed by
1 WAVY WASHER (F) and attach to MAIN FRAME.
A
B
C
D
E
ASSEMBLY STEP 2
MAIN FRAME
LOCK LATCH PIN (G)
RIGHT FOLDING FRAME
HARDWARE BAG 2 CONTENTS :
A Open HARDWARE BAG 2.
B Attach LOCK LATCH PIN (G) into RIGHT FOLDING FRAME using T-wrench and
tighten completely.
Pull LEAD WIRE through RIGHT CONSOLE MAST. After pulling the LEAD WIRE through the
mast, the top of the CONSOLE CABLE should be located at the top of the mast. Detach and
discard LEAD WIRE.
Continue STEP 2 on next page.
C
D
LOCK LATCH PIN (G)
Qty: 1
WAVY WASHER (F)
29 mm
Qty: 1
BOLT (D)
Qty: 1
FLAT WASHER (E)
27 mm
Qty: 1
RIGHT CONSOLE MAST
LEAD WIRE
CONSOLE CABLE
LS780T_Rev.1.3.indd 8-9
6/2/08 4:40:27 PM