Assembly step – Horizon Fitness FS 40 User Manual
Page 8
14
INTRODUCTION
IMPORT
ANT
PRECAUTIONS
ASSEMBL
Y
BEFORE
YOU
BEGIN
CONDITIONING
GUIDELINES
TROUBLESHOOTING
&
MAINTENANCE
LIMITED
W
ARRANTY
1
INTRODUCTION
IMPORT
ANT
PRECAUTIONS
ASSEMBL
Y
BEFORE YOU
BEGIN
CONDITIONING GUIDELINES
TROUBLESHOOTING &
MAINTENANCE
LIMITED WARRANTY
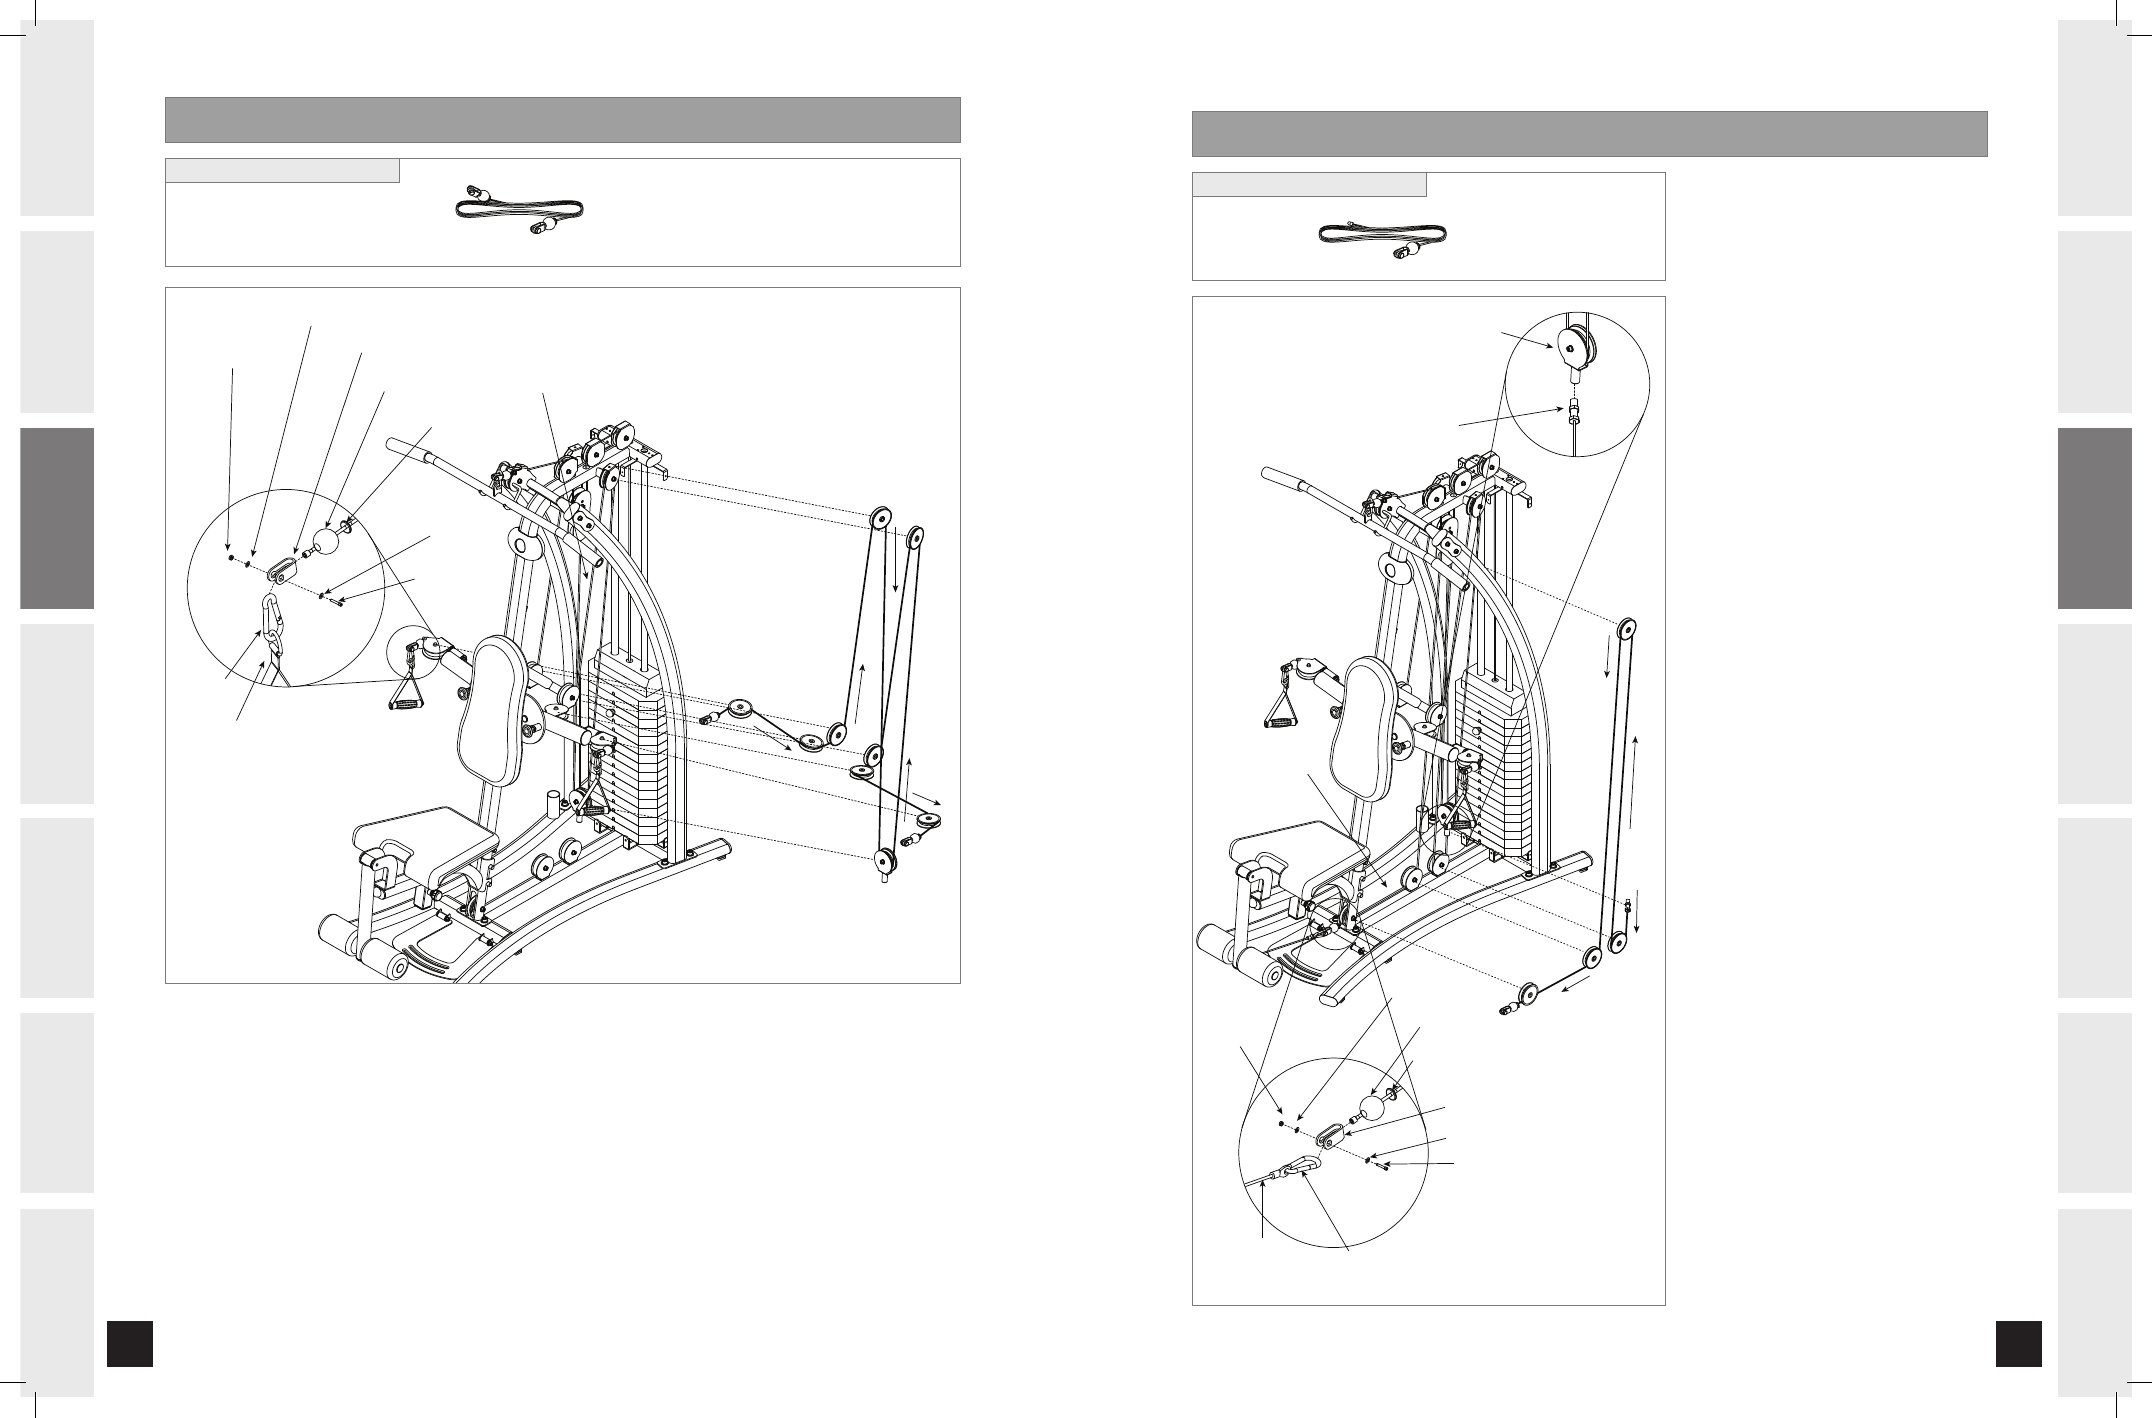
Open HARDWARE BAG .
Remove nylon nut, threaded screw and ball from end of CABLE B.
Route CABLE B through the pulley system in the RADIAL ARM ASSEMBLY as shown in
diagram.
After CABLE B routing is complete replace nylon nut, threaded screw and ball on end of
cable.
Hook HANDLES on to cable using the 2 HOOKS.
A
B
C
D
E
ASSEMBLY STEP
CABLE B
Qty: 1
HARDWARE BAG CONTENTS :
RUBBER STOP
BALL
NYLON NUT (C)
FLAT WASHER (B)
CABLE B
GRIP
HOOK
CLEVIS
FLAT WASHER (B)
SCREW (E)
Open HARDWARE BAG .
Remove nylon nut, threaded
screw and ball from end of
CABLE C.
Attach threaded cable end
to SINGLE FLOATING PULLEY
BRACKET.
Route CABLE C through pulley
system of BASE FRAME up
through the DUAL FLOATING
PULLEY BRACKET and back
to BASE FRAME and CENTER
SUPPORT FRAME as shown in
diagram.
After CABLE C routing is
complete replace nylon nut,
threaded screw and ball on end
of cable.
Hook the LEG ExTENSION/CURL
DOWN TUBE to the end of the
cable using the HOOK and the
ExTENSION CABLE.
A
B
C
D
E
F
ASSEMBLY STEP
CABLE C
Qty: 1
HARDWARE BAG CONTENTS :
RUBBER STOP
BALL
NYLON
NUT (C)
FLAT
WASHER (B)
HOOK
EXTENSION
CABLE
LEG EXTENSION/
CURL DOWN TUBE
CABLE SCREW
SINGLE FLOATING
PULLEY BRACKET
CABLE C
CLEVIS
FLAT WASHER (B)
SCREW (E)
FS 40 rev 1.0.indd 14-15
8/20/07 11:37:15 AM