Preparation – haier HR-145A User Manual
Page 5
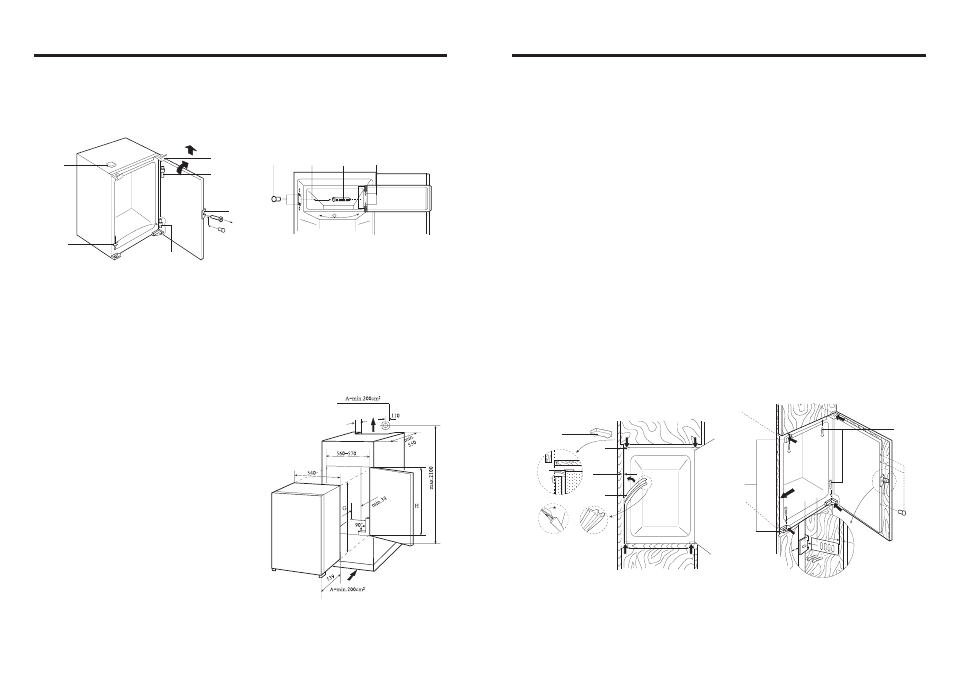
Ventilation
Figure B
*Level the kitchen cabinet unit with a spirit level and a try square. Level the unit by placing
packing material underneath if required.
*A minimum gap of 38mm must be maintained at
the back of the appliance for ventilation.
*Air inlet A must be at least 200 cm square and
air must flow through the panel in the cabinet
plinth.
*Check that the position of the power socket (1)
is correct. AC voltage in the location at which
the appliance is to be used must comply with
that as shown on the data plate located on the
left inside wall of the appliance next to the
vegetable bins. The power supply must be
suitably earthed.
Preparation
9. Remove and replace component (10), at the corresponding position on the left, with the
special tool provided.
10. Fix component (7) in the corresponding opposite position.
Preparation
R
S
cáÖìêÉ=^
cáÖìêÉ=_
Installation
Figure C
1.Check that the kitchen unit door is in the correct operating position.
2. Run the mains cable through the unit such that it can be connected to the power supply
after installing the appliance. Remove the cover (6) only if space is restricted.
3.Push the appliance into the kitchen unit leaving a gap of 4mm at the handle side of the
appliance. Align the top and bottom front edges of the support brackets (2) such that they
are flush with the front edge of the kitchen unit. See detail X
4.Cut sealing strip (1) to the height of the kitchen unit and attach to the handle side of the
unit to close the gap between the appliance and the side panel of the kitchen unit (press
the strip (a) into the gap. Pull away the protective strip on the plastic profile before insertion.
5.Push the appliance against the side panel of the kitchen unit and secure it at the top and
bottom (3).
6.Install the door connecting element (4) in accordance with the handle height and the
number of doors. Open the door fully and insert the connecting rod (5) and screw it to the
kitchen unit door maintaining distance (d) to the edge of the door (d=the thickness of the
panel). Adjust the connecting element so that the handle side of the kitchen unit door
does not make contact with the unit body when closed. (Approximately 1mm gap for
large appliances), mount the second door connecting element where appropriate.
7.Plug the open hole in the appliance door.
cáÖìêÉ=`
d
4mm
x
b
~