The electronic timer, Set the time of day, How to set the countdown – Electrolux COMPETENCE 3210 BU User Manual
Page 9
9
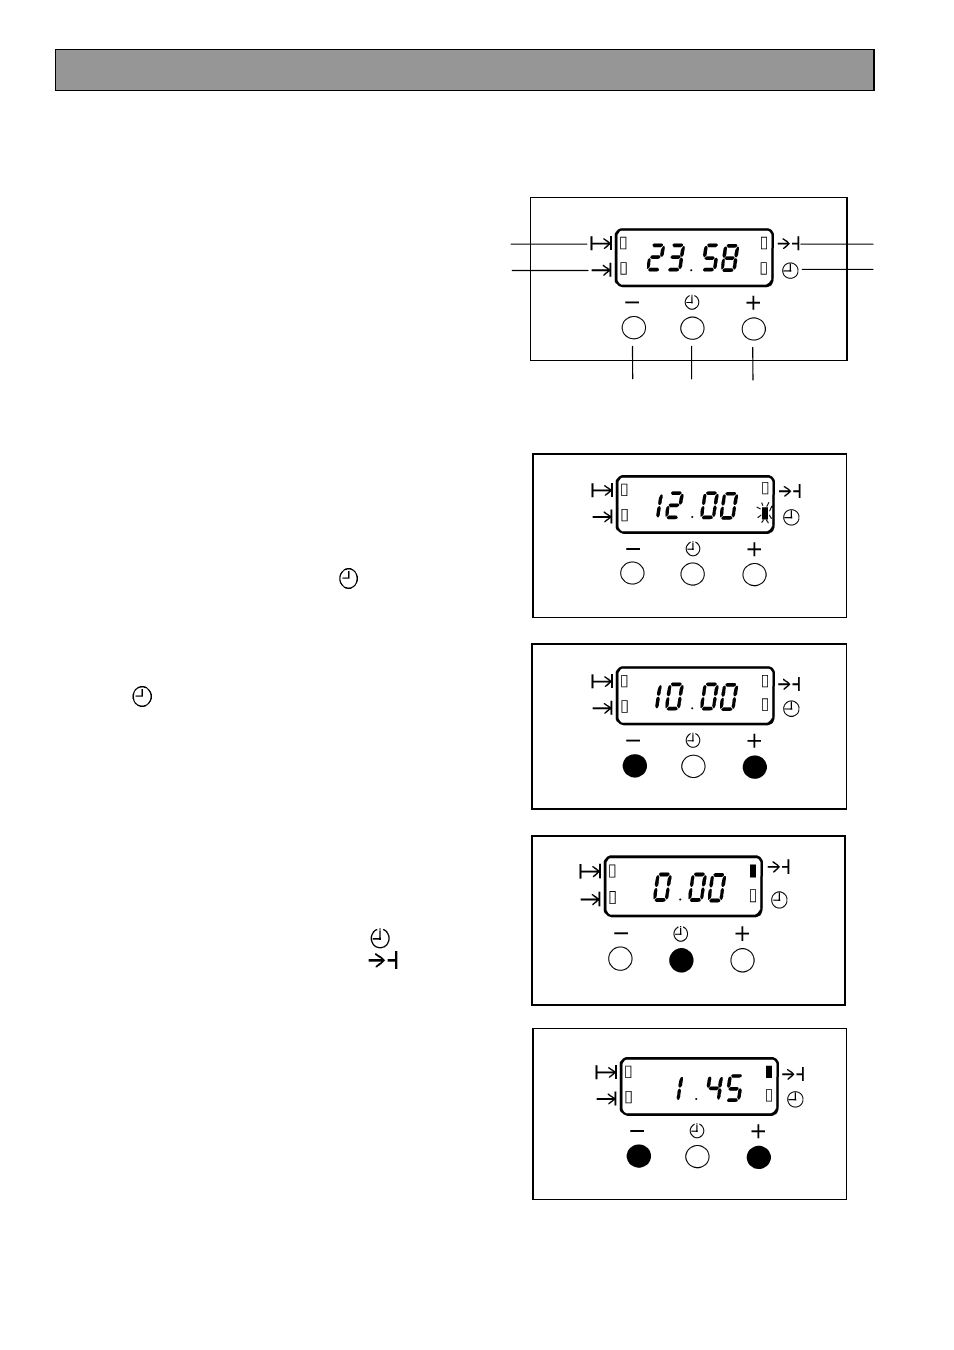
KEY
A
COOK TIME
B
END TIME
C
COUNTDOWN
D
TIME
E
DECREASE CONTROL
F
SELECTOR CONTROL
G
INCREASE CONTROL
NOTE:
The time of day must be set before the main oven
will operate manually.
1. SET THE TIME OF DAY
The oven has a 24 hour clock.
When the electricity supply is first switched ON, the
display will show 12.00 and the 'Time' (
)
indicator neon will flash as Fig. 1.
To set the correct time press the increase control
button ( + ) and if necessary, the decrease control
button ( - ) until the correct time on the 24 hour clock
is reached, e.g. 10.00am as Fig.2.
The 'Time'
indicator (
) neon will flash for 5 seconds and then
go out.
Note: The increase and decrease control buttons
operate slowly at first, and then more rapidly.
They should be pressed separately.
2. HOW TO SET THE COUNTDOWN
The 'Countdown' gives an audible reminder at the
end of any period of cooking.
This cooking period
may be up to 2 hrs 30 mins. It is not part of the
automatic control.
To set, press the Selector Control button (
) until
the 'Countdown' indicator is illuminated (
) the
display reads 0.00 as Fig.3.
To set the correct time duration depress the increase
control ( + ) until the display indicates the interval to
be timed, e.g. 1hr 45 mins as Fig. 4. If necessary
depress the decrease control ( - ) to achieve the
correct time interval.
NOTE: This must be completed within 5 seconds
of first pressing the Selector Control button.
During
the
operation
of
the
'Countdown',
the
remaining time period will be shown in the display.
The 'Countdown' will sound intermittently for up to
2minutes at the end of the timed period. The sound
can be stopped by pressing any button.
THE ELECTRONIC TIMER
G
F
E
D
C
B
A
Fig.1.
Fig.2.
Fig.3.
Fig.4.