Conversion from natural to lpg gas, Replacement of gas oven burner injector, Replacement of gas type label – Electrolux EOG 601 User Manual
Page 18: Gas oven burner data
18
Conversion from Natural to LPG Gas
IMPORTANT
The replacement/conversion from Natural to
LPG should only be undertaken by a
competent and qualified engineer.
It is important to note that this model is designed for use
with natural gas but can be converted for use with LPG
providing the correct injectors are fitted. The gas rate is
adjusted to suit.
Replacement of gas oven
burner injector
To replace the gas burner oven injector, follow this
procedure:
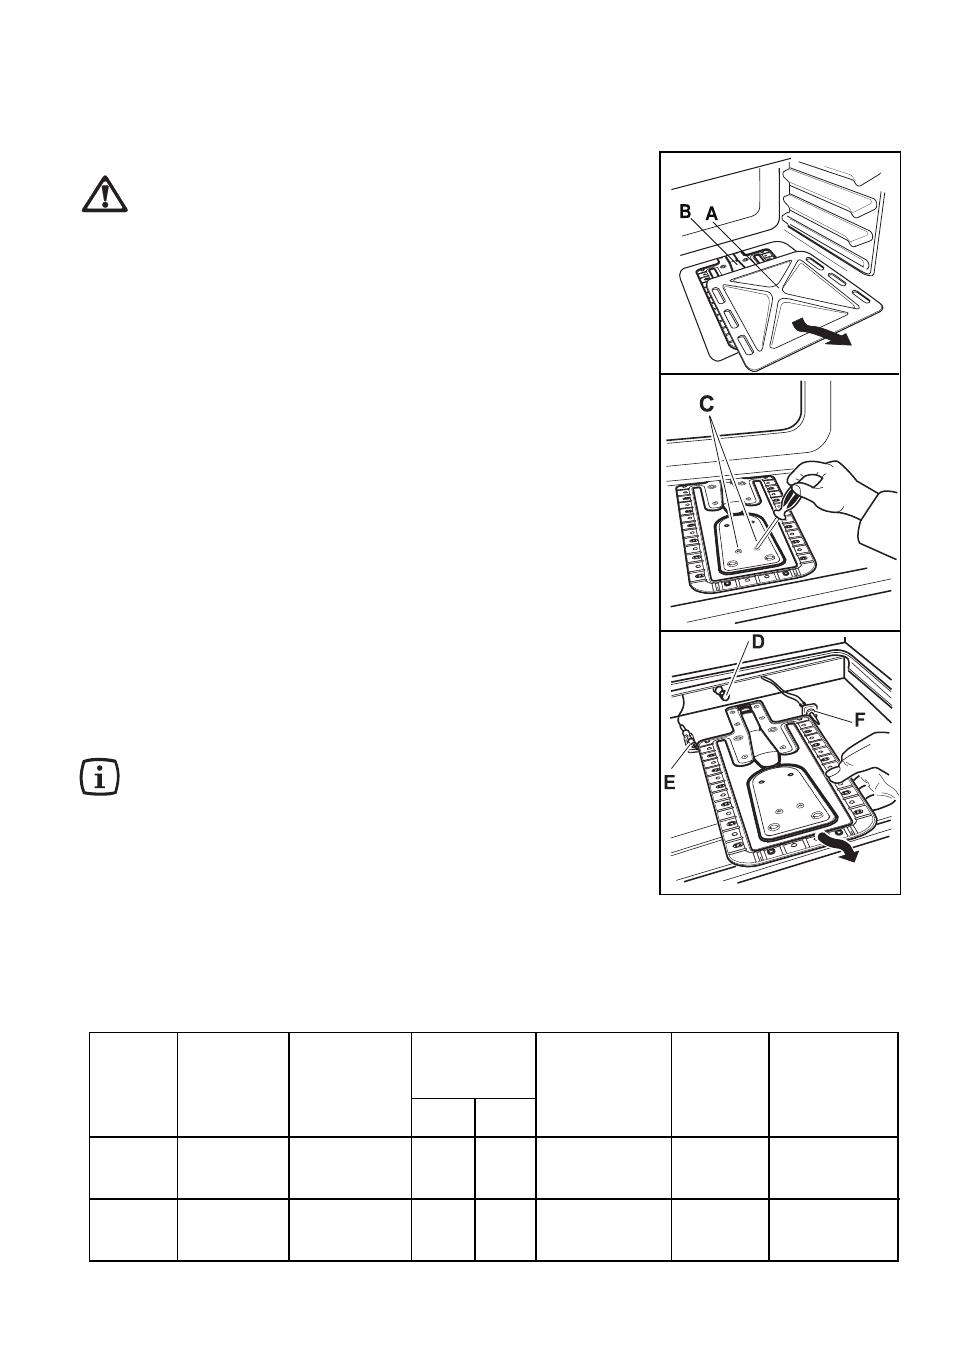
1. Remove the bottom plate of the oven (“A”) to access
the gas oven burner;
2. Undo the two fixing screws (“C”) which keep the gas
oven burner in place
3. Gently slide the oven gas burner off the injector
support (“D”) and slowly move it to the left hand side.
Check that the burner bush does not slip off the burner
mouthpiece, and take care not to cause stress to the
spark plug connection wire (“E”) and the thermocouple
(“F”) conductor;
3. With a 7 mm socket spanner unscrew and remove
the gas burner injector (“D”), and replace it with the
required one (see Table on this page);
4. Reassemble the burner following the same procedure
backwards.
The oven burner does not require any primary
air regulation.
Replacement of Gas Type Label
Once both the injectors for the gas oven burner and the
gas grill burner have been replaced, take the Gas Type
Label which is relevant to the new gas type and place it
over the old one (it is located near the gas connection
ramp). The replacement label is supplied with the injector
kit.
GAS
INJECTOR
NOMINAL
NOMINAL GAS
REDUCED
BY-PASS
NOMINAL
TYPE
MARK
GAS
FLOW IN
GAS
NEEDLE
GAS
1/100 mm
POWER
POWER
(1/100 mm)
PRESSURE
(kW)
m
3
/h
g/h
(kW)
(mbar)
114
2,7
0,257
-
1,0
Reg.
20
78
2,5
-
182
1,0
52
28-30 / 37
Gas Oven Burner Data
Natural Gas
(G20)
LPG
(G30/G31)