Emerson CF4600GLZ00 User Manual
Page 6
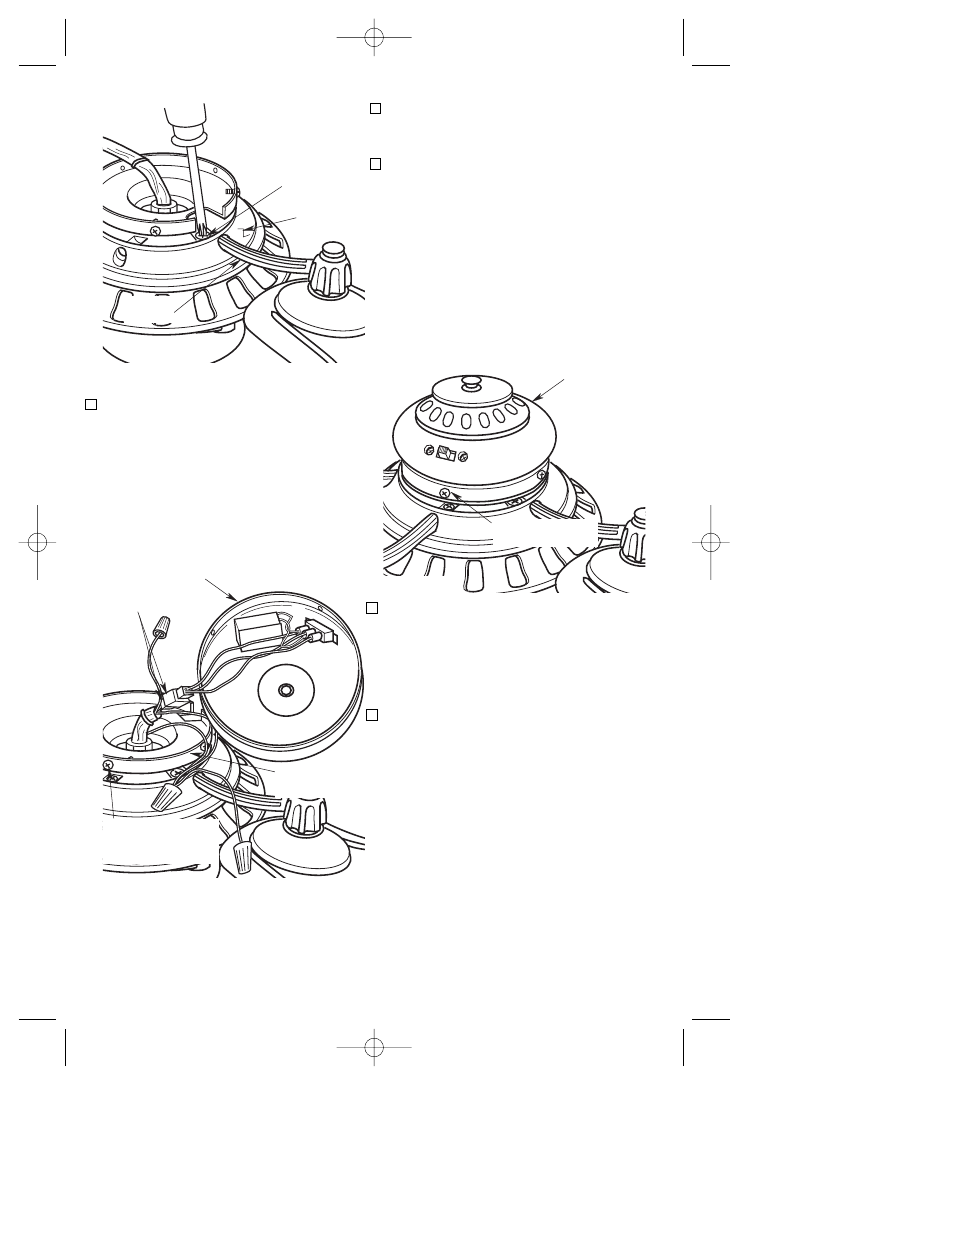
3. Carefully rest the switch cup assembly
on the fan blades, then engage the
connector of the switch cup assembly
with the motor connector (Figure 3).
The two connectors are keyed and
must be mated correctly before they
can be engaged. Make sure the
connectors are engaged properly.
4. Remove and retain four pan head
screws from the rim of the switch cup
adapter (Figure 3).
5. Position the switch cup assembly on
the switch cup adapter. Line up the
four holes in the switch cup with the
threaded holes in the switch cup
adapter and reinstall four pan head
screws (previously removed) (Figure
4).
CAUTION: Before installing and
tightening the screws, be sure there are
no wires pinched between the switch
cup adapter and switch cup assembly.
6
5/32 x 9/16"
PAN HEAD
SCREWS (2)
MOUNTING
HUB
BLADE
FLANGE
Figure 2
SWITCH CUP
ASSEMBLY
CONNECTORS
REMOVE AND RETAIN
FOUR PAN HEAD
SCREWS
SWITCH CUP
ADAPTER
Figure 3
SWITCH CUP
ASSEMBLY
REINSTALL FOUR
PAN HEAD SCREWS
Figure 4
6. Carefully place the partially assembled
ceiling fan on the lower styrofoam pad,
with the switch cup assembly
positioned in the opening and the blade
assemblies resting on the outer rim of
the styrofoam pad.
7. Remove the hanger ball by loosening
the setscrew in the hanger ball until the
ball falls freely down the downrod
(Figure 5). Remove th pin from the
downrod, then remove the hanger ball.
Retain the pin and hanger ball for
reinstallation in step 19.
BP7306 Nottingham 6/19/06 1:00 PM Page 6