Echo SRM - 230S User Manual
Page 9
G
rass
T
rimmer
/B
rush
C
uTTer
9
O
peraTOr
'
s
m
anual
c
ontents
The ECHO product you purchased has been partially assembled for your convenience. Due to packaging restrictions,
installation of the plastic debris shield, nylon line head, and positioning of the front handle are necessary.
After opening the carton, check for damage. Immediately notify your retailer or ECHO Dealer of damaged or missing
parts. Use the contents list to check for missing parts.
*
Some Echo units may be factory pre-assembled. The nylon line head, plastic debris shield, and mounting hardware
shown in the contents list are pre-assembled to the unit. No assembly tools are needed. The front handle may need to
be re-positioned for comfortable operation.
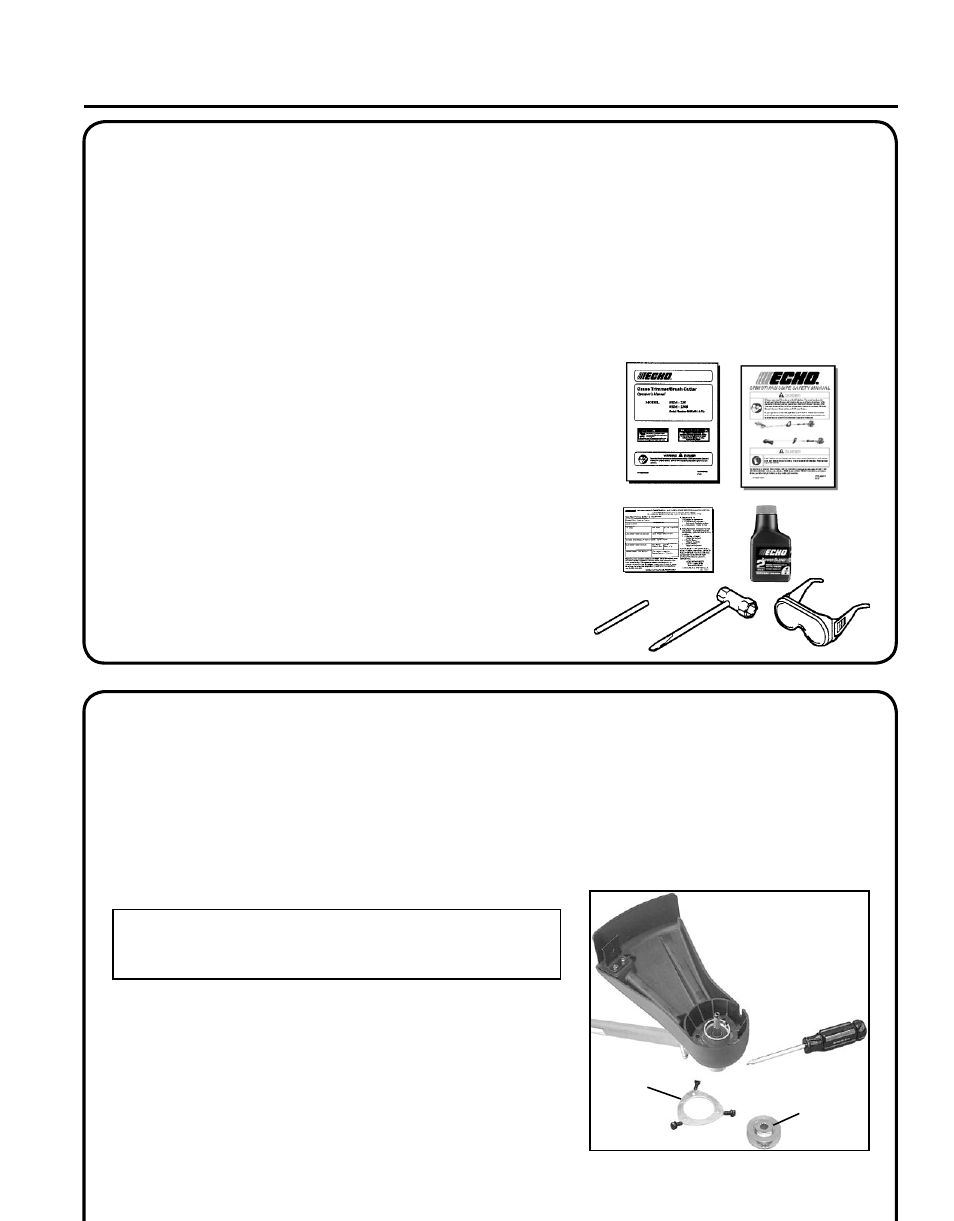
_______1 - Power Head / Drive Shaft Assembly
______1 - Operator's Manual
______1 - Safety Manual
______1 - Warranty Registration Card
_______1 - Safety Glasses
_______1 - Echo Power BlendX
TM
2-stroke oil sample
*
_____1 - Nylon Trimmer Head
*
_____1 - T-wrench 17x19,
*
_____1 - Locking tool,
*
_____1 - Plastic shield
*
_____1 - Shield plate
*
_____3 - 5mm x 16mm screws (shield mtg.)
a
ssembly
Tools Required: Screwdriver, Head Locking Tool
Parts Required: Plastic Shield, Shield Plate, three (3) 5mm x 16mm
screws, Nylon Line Head, Front Handle Assembly
plastIc
shIeld
InstallatIon
(For Nylon Line Operation)
NOTE
The plastic shield is for use with the Nylon Line Head only.
Install Metal Shield when using plastic or metal blades.
1. Remove plastic sleeve and upper plate (A) from PTO shaft.
2. Install the shield on the bottom of the bearing housing flange.
3. Place shield plate (B) on shield, align holes and install three (3)
5x16 mm screws.
4. Install upper plate (A).
B
A