Operation, Adjusting the cutting height – Exmark lazer Z 790 User Manual
Page 26
Operation
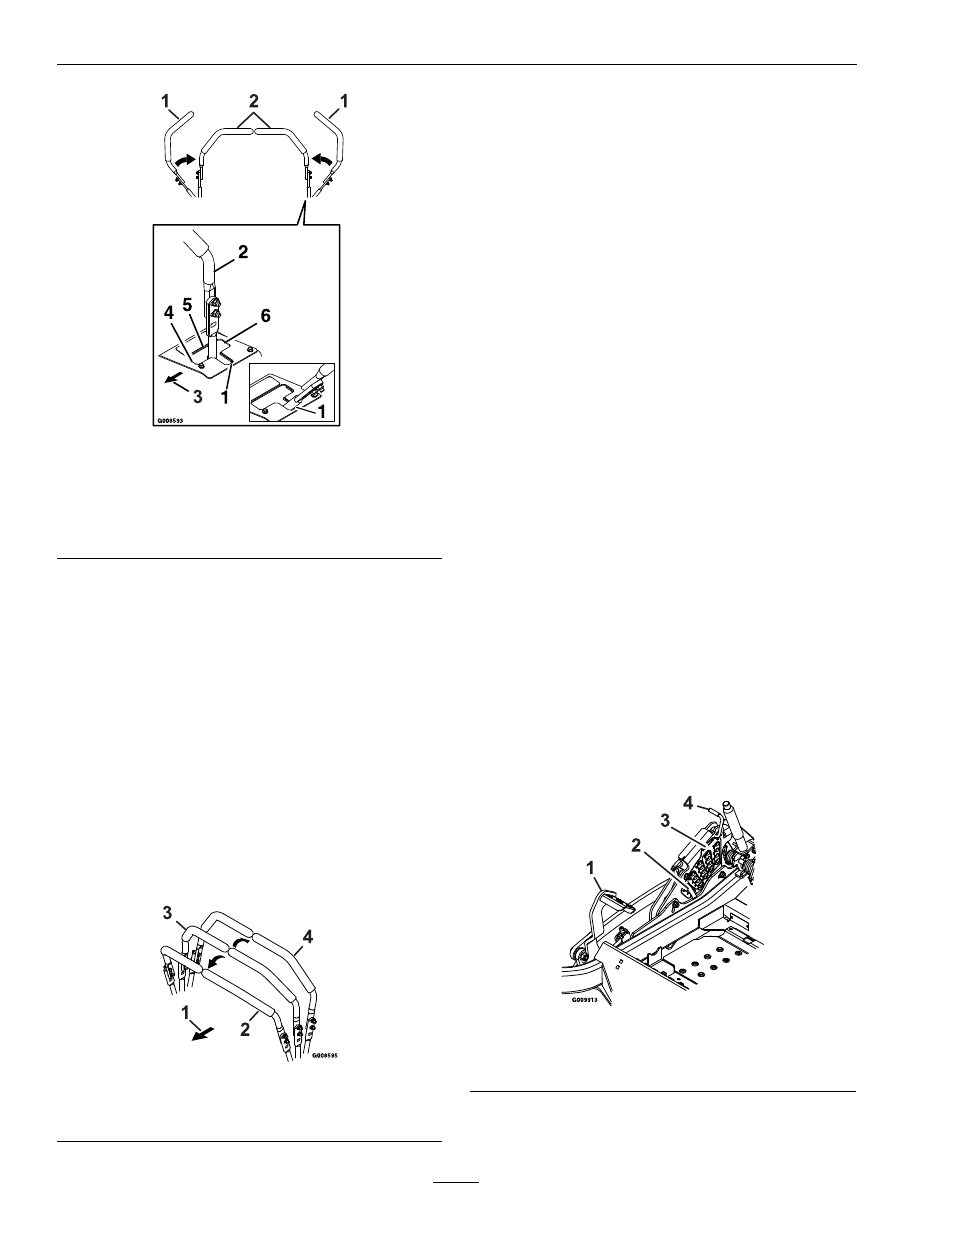
Figure 15
1.
Neutral lock position
(handles out)
4.
Forward
2.
Neutral operate position
(handles in)
5.
Neutral (operate)
3.
Front of Unit
6.
Reverse
Driving Forward
1. Release the parking brake.
2. Move the motion control levers inward to the
center to the neutral position.
3. To move forward in a straight line, move both
levers forward with equal pressure.
To turn left or right, pull the motion control lever
back toward neutral in the desired turn direction.
The machine will move faster the farther the
motion control levers are moved from the neutral
position.
4. To stop, position both motion control levers in
the neutral operate position.
Figure 16
1.
Front of Unit
3.
Neutral
2.
Forward
4.
Reverse
Driving in Reverse
1. Move the motion control levers inward to the
neutral operate position.
2. To move rearward in a straight line, move both
levers rearward with equal pressure.
To turn left or right, release pressure on the
motion control lever toward the desired turn
direction.
3. To stop, position both motion control levers in
the neutral operate position.
Adjusting the Cutting Height
The cutting height of the mower deck is adjusted
from 1 to 5 1/2 inches (2.5 cm to 14 cm) in 1/4 inch
(6.4 mm) increments.
1. Stop the machine and move the motion control
levers outward to the neutral locked position.
2. Disengage the PTO.
3. Position the transport lock in the latching
position.
4. Raise and lock the deck to the 5 1/2 inch (14 cm)
transport position (Figure 17).
The deck is raised by pushing the foot operated
deck lift pedal forward. The pedal is located at the
front right corner of the floor pan.
Note: When changing the cutting height
positions, always come to a complete stop
and disengage the PTO.
Figure 17
1.
Deck foot pedal
3.
Cut of height decal
2.
Height adjustment pin
4.
Transport lock control
5. Insert the height adjustment pin into the hole
corresponding to the desired cutting height.
26