Wall mounting – VIEWSONIC VX3418-2KPC 34" 21:9 Curved VA Gaming Monitor User Manual
Page 11
11
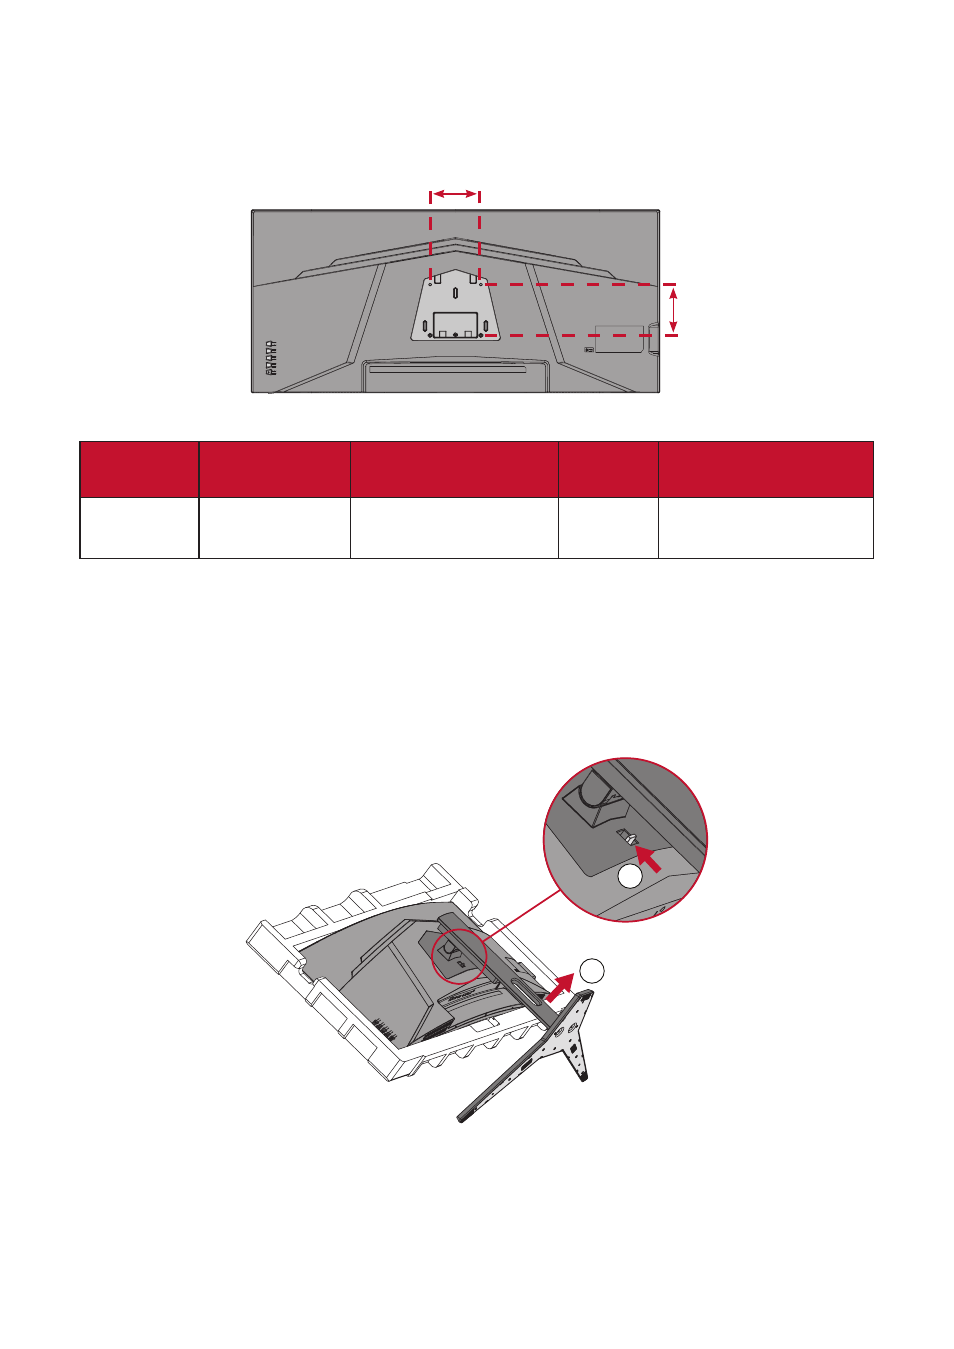
Wall Mounting
NOTE:
Only use UL Certified wall mount kits.
75 mm
75 mm
Refer to the table below for the standard dimensions for wall mount kits.
Maximum
Loading
Hole pattern
(W x H)
Interface Pad
(W x H x D)
Pad Hole
Screw Specification
& Quantity
14 kg
75 x 75 mm 115 x 115 x 2.6 mm Ø 5 mm
M4 x 10 mm
4 pieces
NOTE:
Wall mount kits are sold separately. To obtain a wall mounting kit,
contact ViewSonic® or your local dealer.
1.
Turn off the device and disconnect all cables.
2.
Place the device on a flat, stable surface with the screen facing down.
3.
Remove the monitor stand.
2
1
4.
Attach the mounting bracket to the VESA mounting holes at the rear of the
device. Then secure it with four (4) screws (M4 x 10 mm).
5.
Follow the instructions that come with the wall mounting kit to mount the
monitor onto the wall.
- VX2418-P-MHD 23.8"16:9 165 Hz Gaming LCD Monitor VX3218-PC-MHD 31.5" 16:9 165 Hz Curved LCD Gaming Monitor VX2267-MHD 22" 16:9 FreeSync VA Monitor VX2767-MHD 27" 16:9 FreeSync VA Monitor VA2447 24" VA Monitor VX3267U-2K 31.5" 1440p HDR Monitor VA2747-MH 27" 16:9 Adaptive-Sync VA Monitor OMNI 27" HDR 165 Hz Gaming Monitor VX3218C-2K 31.5" 1440p 165 Hz Curved Gaming Monitor VX2416 23.8" 100 Hz Gaming Monitor VA2409m 23.6" Monitor VA2715-2K-MHD 27" 1440p Monitor VA2447-MH 23.8" 16:9 Adaptive-Sync VA Monitor 27" 16:9 Curved VA Gaming Monitor VA3456-MHDJ 34" 21:9 IPS Monitor VX2418C 23.6" 165 Hz Curved Gaming Monitor VA2247-MH 22" 16:9 Frameless Adaptive-Sync Monitor 24" 16:9 240 Hz IPS Gaming Monitor