Echo TC-210 User Manual
Page 9
T
iller
/C
ulTivaTor
o
peraTor
'
s
M
anual
9
c
ontents
The ECHO product you purchased has been factory pre-assembled for your convenience. Due to packaging restrictions
some assembly is required.
After opening the carton, check for damage. Immediately notify your retailer or ECHO Dealer of damaged or missing
parts. Use the contents list to check for missing parts.
____ 1 - Power Head & Shield Assembly
____ 1 - Upper Handle Assembly
____ 1 - Left Lower Handle
____ 1 - Right Lower Handle
____ 2 - Lower Handle Mounting Eye Plates
____ 1 - 1/4 in. x 3 in. Hex Head Shoulder Bolt
____ 1 - 1/4 in. x 3-1/4 in. Hex Head Shoulder Bolt
____ 4 - 1/4 in. Lock Washers
____ 2 - 1/4 in. Lock Nuts
____ 1 - Plastic Carry Handle
____ 1 - Kick Stand
____ 2 - Cable Clips
____ 1 - Operator's Manual
____ 1 - Emission Control Warranty Statement
____ 1 - Warranty Card
____ 2 - 1/4" x 1-1/4" Carriage Bolts
____ 2 - 1/4" Nuts
____ 2 - 6 x 12 mm Bolts
____ 1 - Echo Power Blend X
TM
2-stroke oil sample
a
ssembly
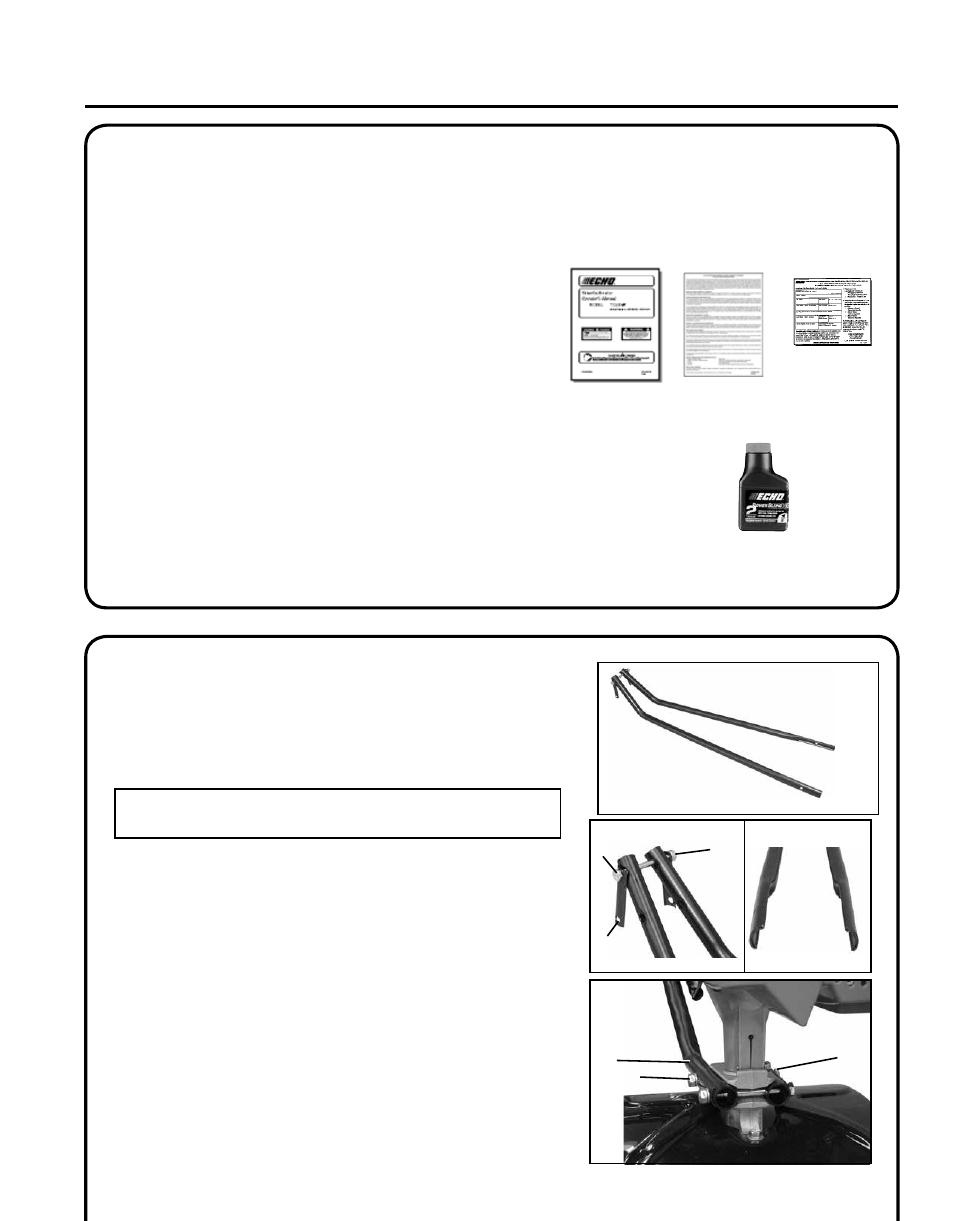
Tools Required: (2) 7/16 in. Wrenches, 3/8 Wrench
1. Support powerhead assembly upright on tines. Place top handle
assembly to rear.
NOTE
Make sure inside curves at handle ends are facing each other.
2. Loosely assemble lower handles using short 1/4 in. x 3 in. long
hex head shoulder bolt (A), eye plates (B), lockwasher (C), and
locknut (D) in front handle end mounting hole as shown.
3. Slide lower handle assembly under power head and throttle link-
age/ignition wires, and position in mounting groove.
4. Assemble using long 1/4 in. x 3-1/4 in. hex head shoulder bolt
(E), eye plate (B), lockwasher (C), and locknut (D) in rear handle
mounting holes. DO NOT TIGHTEN BOLTS.
5. Slide plastic carry handle onto lower handle tubes.
A
C,D
B
C,D
B
E