Warning – Echo TC-210 User Manual
Page 10
10
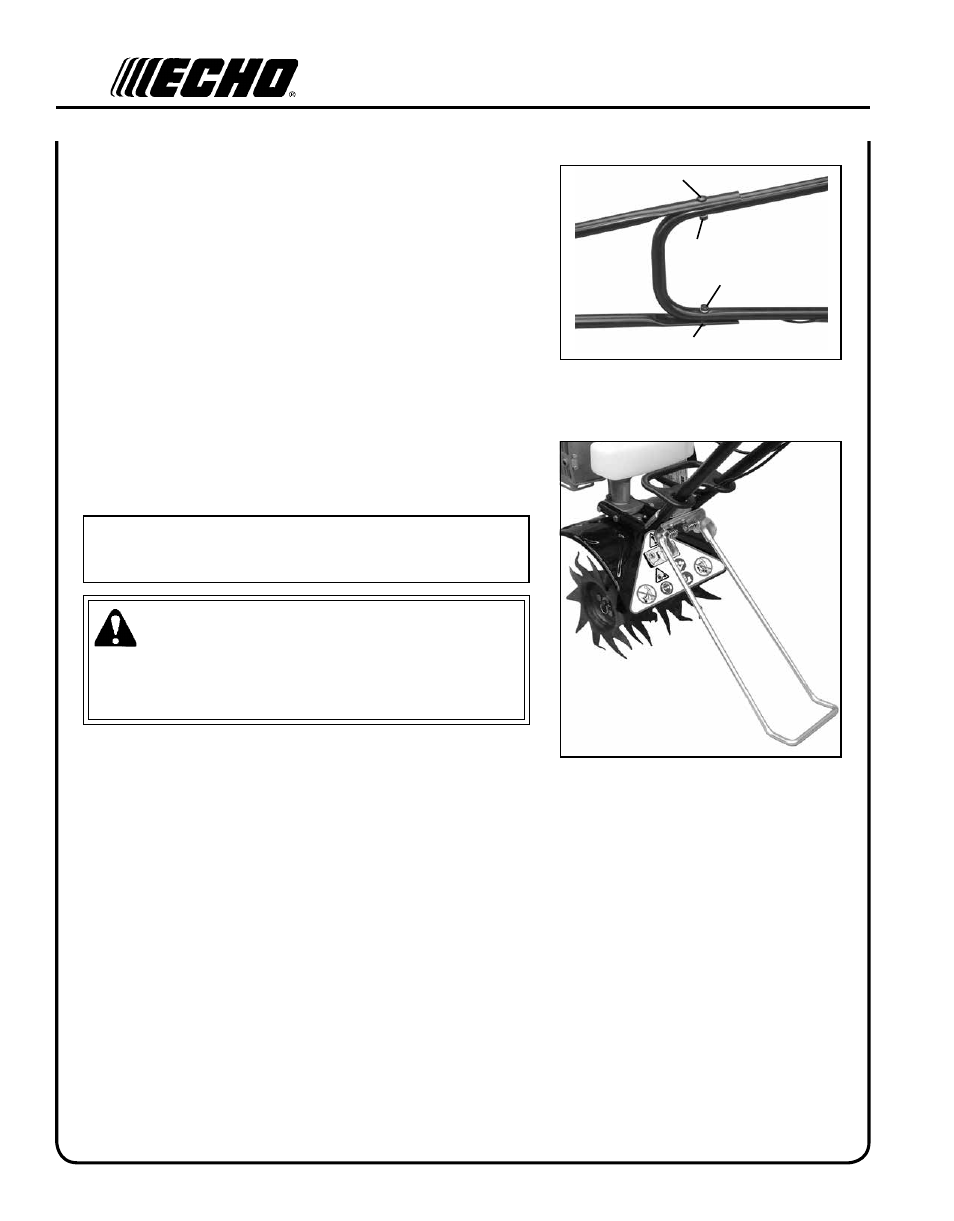
F
G, H
F
G, H
6. Remove (2) 1/4 " x 1-1/4" carriage bolts (F), (2) 1/4" lockwashers
(G), and (2) 1/4" nuts (H) from top handle assembly.
7. Place top handle assembly between lower handles, align mounting
holes and install (2) 1/4 " x 1-1/4" carriage bolts (F), (2) 1/4" lock-
washers (G), and (2) 1/4" nuts (H). Carriage bolts must be installed
from the outside through square holes in the lower handle, then
through upper handle tube.
8. Securely tighten lower handle bolts first, then the upper handle
bolts.
9. Secure throttle linkage and stop switch lead midway on right upper
and lower handle with cable clips.
10. Position top kick stand mounting plate on lower handles, matching
curved mounting plate channels to angle of handles. Secure top
plate to kick stand mounting plate with (2) 6 x 12 mm bolts, and
tighten securely.
NOTE
In down position, lower end of kick stand must rest flat against
ground.
WARNING
The plastic shield is for use with the Nylon Line Head only. Install
Metal Shield when using plastic or metal blades, or serious injury
may result.