Door removal – Electrolux 7388KG User Manual
Page 13
Door Removal
If it is necessary to move the refrigerator
through narrow doorways, follow these
steps to remove the refrigerator and freezer
doors.
Before removing doors, ensure that the
freezer control is turned to OFF. Remove all
food from doors and unplug refrigerator.
IMPORTANT: Trace around the hinges with
a soft lead pencil. This will make it easier to
realign the doors when they are replaced.
Completely remove one door before
starting removal of the other.
TO REMOVE FREEZER DOOR:
1. Disconnect water line at lower hinge on
freezer door: grip water tube firmly in
one hand, then with 3/8” wrencn, push
in on gray collar to release water
connector.
2. Remove top hinge cover screw on
freezer door and remove cover.
3. Disconnect wiring harness connector
plug at top hinge: place your thumbs on
flat side of each connector and bend
both parts back and forth, then with
firm grip, pull both pieces apart.
4. Trace around hinge with soft lead pencil.
This will make it easier to realign doors
when they are replaced.
5. Remove top hinge and lift freezer door
off od bottom hinge pin. Set door aside.
6. Remove bottom hinge, if necessary.
7. Reverse this procedure to reinstall
freezer door.
TO REINSTALL FREEZER DOOR
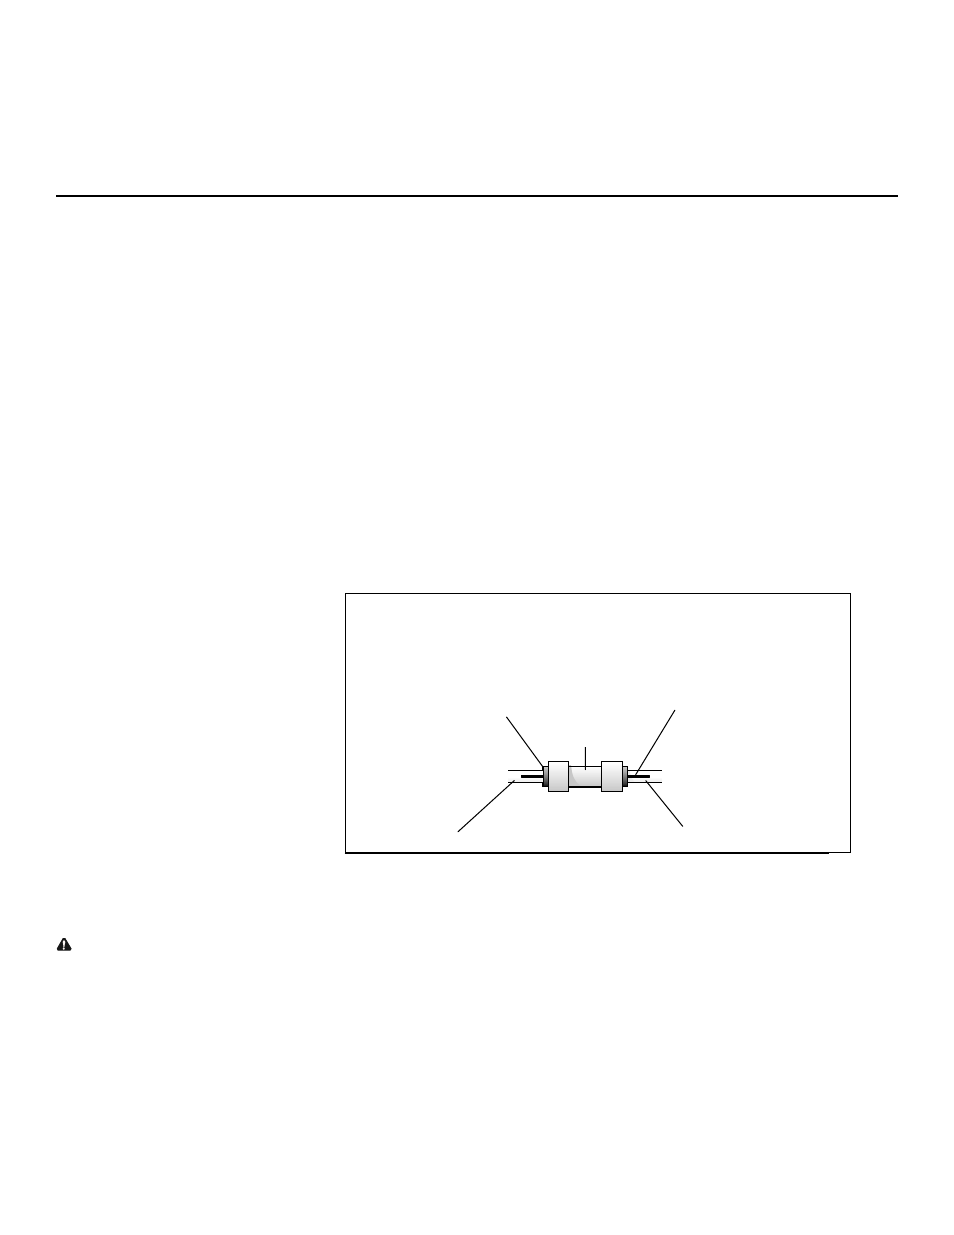
8. To reinstall water line connector, push
tube firmly into connector until connec-
tor touches the black mark on the tube
and stops. (See Figure 7.)
WARNING: This step is critical to
ensure that water line does not leak.
(continued)
TO REMOVE REFRIGERATOR DOOR:
1. Remove top hinge cover screw on
refrigerator door and remove cover.
2. Trace around hinge with soft lead pencil.
This will make it easier to realign doors
when they are replaced.
3. Remove top hinge and lift refrigerator
door off bottom hinge pin. Set door
aside.
4. Remove bottom hinge, if necessary.
5. Reverse this procedure to reinstall
refrigerator door.
When both doors have been reinstalled,
replace toe grille and plug in electrical
power cord. Turn both temperature controls
to centre position. Adjust settings as
necessary.
Door Removal
continued
Tubing From Door
Tuberías de la puerta
Tuyau sortant de la porte
An Tür montierter Schlauch
УщлЮнщуз брь фзн Рьсфб
[£¤Z [¤~
Water Line
Aprovisionamiento de agua
Alimentation en eau
Wasserzufuhr
Бгщгьт Неспэ
Y£ыZ [В¤~
Figure 7
Figura 7
Figure 7
Abbildung 7
УчЮмб 7
7 б¼
Ink Mark
Marca de tinta
Marque à l’encre
Markierung
УзмЬдй брь МелЬнй
®¤©Z жл
Gray Collar
Abrazadera gris
Anneau gris
Graue Manschette
Гксй КплЬсп
жd£®Z 溾©Z
Conector
Joint
УхндефЮсбт
Y£ыZ [В¤~ ж¾z
Connector
Anschlußflansch
13