Center support bar d, Attaching the fix plates – Elite Screens 010410-JA User Manual
Page 7
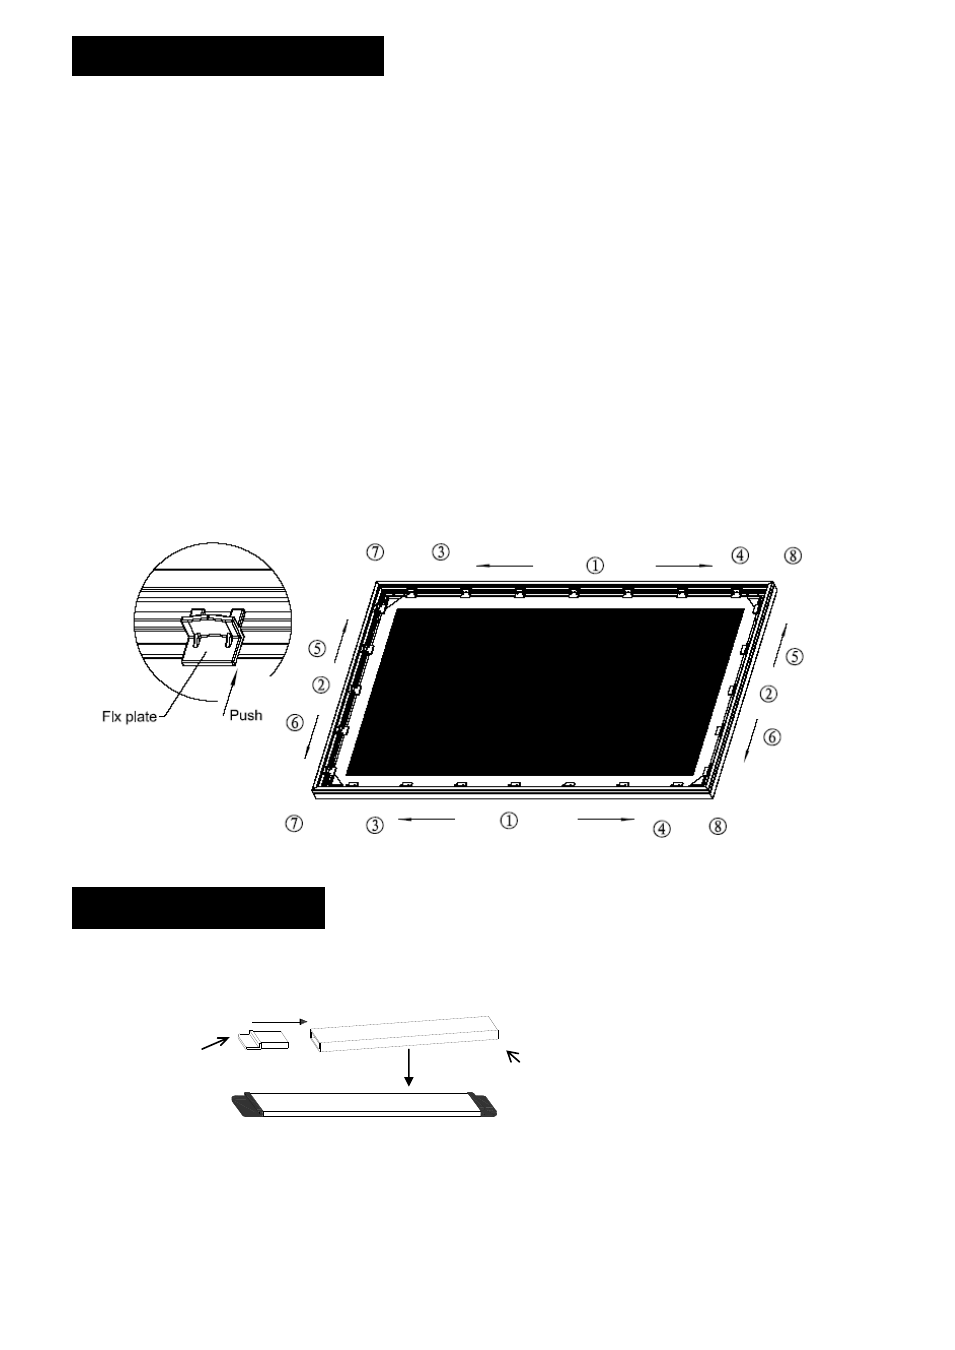
Attaching the Fix Plates
___
1. Make sure that the material and frame are both lying face down on a clean, dry and non-abrasive
surface.
2. Center the material inside the frame.
Please note the material will be noticeably smaller because stretching the material is required to create
a sufficient amount of tension for perfect material flatness.
3. Start attaching the fix plates in the center of the long horizontal edge and (1) then alternate with the
center short sides (2) as shown in diagram (fig.7).
Note:
Follow these instructions to make sure the material is properly fixed in the center position of the
frame. After attaching the fix plates in sequence #2 (the center of the short sides), please remove the fix
plates in sequence #1 (the center of the long horizontal edge) and reattach them again, and also remove the
fix plates on sequence# (2) and reattach them again.
4.
Then continue to follow our recommended order numbers 3-8 to properly distribute tension to the
screen material.
Center Support Bar
d
1. Insert the support joiner into each side of the center support bar to complete assembly.
support joiner
Center support bar
2. Insert the Center Support Bar into the upper top groove on the back of the frame (not the one where
the fix plate inserts) with the bottom end near the approximate center point of the frame and place it in at
an angle so that both ends of the bar are in alignment with the groove. (see Fig. 8 below for details).
(6)
支
撑
(Fig. 7)