Unit installation, Installation, Single head (usb-hid model) installation – Rose Electronics CrystalView DVI Mini User Manual
Page 14
INSTALLATION
10
CrystalView DVI Mini Installation and Operations Manual
Unit Installation
The installation guide section describes a typical installation for all four models.
See the installation section for your particular model.
It is recommended that power to all equipment be off until all cabling is in place.
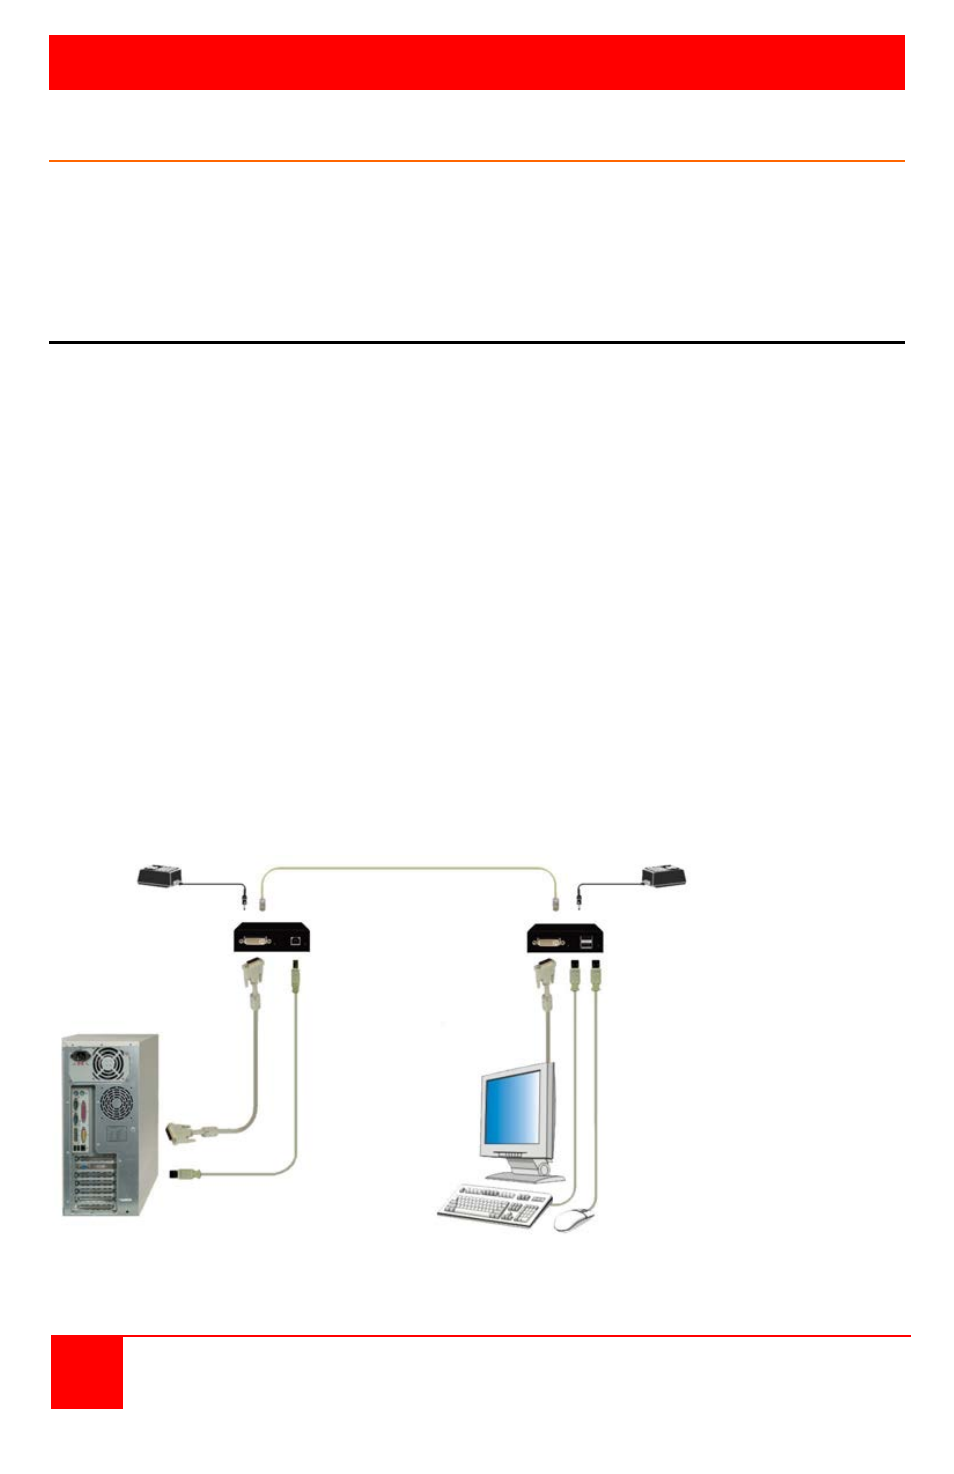
Refer to Figure 5
Single head (USB-HID model) Installation
Transmitter Installation
1. Connect the supplied DVI-D male-to-male cable from the computer’s DVI
video out connector to the Transmitter’s DVI-D video in connector.
2. Connect the supplied USB Type A to Type B cable from a USB port on the
computer to the USB Type A connector on the Transmitter.
3. Connect the supplied power adapter to the Transmitter. (Do not apply
power at this time)
Receiver Installation
4. Connect a DVI monitor, USB keyboard, and USB mouse to the
corresponding connectors on the Receiver unit.
5. Connect the supplied power adapter to the Receiver. (Do not apply power
at this time)
Transmitter to Receiver Connection
6. Connect up to 150 ft. (50 m) of CAT5e or better cable from the RJ45
connector on the Transmitter to the RJ45 connector on the Receiver.
Figure 5. Single head Installation (USB-HID)
Power adapter CATx cable Power adapter
Transmitter Receiver