Grill assembly – Electrolux 26" Stainless Steel Outdoor Grill User Manual
Page 6
Grill Assembly
5
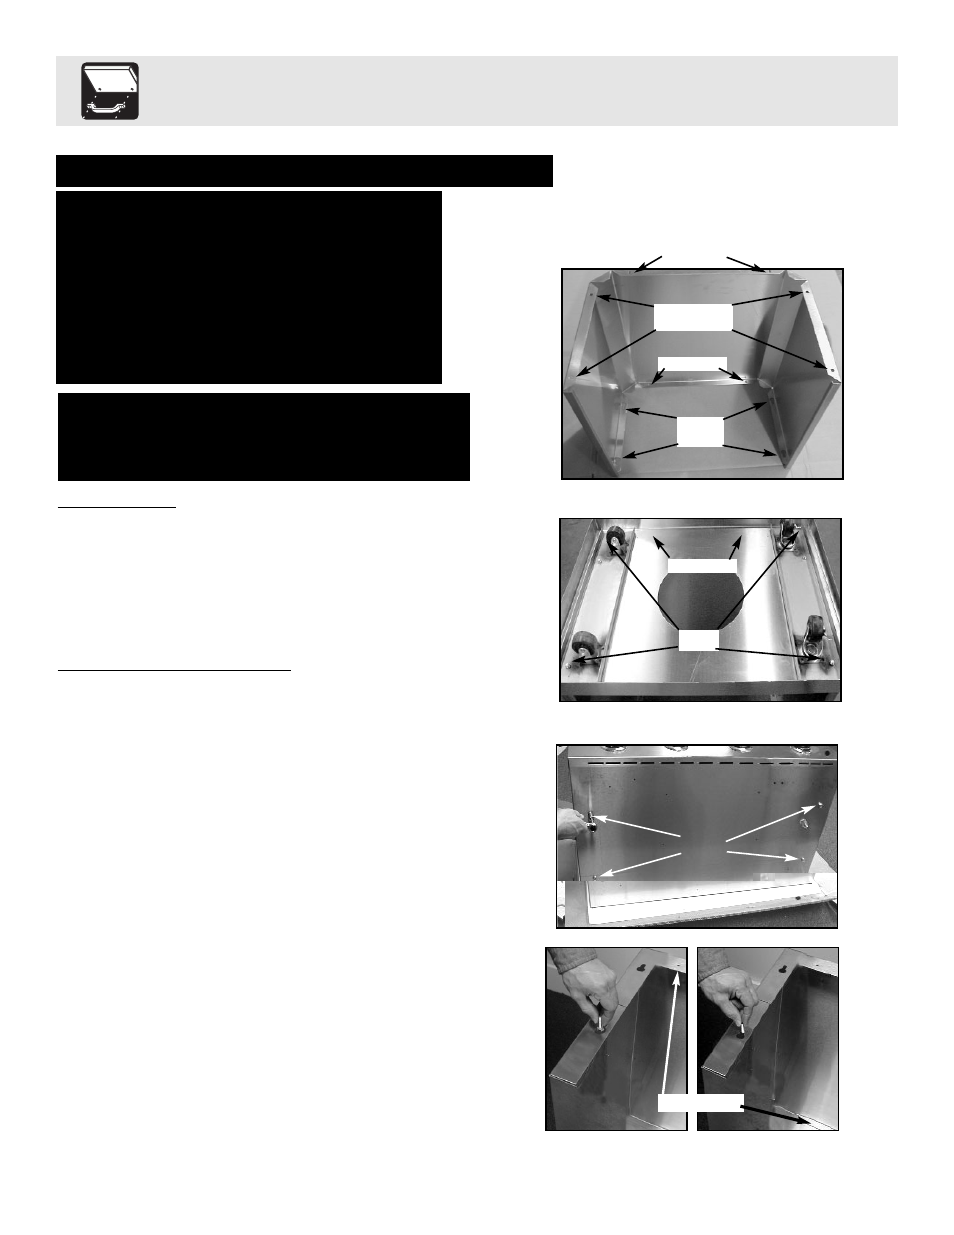
Cart Assembly
1.
Set 3 sided pedestal upside down. Set the base
on the top of the cart assembly aligning the four
wheel channel holes and 2 screw holes . Then set
the 2 wheel channels on the base and attach them
using the (4) bolts provided, from inside the cart
upwards through wheel channels. (See Fig. 1 & 2)
Attaching Grill Head to Cart
1.
With the grill on its back, (be sure to hold the
hood shut when doing this) loosen all 4 bolts
on the bottom side of the grill. (See Fig. 3)
2.
Have someone help you pick up the grill and set it
on the top of the cart, with the rear of the grill
above the opening . Make sure the 4 bolt heads
fall through the large opening of the key hole slots
in the top of the cart. Slide the grill head
backward so the bolts are resting in the small
opening of the key hole slots. Tighten the bolts
securely-be sure not to over tighten and strip the
bolts. Next insert 2 hex head screws into grill
bottom through cart & 2 hex head screws into the
cart base. (See Fig. 4)
Note: This is a very heavy step that requires
two individuals to complete.
Fig. 3
Fig. 4
Note: Prior to assembly remove protective film from stainless steel parts
Fig. 2
Fig. 1
Bolts
Bolts
Screw holes
Caution: Gas regulator is not flush with bottom.
DO NOT let the Grill head sit flat without placing
support around regulator to prevent damage to
the regulator prior to installing on cart.
Assembly requires: 6 tools and a Friend
Tools required:
Power screwdriver
Screwdriver extension
1/4” socket wrench
1/2” socket wrench
adjustable wrench
scissors
Key hole
slots
Wheel Channel
holes
Screw Holes
Screw Holes
Screw Holes